Being the holidays I’ve been at my moms place the past few days and therefore away from Stance H.Q. I didn’t have much time to be bouncing from forum to forum and blog to blog looking for new content nor did I feel like cluttering up her computer with photos of cars she won’t appreciate. So I made due with what I had (my iphone and creativity) and figured that perhaps some of you might be interested in my latest model car project that’s been hiding in the depths of my moms basement waiting for me to finish. Hopefully this will be the year I actually finish…
My dad got me into building model cars fairly young since he realized it was a great cheap way to keep me out of his hair for hours at a time. As I got more hobbies and my 1:1 cars started to consume my time I started building less and less and slower and slower. Regardless of how much time I might have I still buy kits that catch my eye and store them away for when little bits of time make themselves available.
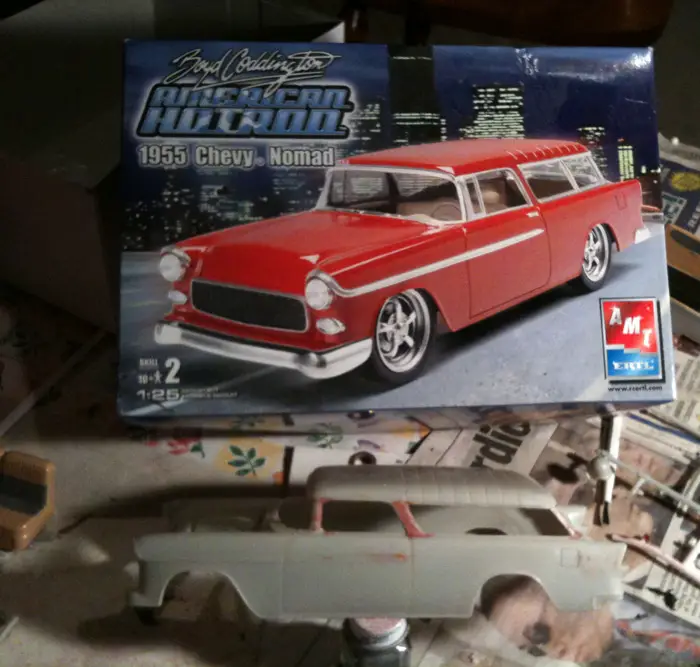
This 1955 Chevy Nomad is one of those kits. I chose the Nomad because I’ve never built a wagon before and I liked the fact that this one came with nice (but somewhat over scale) wheels and a nice stance. I figured it would be something I could build fairly easily and ad some custom touches along the way, if I recall it was under 10 bucks too so the price was right.
The very first thing I did to the model once I got it out of the box was chop the top, I decided the stock roof-line was a little to mundane for the wheels and ride height of the car and that a slightly lower top would help it all flow better. This is my first chop top so it’s a cool challenge, I eliminated some pillars and scratch built some others, while I was working on the body I decided to get rid of the door handles and emblems as well.


The interior and chassis are getting normal treatment, with nothing over the top just adding detail where I can and how I can. The brake setup was done with red calipers while the rotors got some detailing so the look cross drilled and slotted. The interior is going to be tan with silver accents once complete, and I am also looking into building, or finding a tank and some hose to simulate an air ride set up but we will see if that actually happens.


Once the Nomad is done and the s-10 and 32 Ford are fixed back up I plan to get my Bryce Casselman on and shoot some creative shots of all of my slammed models. I’m back at home now so you can expect more 1:1 scale content tomorrow.


Ha, awesome… I have a poor S2000 model still in box from England, I should get on that someday when I’ve got some spare time.
Spare time is the hardest part 😉