Home Blog Page 16

WTF Friday: Party At Each End

0

If you’ve never worked on one, you might not know, but GM G body cars S trucks and are really similar front end wise. Essentially a G body (Cutlass, Monte Carlo etc) front end is just a wider set s10. The control arms, spindles, brakes etc are completely interchangeable given we’re talking 2WD. I know this of course because of Project Why Wait.

The ability to interchange parts is what helped GM keep costs down and profits up in the 80s and 90s. It’s also lead to people creating all sorts of parts bin creations. Creations like this s10.

At the most casual of glances this Monte Carlo clipped S10 resembles an El Camino. Actually, considering the El Camino exists, it’s weird the owner didn’t start with one.

Corvette roll pans were extremely popular for s10s, but the owner of this truck took things further by grafting on the rear end of a C5.

Honestly the ass job looks the job fairly well all things considered. Hats off for retaining an opening tailgate, that probably wasn’t easy.

Unfortunately from the side everything falls apart. The front end sticks out way, way too far, and the opposing angles of the clip swap and rear end swap just visually conflict.

Surprisingly though the 3″ roof chop looks right at home. A healthy drop might help things out, but I really have my doubts.

Theres a V6 under the hood and according to the owner all the hard work is done and it needs ‘little’ to finish. If this is up your alley, then check out the ad on Kijiji where it’s for sale at 6,800

Keeping Pace, With a Ford Mustang Pace Car

2

In yesterday’s CSCS finale post I mentioned holding back a few photos of a car I found particularly awesome. As a Foxbody fan and a Pro Street fan this Mustang Pace Car stopped me in my tracks.

I’m talking immediate tunnel vision resulting in a disproportionate amount of photos. Similar happened with the Cavalier I posted a few weeks ago. As luck would have it the two cars were actually pitted side by side.

With 10,000 units being produced only in 1979 the Mustang Pace car isn’t an overly common find. I’ve probably seen less than five in my travels, none modified to this level.

With the owner hanging around the car, I had to ask if it was the real deal and the owner’s assured me that it was the genuine article.

Pace cars came with either a 5.0 or a turbo six and this car sports a crate Ford 302. The v8 has been fit with AFR heads, and an electric water pump. I’m pretty sure it was punched out a little bit as well, though I can’t quite remember how much.

The car sports the original Holley Carb these cars sold with. Albeit significantly refurbished.

Prior to the current owners taking possession the car was involved in a fairly significant accident. It was repaired, but somewhat haphazardly. Since it would never quite be the same again the owner’s decided to take this route.

As you’d expect from a proper 1/4 miler the car has a cage installed, as well as Kirkey seats. But, as a nod to its origins plenty of the original interior is intact.

The 2018 CSCS finale was the car’s first time out complete, so the owners were just giving it  bit of  shakedown. Next year however it should be out for blood.

I hope to catch it at the track again cause I wouldn’t mind seeing what sort of numbers it does down the quarter-mile.

Event Coverage: CSCS Finale 2018

0

CSCS coverage was a staple of this site in its developing years. Without fail I attended every round, and each round had its coverage broken into multiple parts. I’ve learned a lot shooting CSCS events. More importantly I’ve made several friends covering the event as well.

In recent years the number of CSCS rounds I’ve been able to personally attend has drastically declined. I hope the lack of CSCS coverage here hasn’t been interpreted as any sort of disdain for the series.

I still have tons of respect for the series. These days it’s just hard to pry a full day out of my summer weekend schedule to go. It’s unfortunate no doubt, but it’s not all bad.

There’s an extra level of appreciation that comes from something you have to work to make happen. Now when I do get to go to a CSCS event it’s practically a special occasion.

CSCS has grown in all the right ways the past four years. The show component is better, the track events run smoother, and the driving is great.

It’s impressive that still, after all this time, CSCS remains as the premiere see it all, do it all event in Ontario.

Something I’ve always made a point of doing every CSCS event is exploring the pits and general parking grounds. No matter the venue there’s always something interesting sitting among the daily drivers and tow pigs.

The finale in particular seems to coax out some of the more unique builds.

This year my favorite parking lot, or parking field, finds were a race ready Volvo Amazon, a classy lowered Jag and a first gen Eagle Talon.

All three are platforms I don’t see very often at car events. I did however have a bit of Deja Vu upon seeing the Amazon. There’s a good chance I might have seen it before.


In the pits, outside of the Cavalier posted earlier this month –and another car I’ll be sharing later this week– my favorite car was this 300zx.

Considering their weight, and somewhat rarity, seeing one in time attack trim was really cool.

The car is owned by Sylvain Toupin who despite being from Quebec participated in every round. His efforts were rewarded at the finale with a second place in unlimited rear wheel drive.

Time attack action at the finale was particularly lively. PFAFF Tuning/Motorsports had some of their heavy hitters out, and there were a few cars over from the states as well. Including the stunning, and fast, Evo in the feature photo.

CSCS is where I initally learned to take a panning photo, so I couldn’t help but take a few more.

I’m considering a different lens for Motorsports next year. Before I mad a full frame I had a telephoto that worked quite well for motorsport.

I really ought to pick up a suitable replacement in the off season, any suggestions?

Between the various rounds of time attack classes (street all the way to unlimited) the drift drivers came out for their portion of competition.

It was great to see how many drivers were out supporting both CSCS and Drift Jam this year.

More seat time for everyone is never a bad thing.

After drifting, CSCS ran their Max Attack race. Max Attack is a bracketed wheel to wheel race, and as you can tell from the photo above, it gets pretty competitive.

Don’t worry after rolling his car a few times “Crazy” Leo and his passenger were quite alright.

With another CSCS year in the books, I’m going to end this post with a barrage of various photos from the day as a whole.

See everyone at, at least one e ent next year. Who knows maybe I’ll switch things up and go to the season opener!

Project Why Wait: I Was Warned

7

I was warned. I was warned that few things throw off a timeline more than rust repair. But, I was optimistic and admittedly a little naive when I muttered every weekend warrior’s famous last words; ‘how bad could it be?’

After all my truck is a western truck and they don’t use salt in the west. I can hear some of you chuckling at my lack of experience already.

Curious how I made out? Read on. But before you do, please note that significant rust, amateur welds and copious grinding exist herein.

Fabricators discretion is advised.

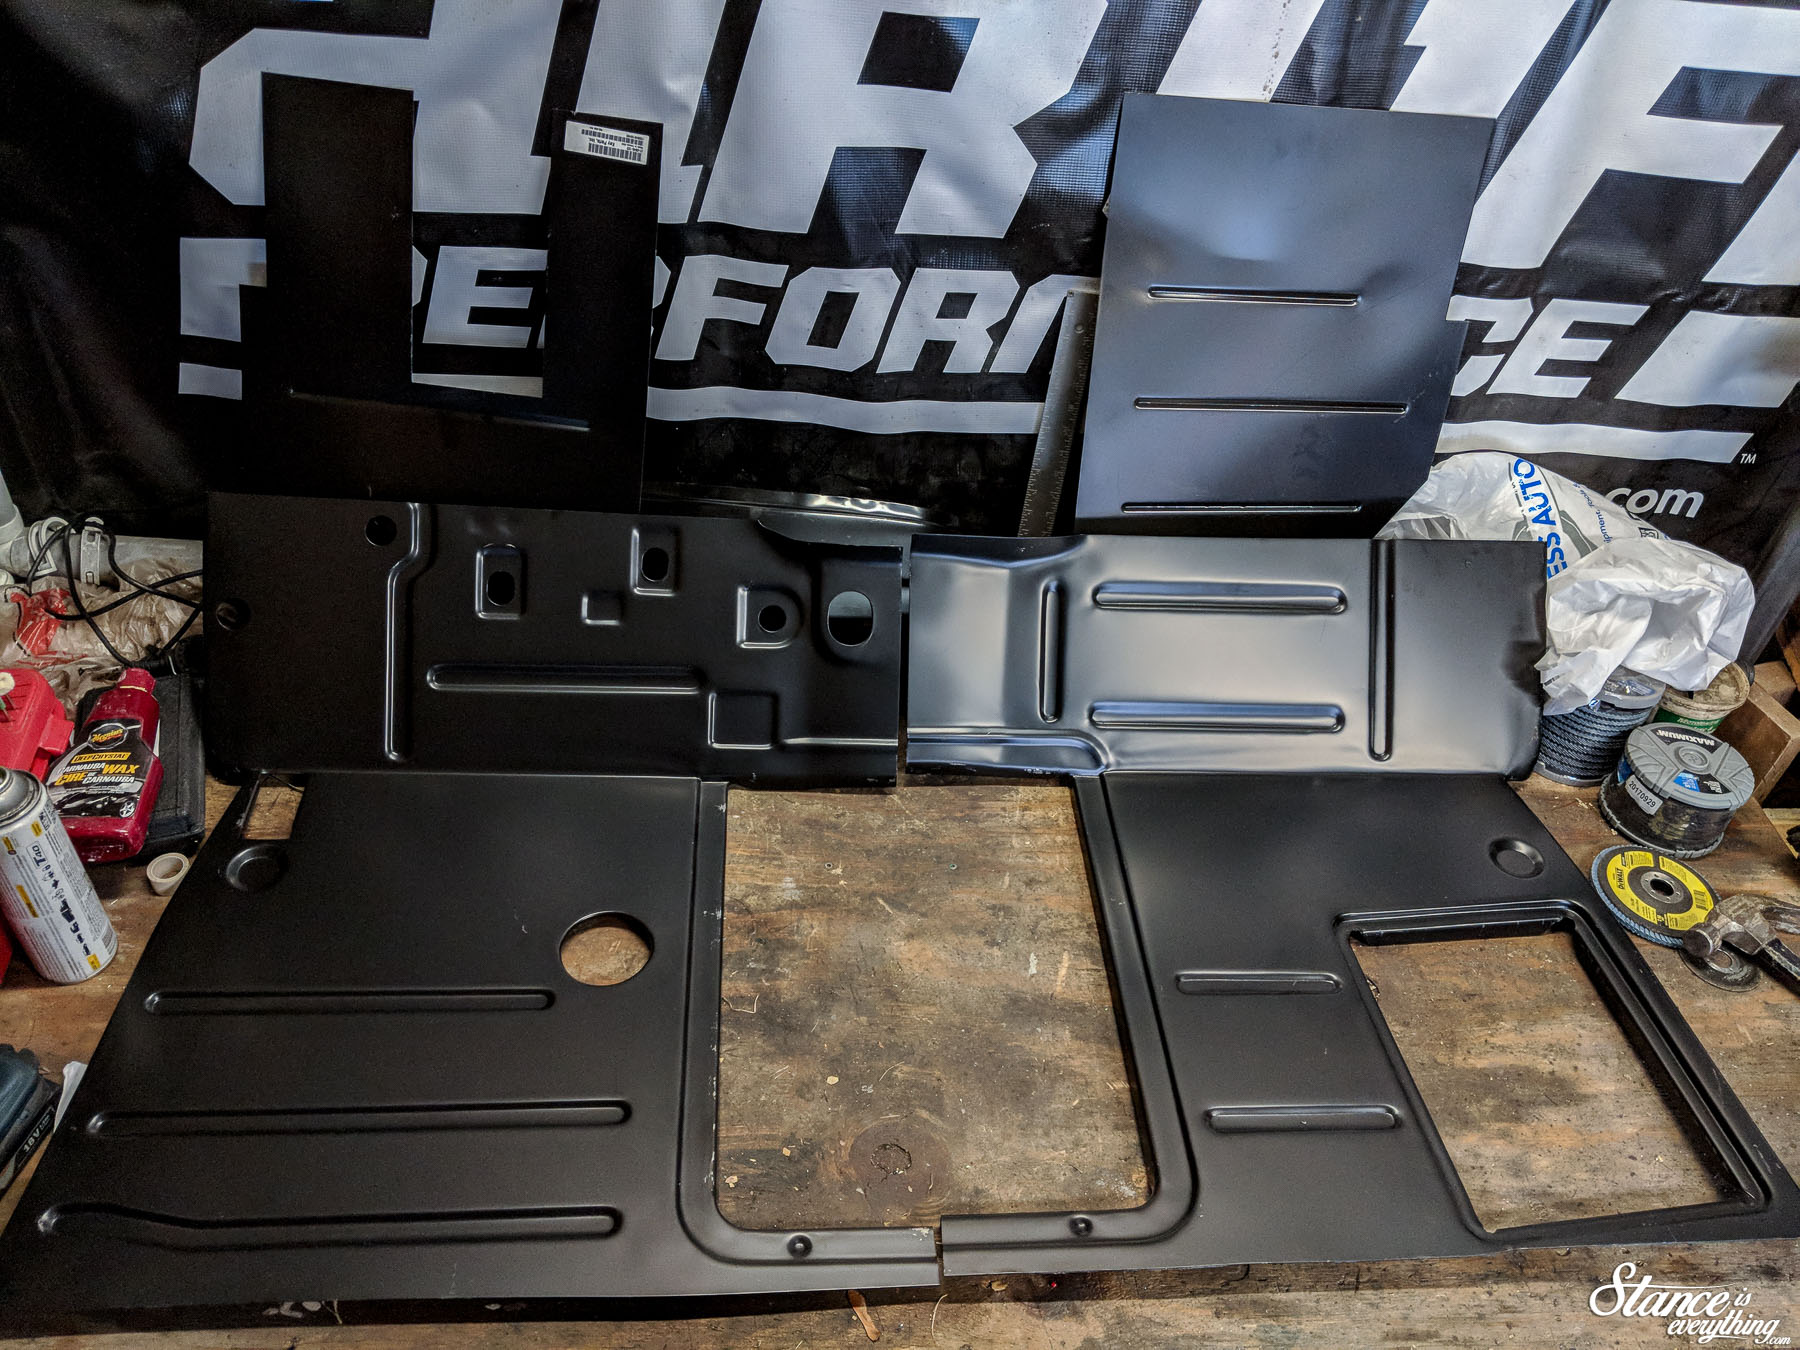
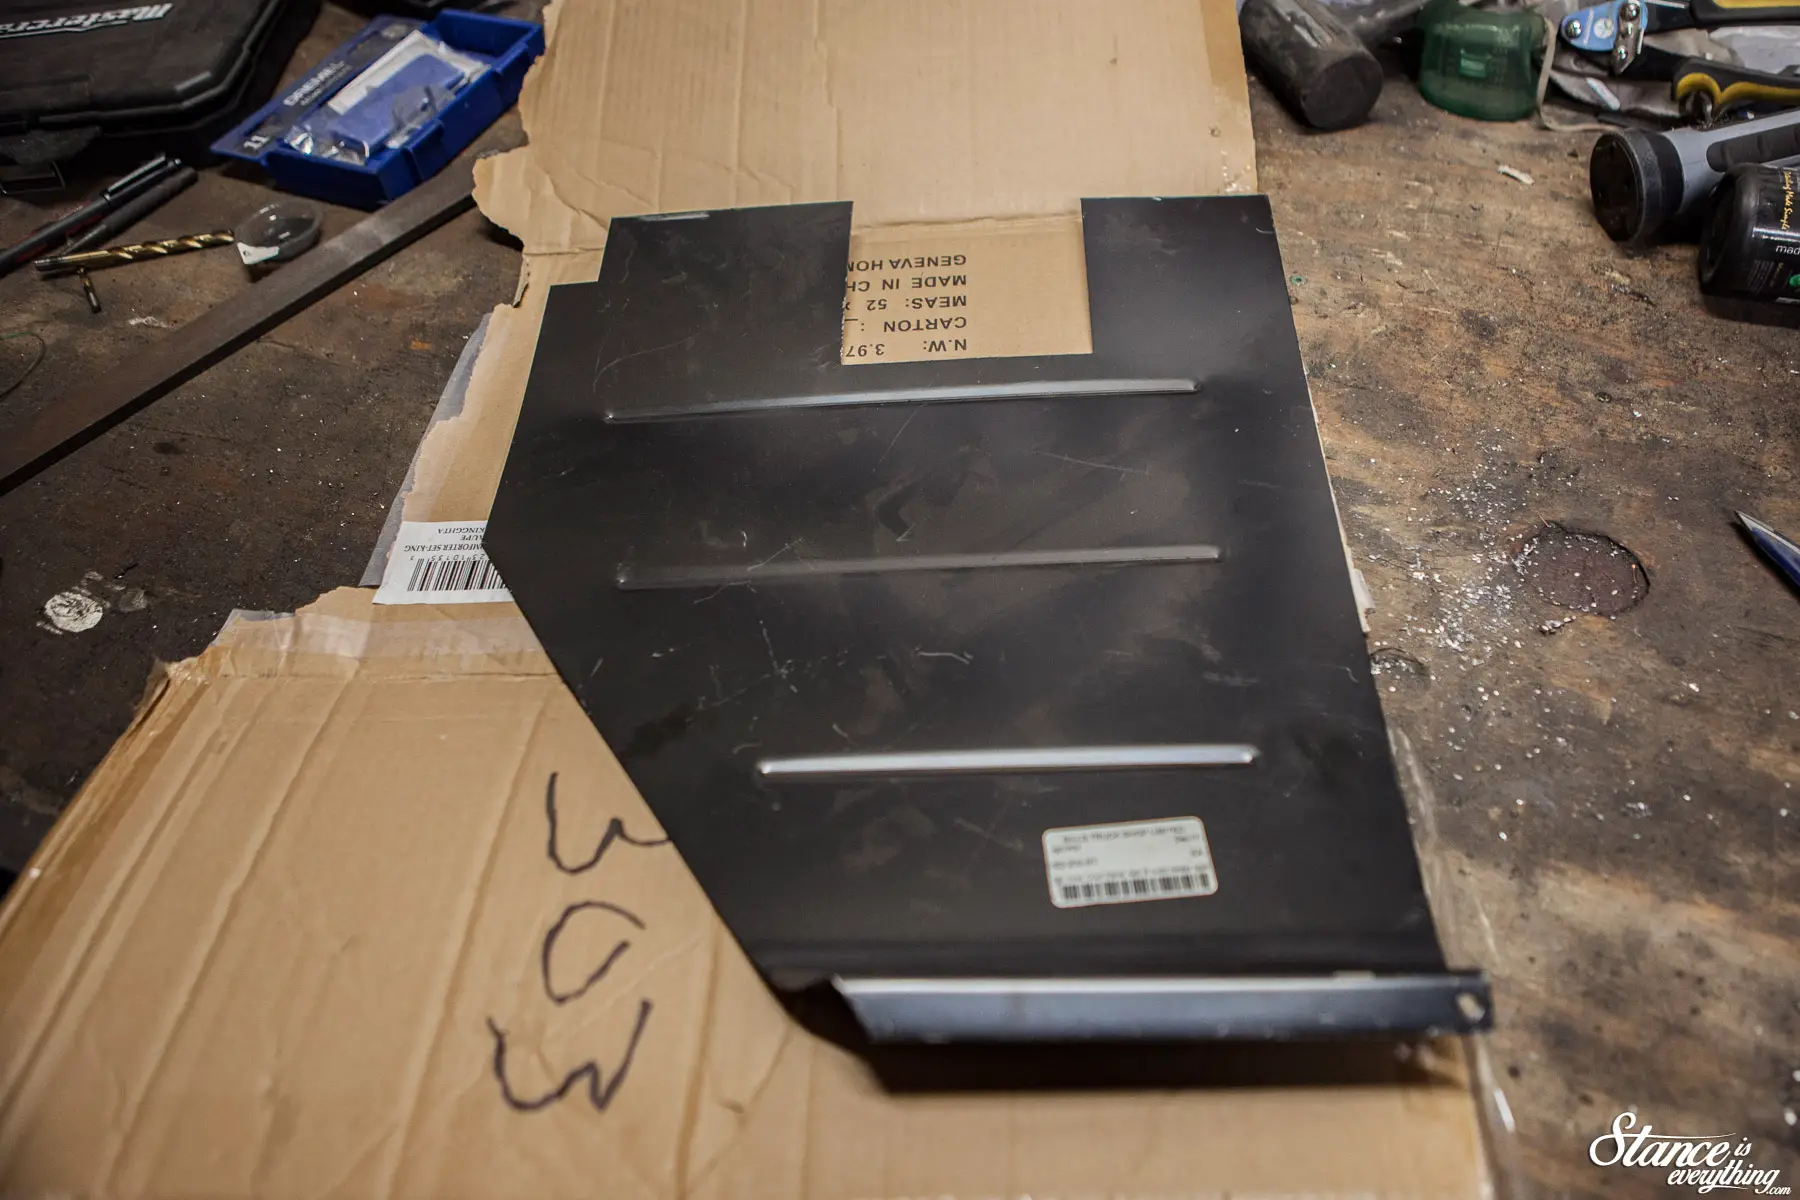
Before getting out the cutting discs, I took a trip to Bill’s Truck Shop in Courtice Ontario. Bill is two exits up the highway from my house and trips to the shop became quite frequent during the summer.

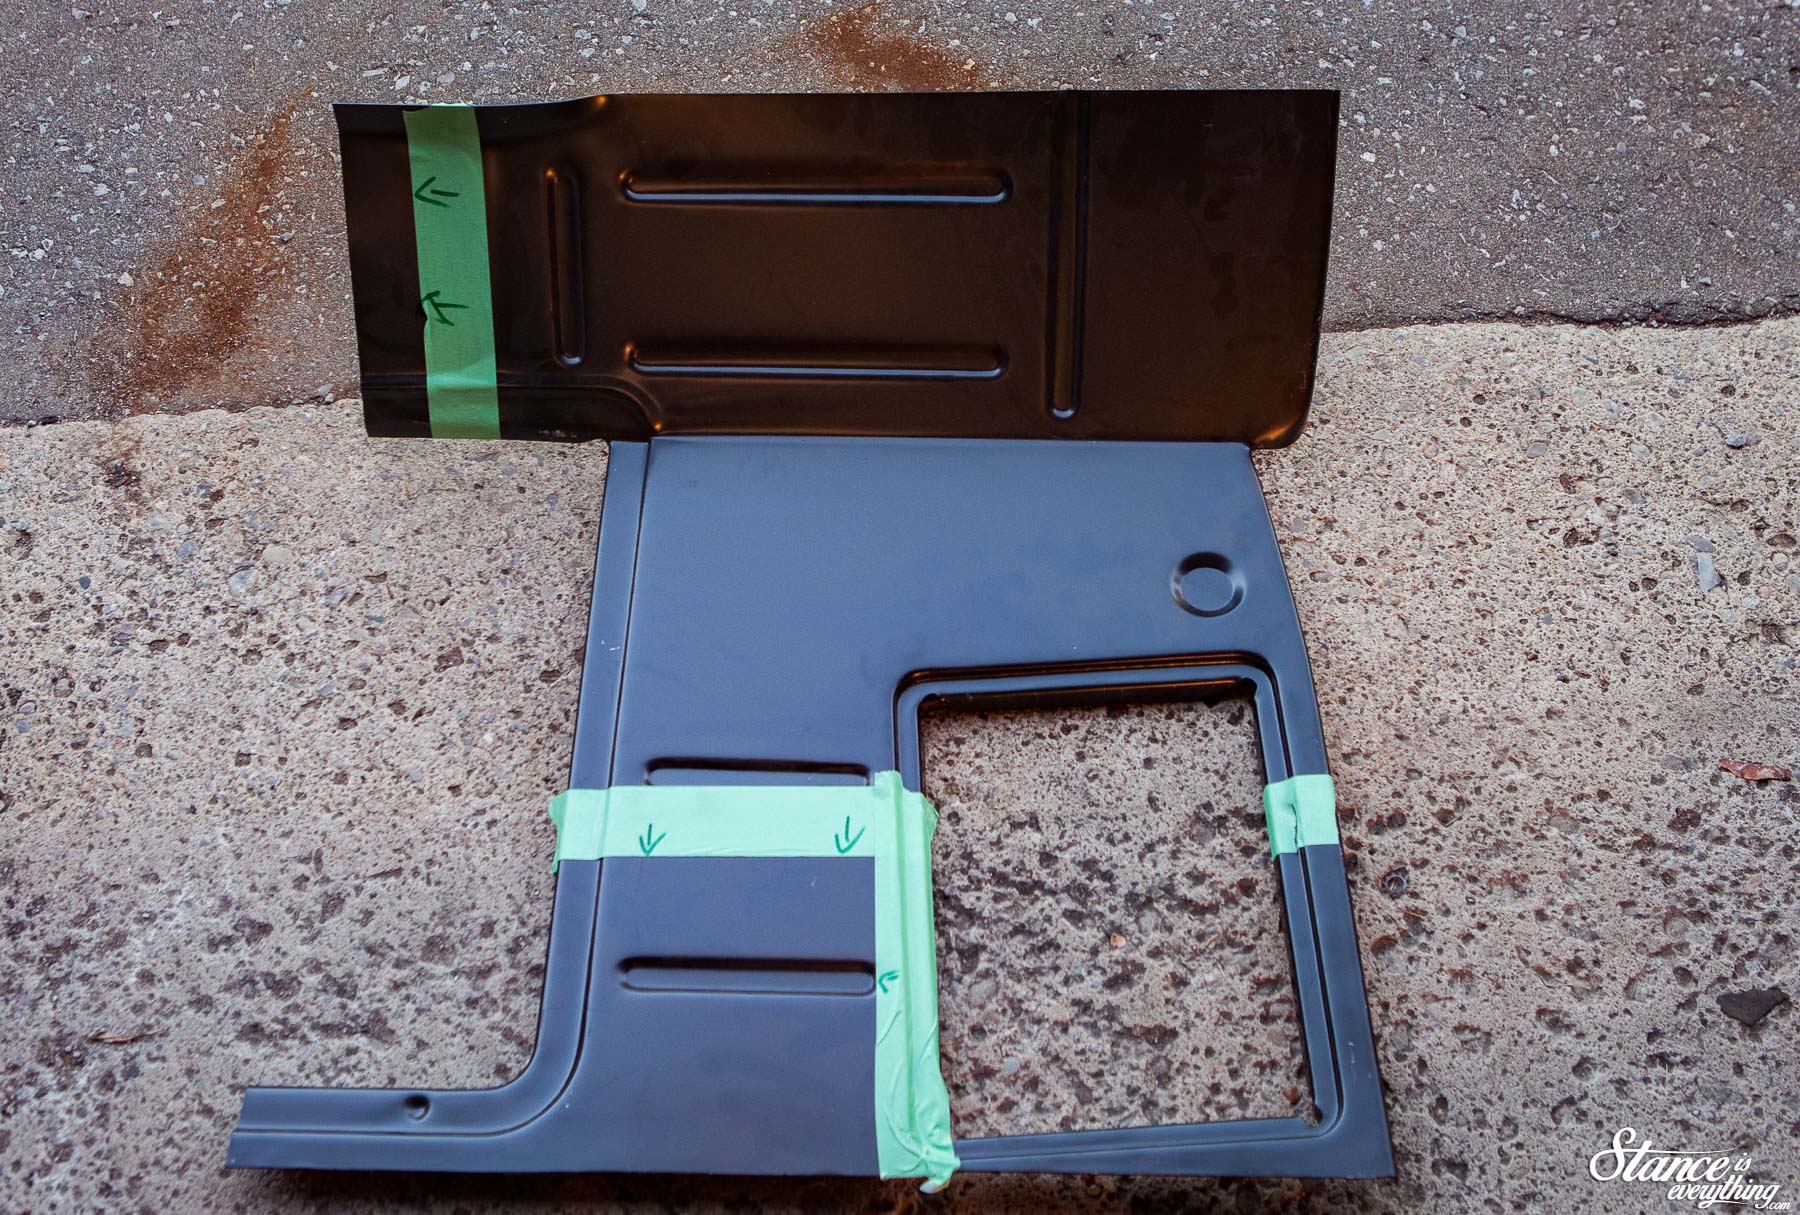
Pictured above are the panels I originally thought I needed. In reality I needed all of the above along with a cab support, lower hinge pocket, inner fender and outer cowl.

Thinking ahead I’ve bought the same for the driver’s side because there’s little worse than running out of material mid job.

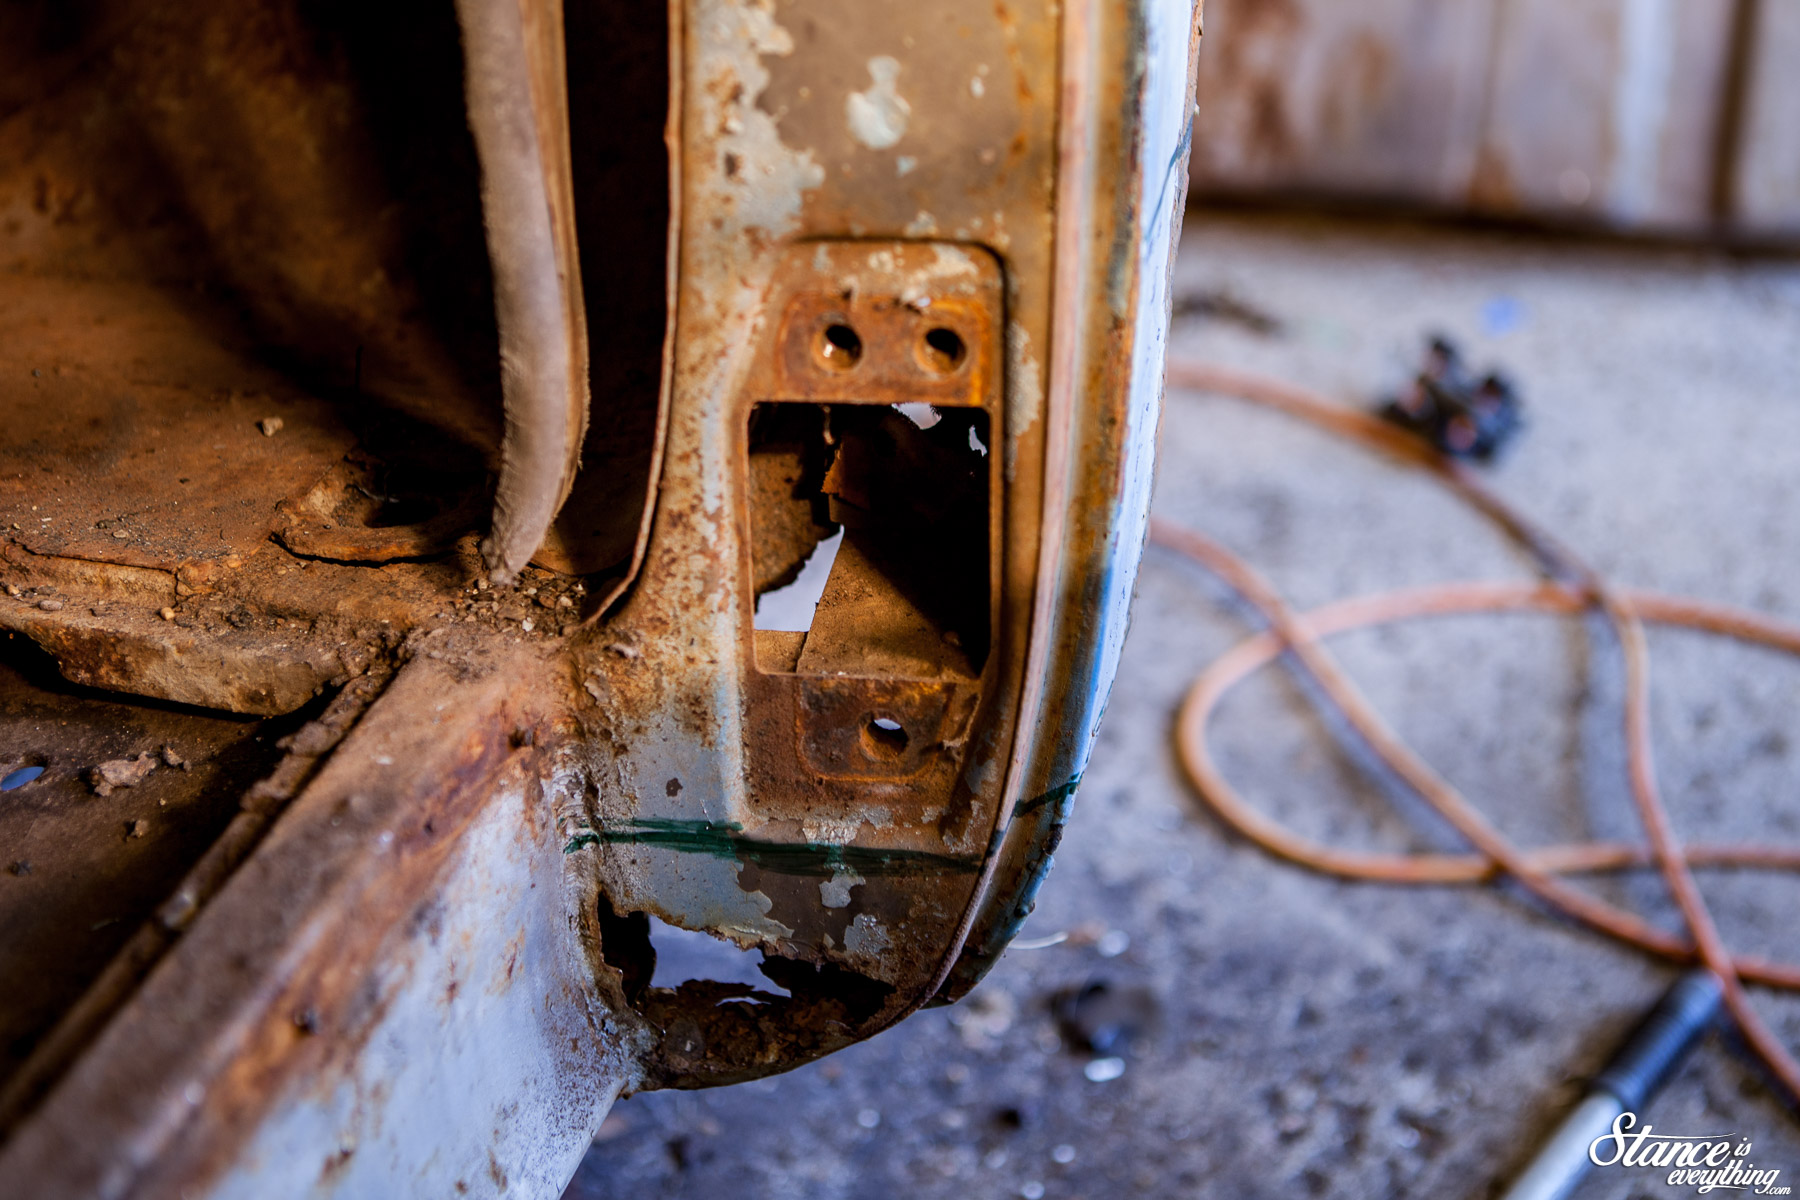
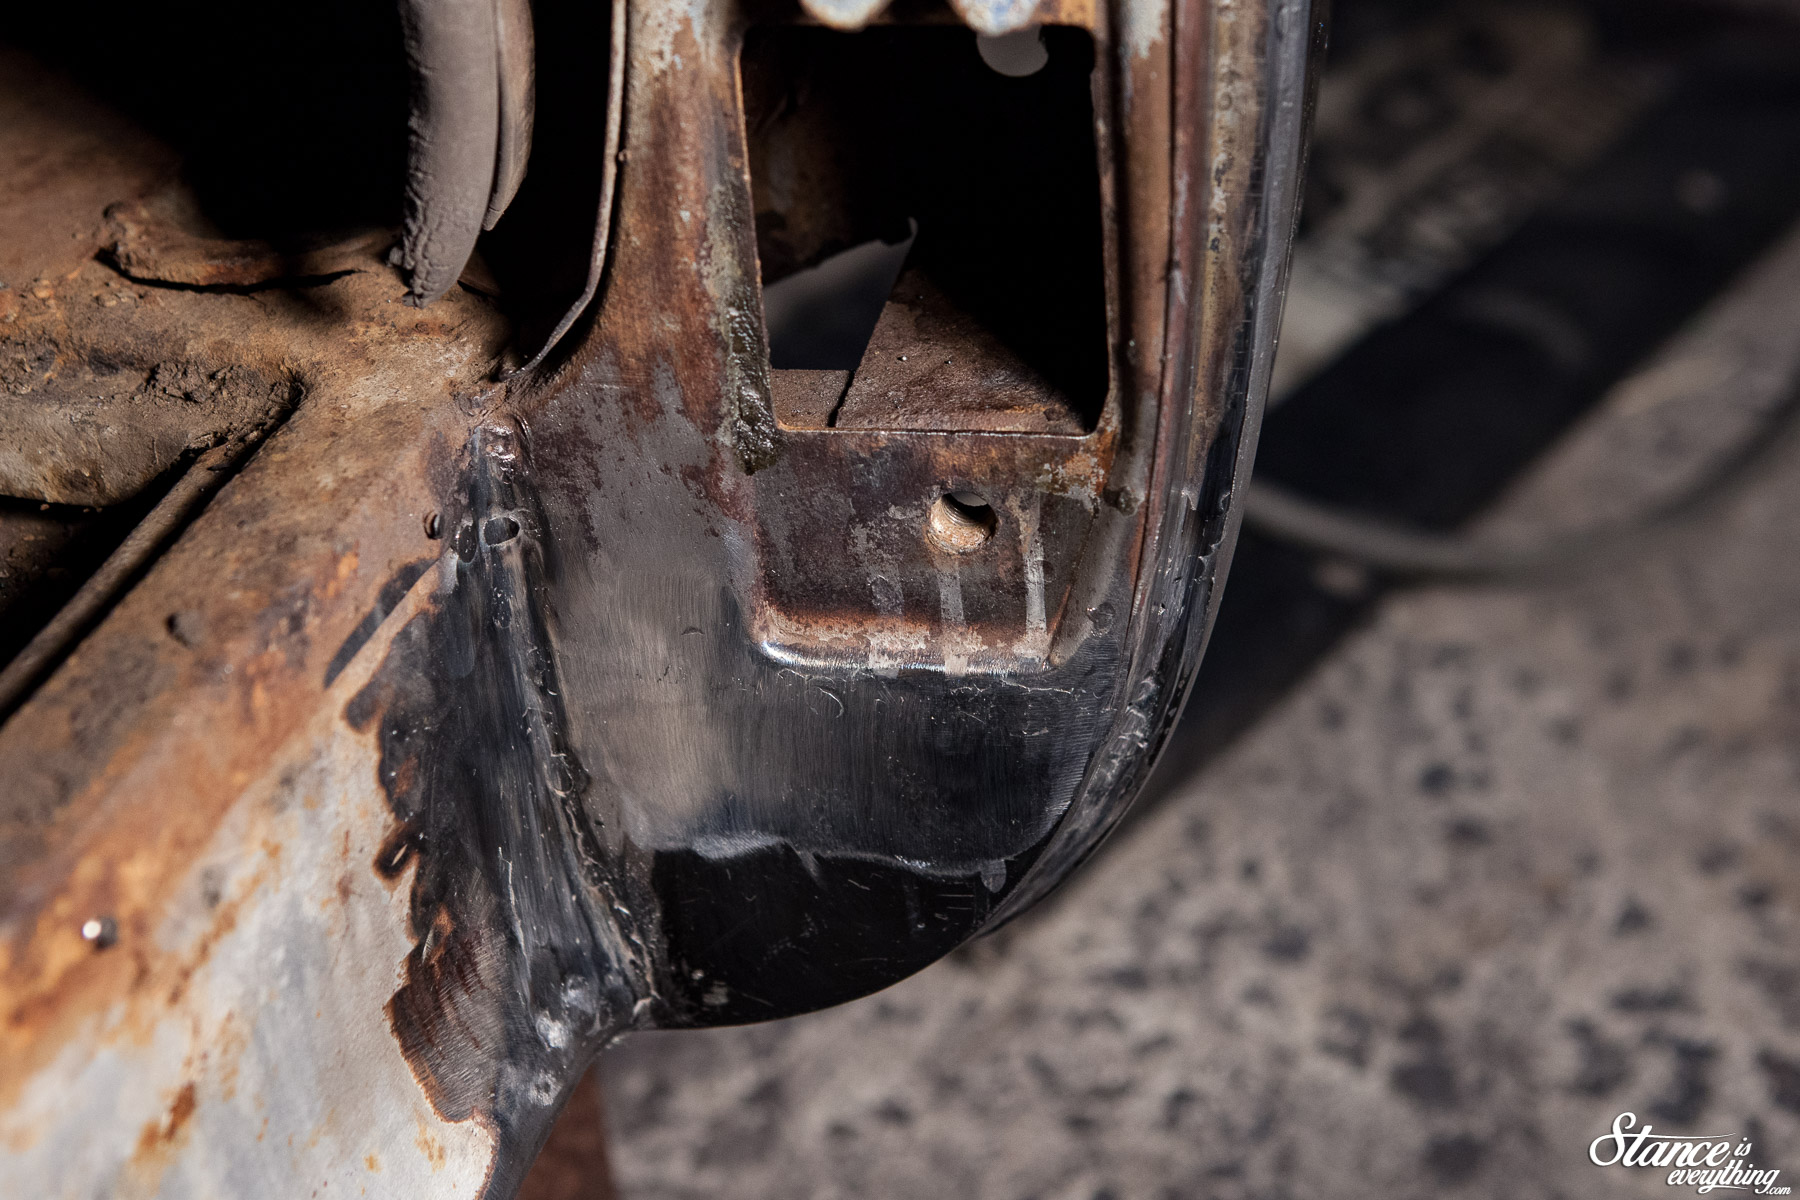
As a starting point I chose the bottom of the hinge pocket on the passenger side. The metal in that area was pretty thick which meant I’d have a hard time blowing through while I learned the intricisices of patching panels.

There were also plenty of body lines to aid in panel line up.

A grinding wheel made short work of the affected area, though the tight quarters made it a little hard to cut cleanly.

An air powered cut off wheel, with a small disc attached would have worked better. Unfortunately my current compressor is far to small to run air tools for any length of time.

This is an issue I hope to resolve in the near future, but for now a grinder does the trick. I even used my Dremel a few times, equipped with the quick cut, thicker, discs.

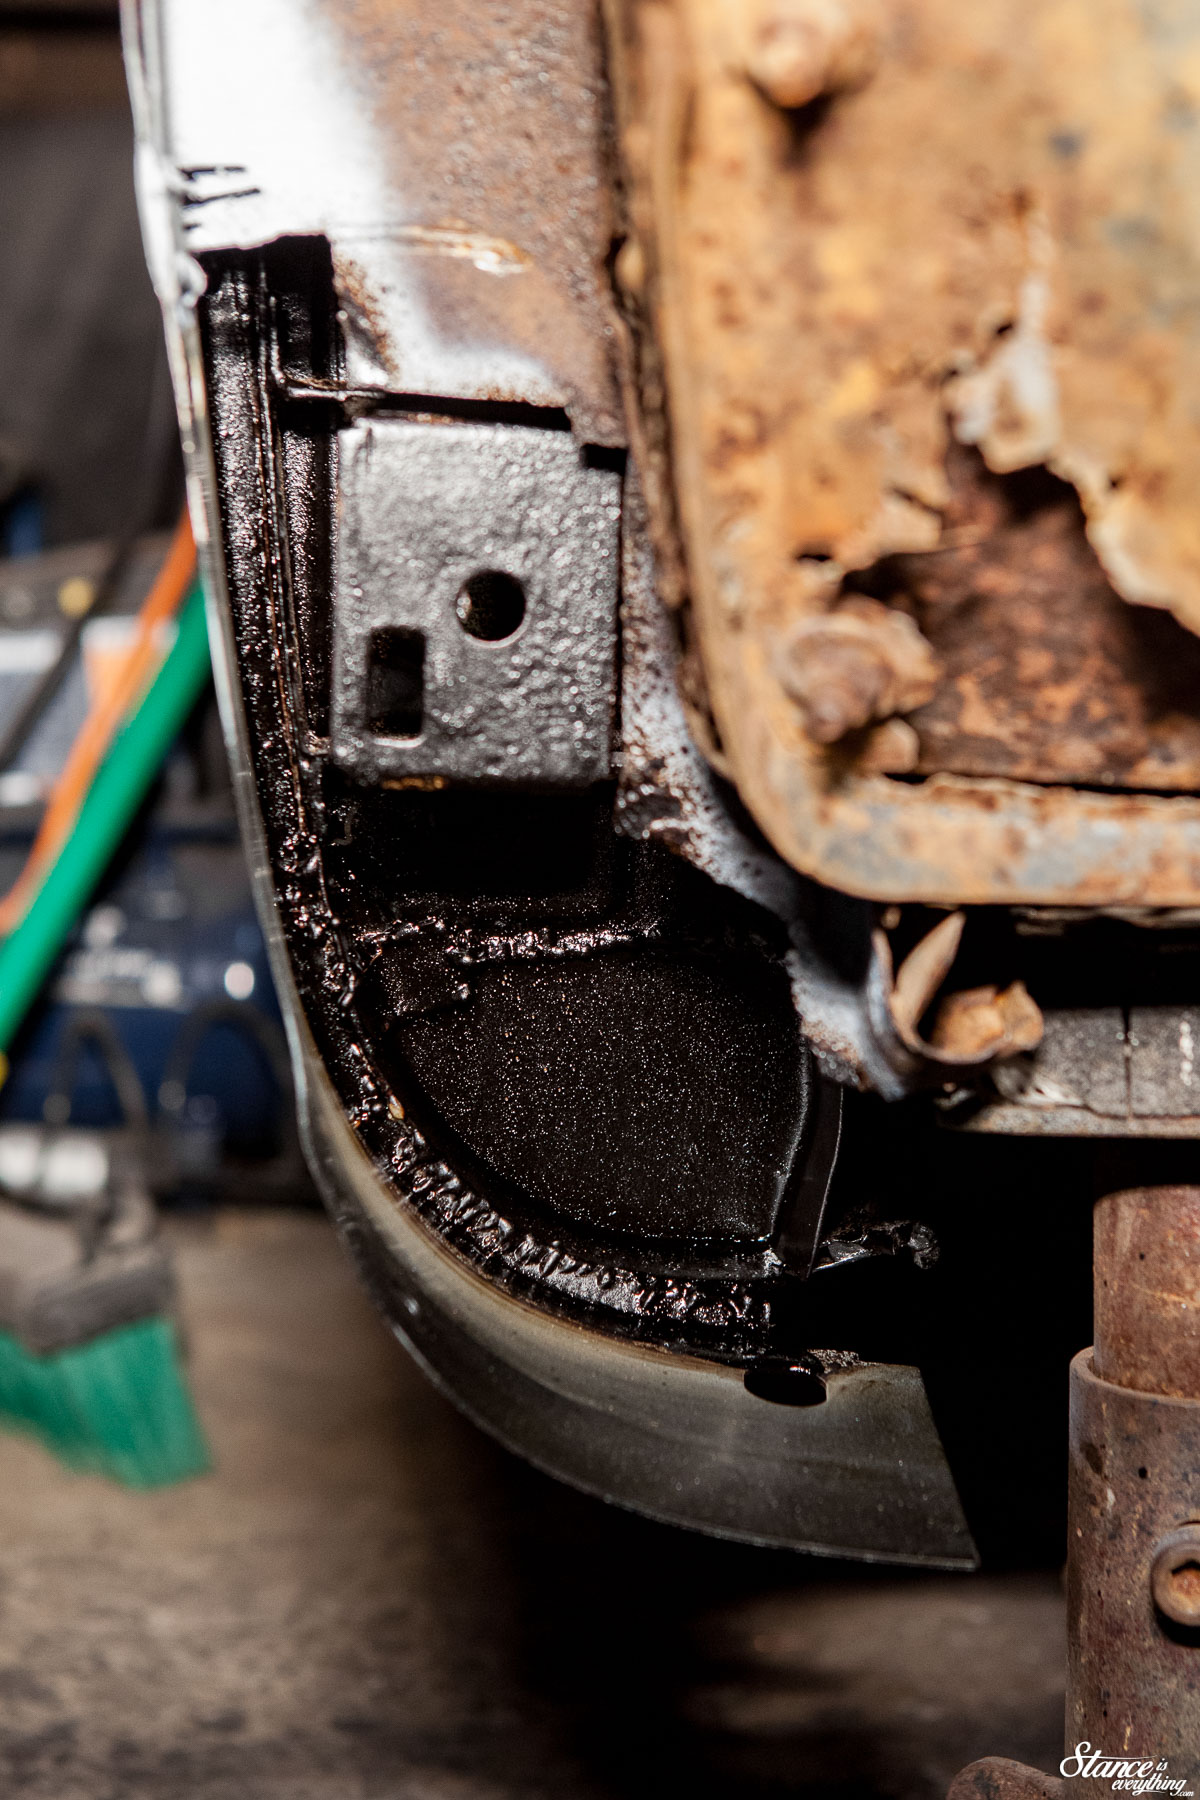
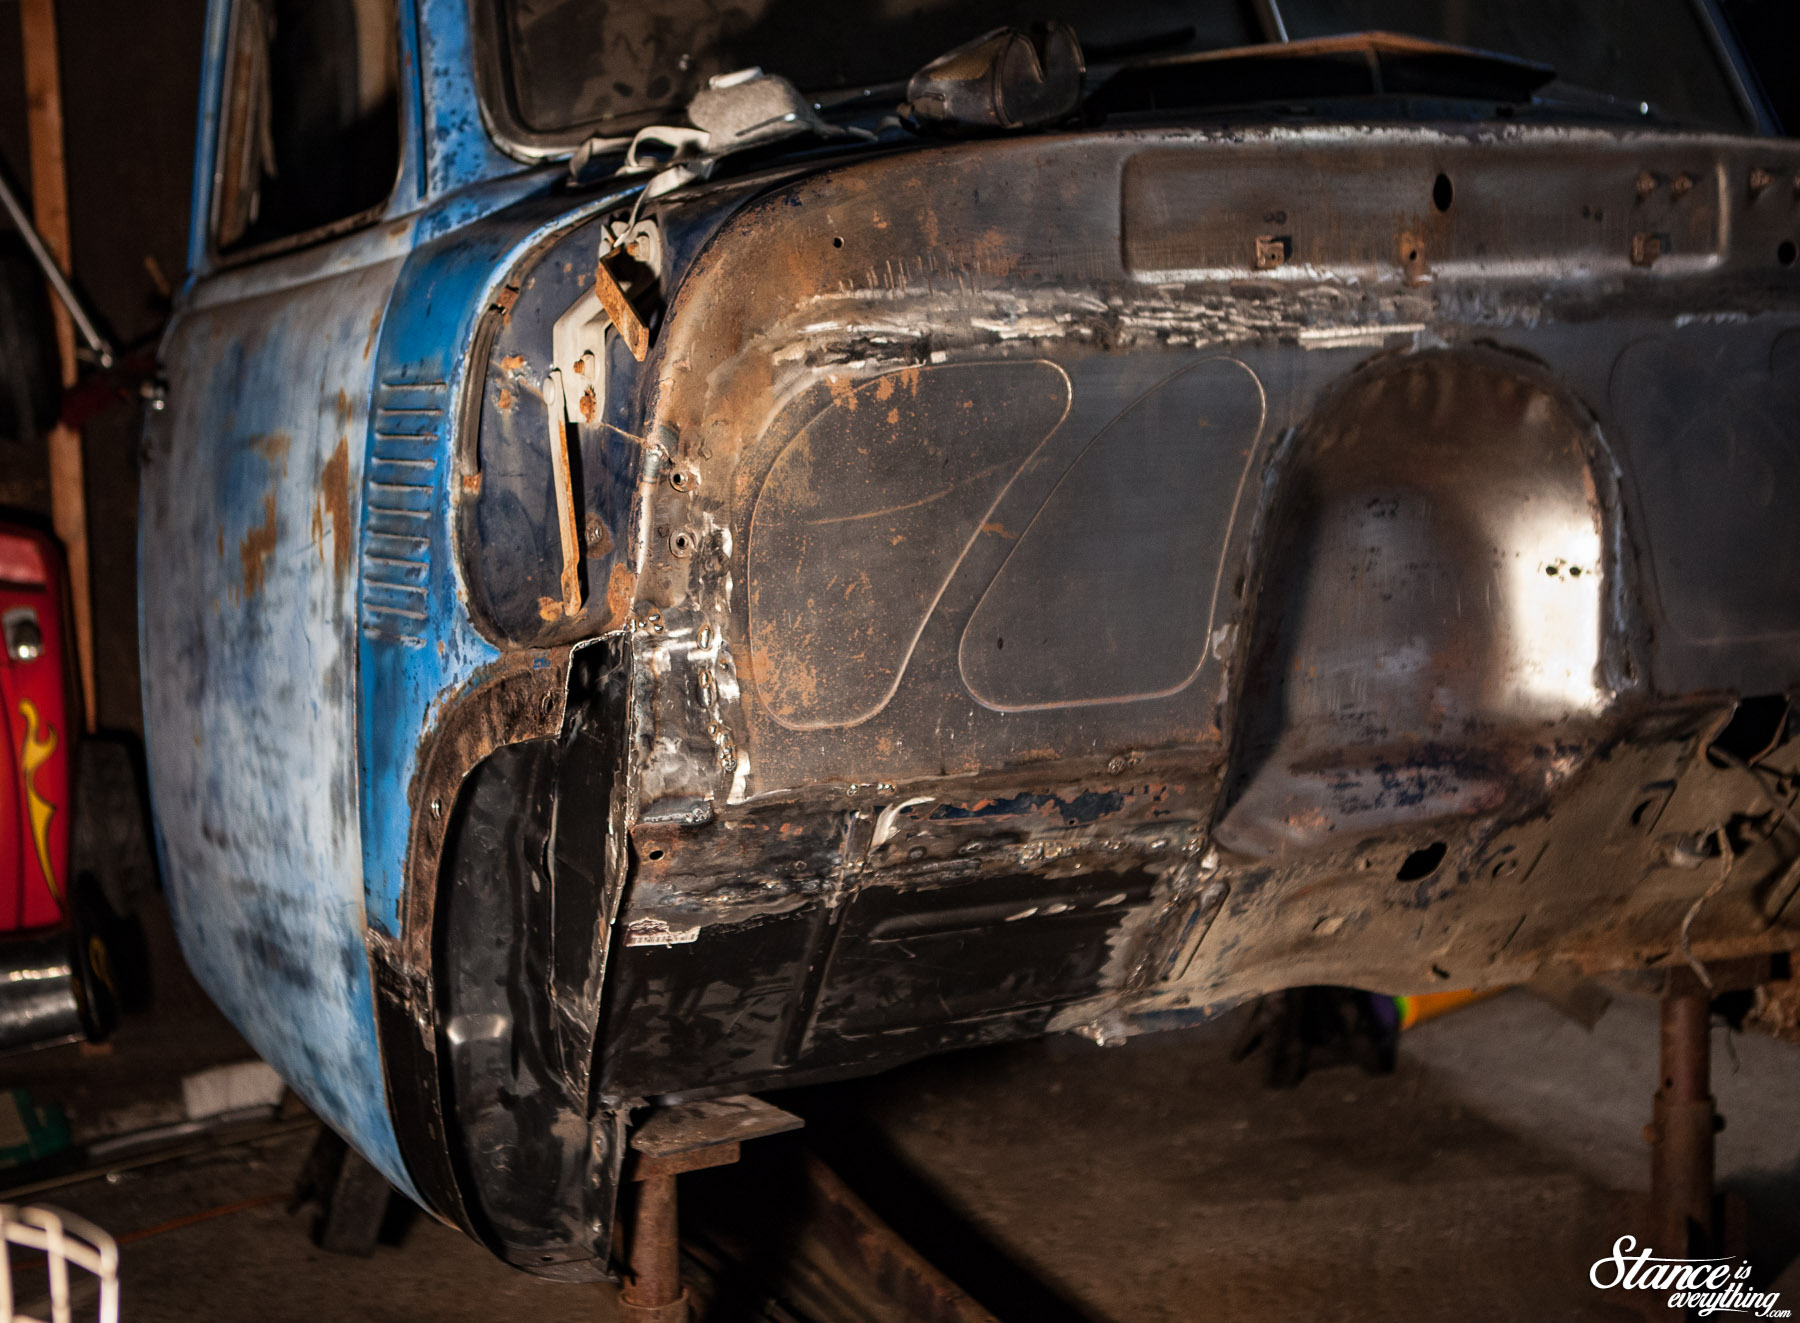
Lower hinge pocket tossed in the scrap pile I continued into the cowl. As I worked I made mental note of how bad the floor, kick panel and inner fender were and tried not to get discouraged.

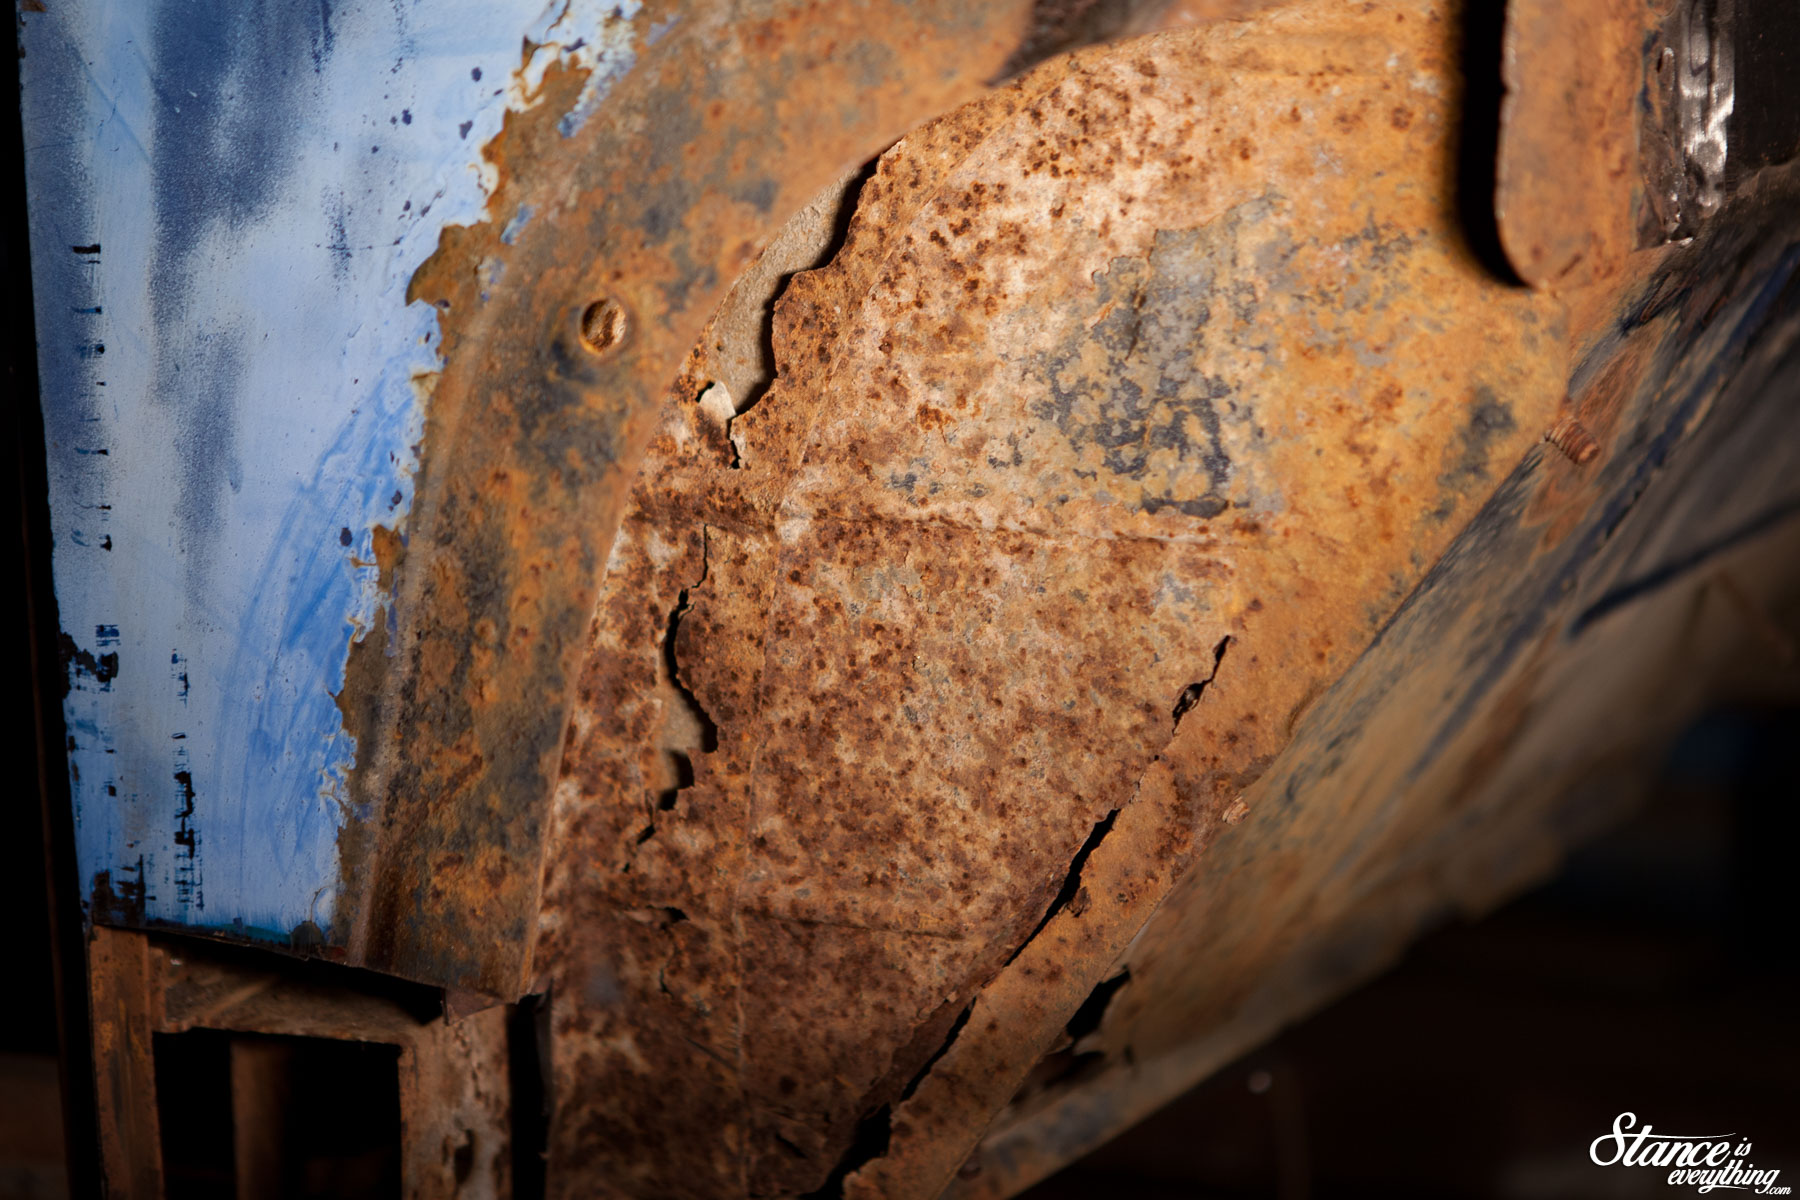
While I was in the area I cut out the lower outer cowl as well. Compared to the new panel you can see just how much was missing.

I’ve since learned this area is known for poor drainage and nearly all Advanced Design trucks are rotted out here. The driver’s side shows similar damage though not quite as significant.

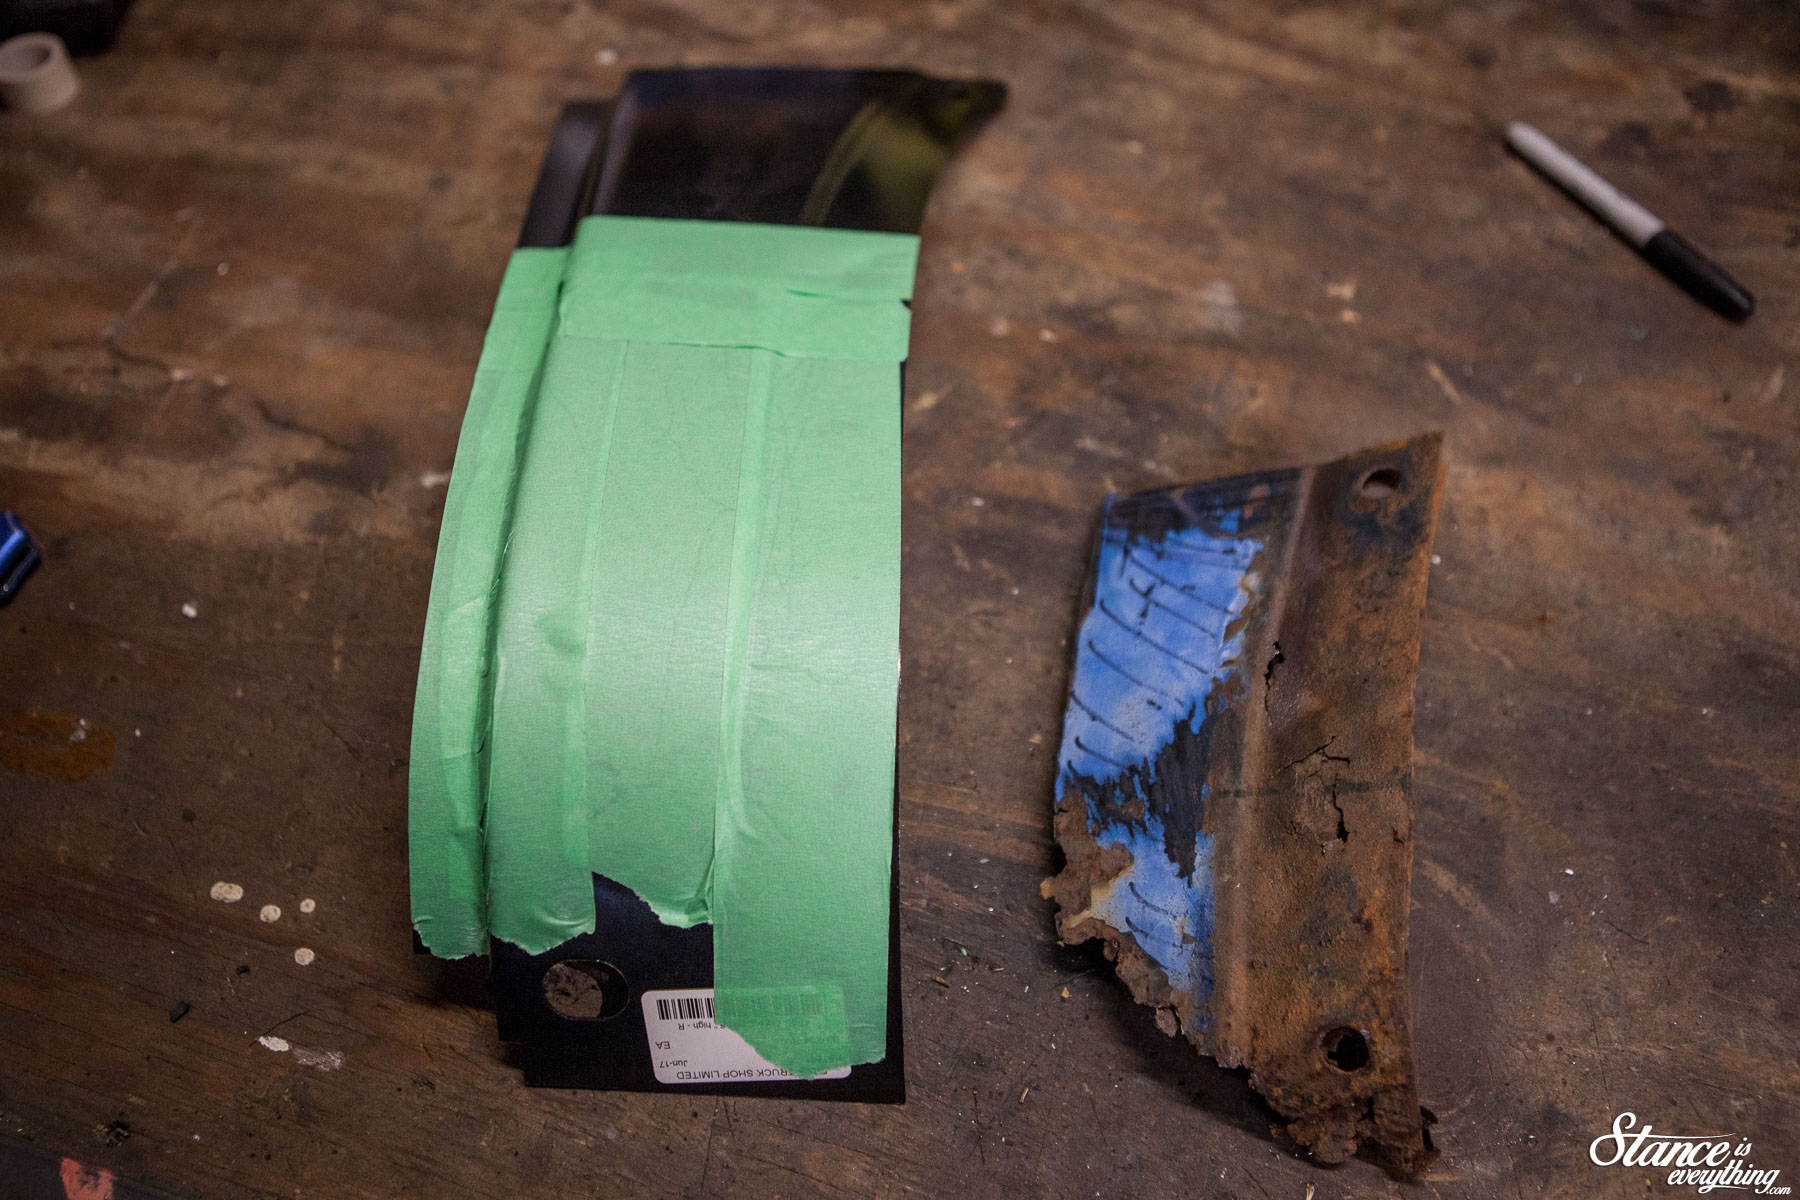
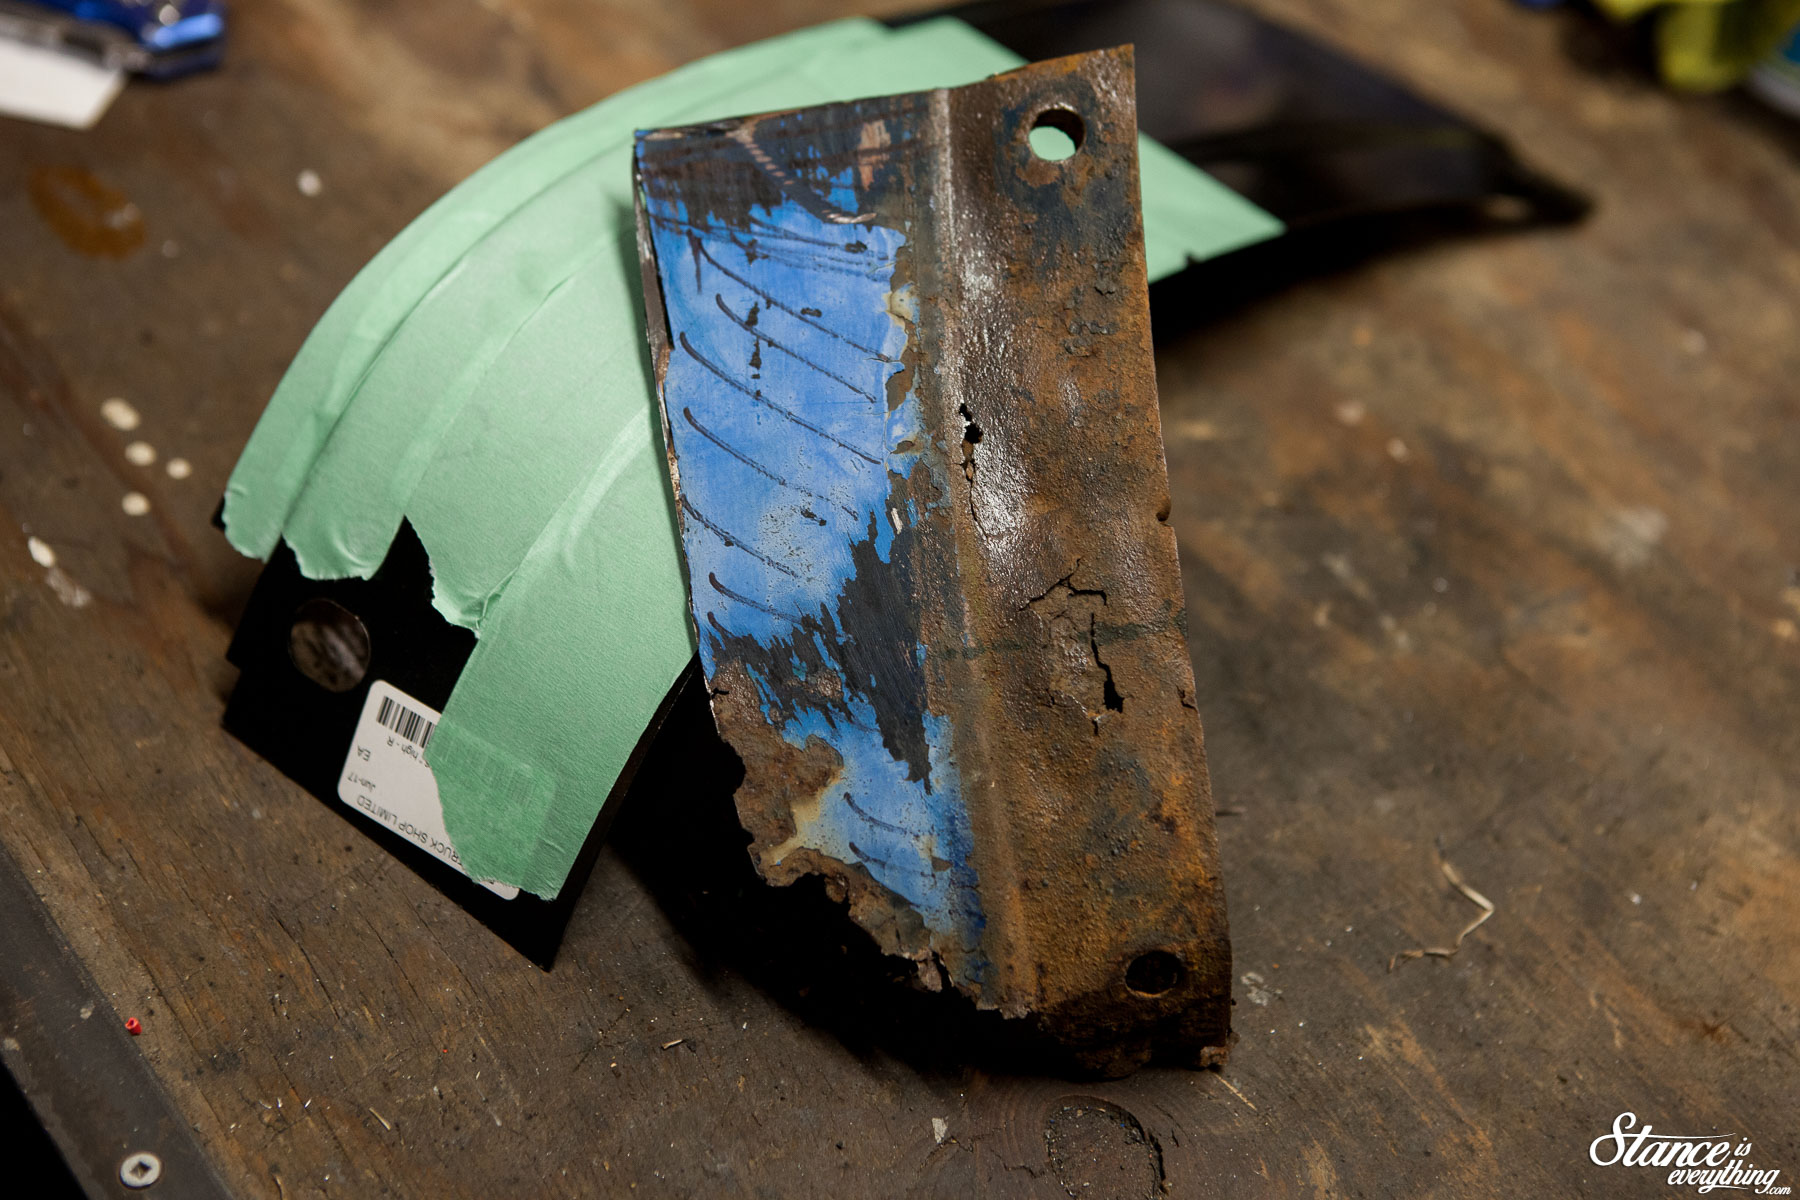
I masked up the new piece, traced what I could, and transferred it to the new panel. I did the same with the lower hinge pocket.

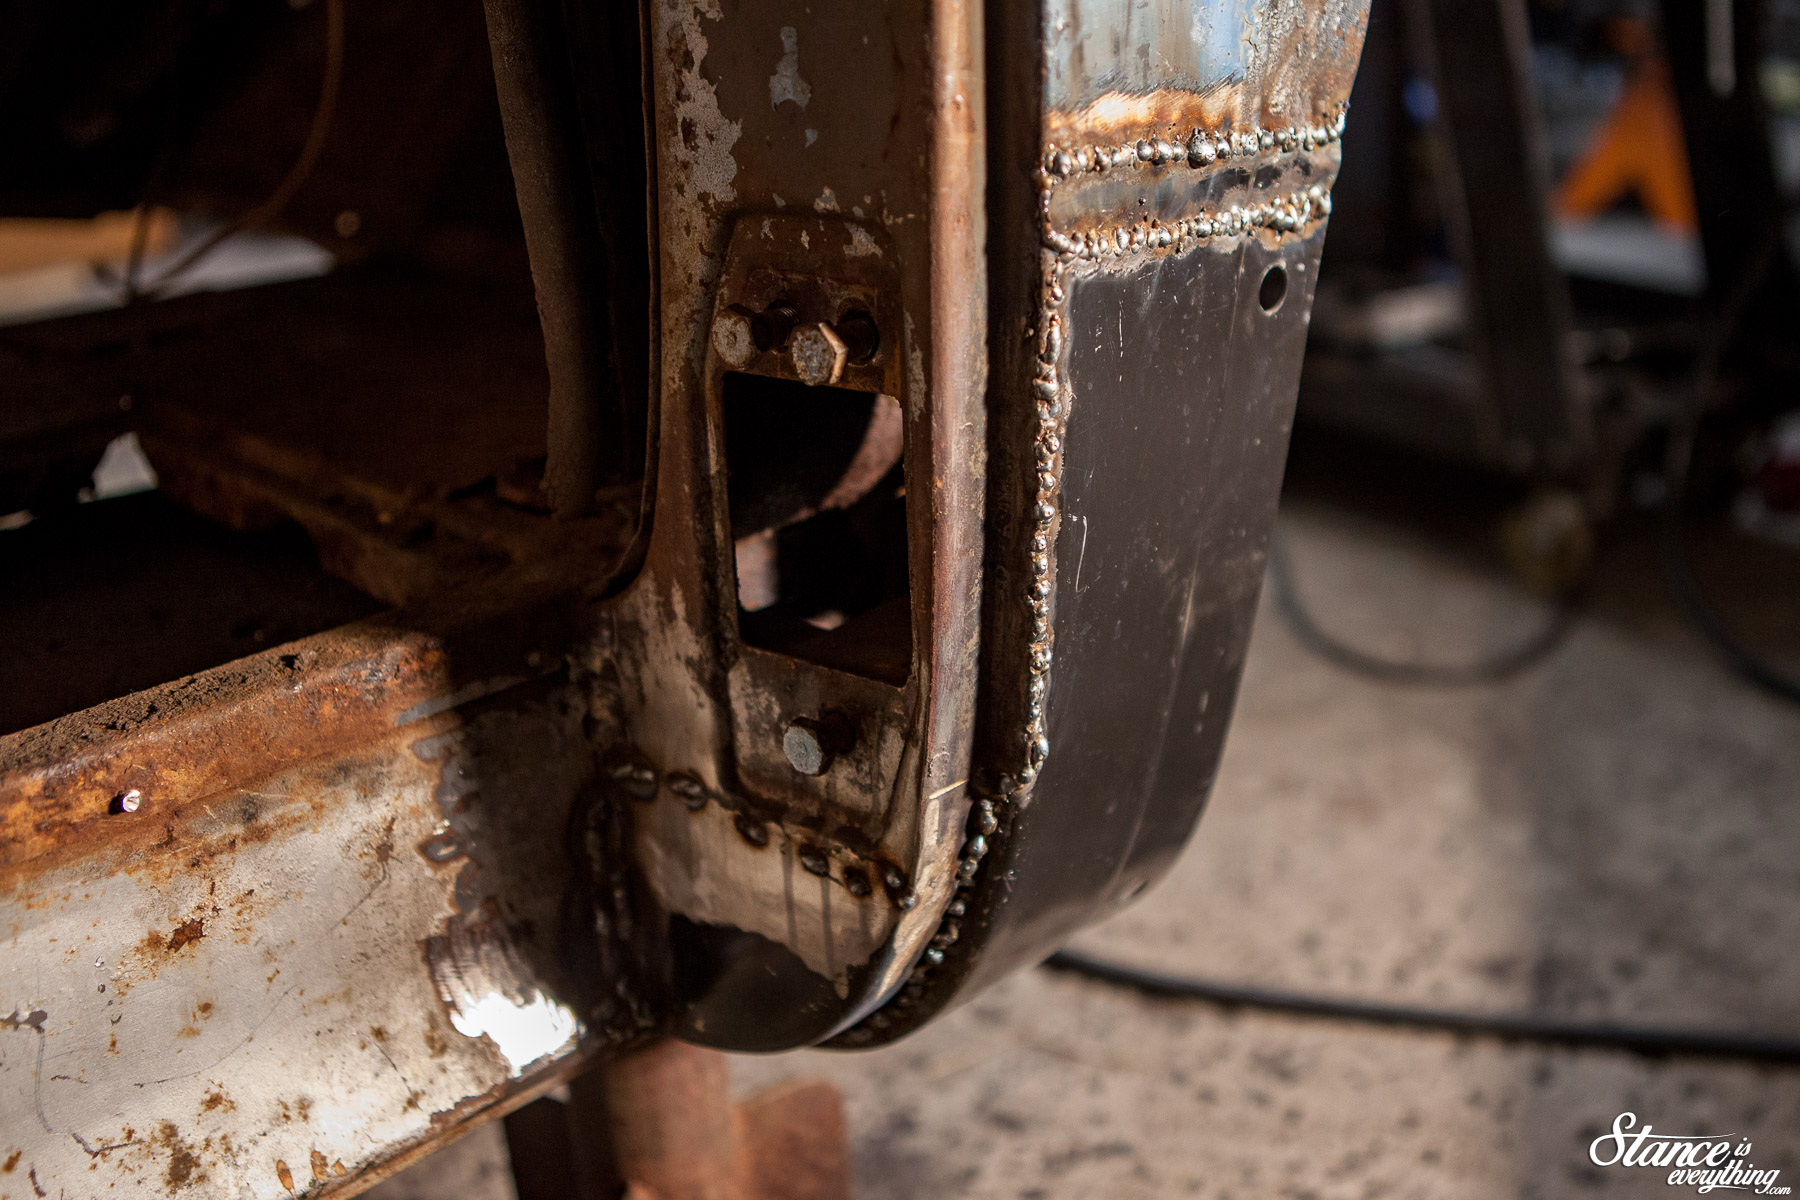
A bit finessing, and I manged to get both pieces in reasonably well.

In the photo above you’ve probably noticed a multitude of sins but one stands out; the double weld line.

I made the mistake of being too conservative with my cuts resulting in not enough solid metal to weld to. I’d love to say that was the only time this happened.

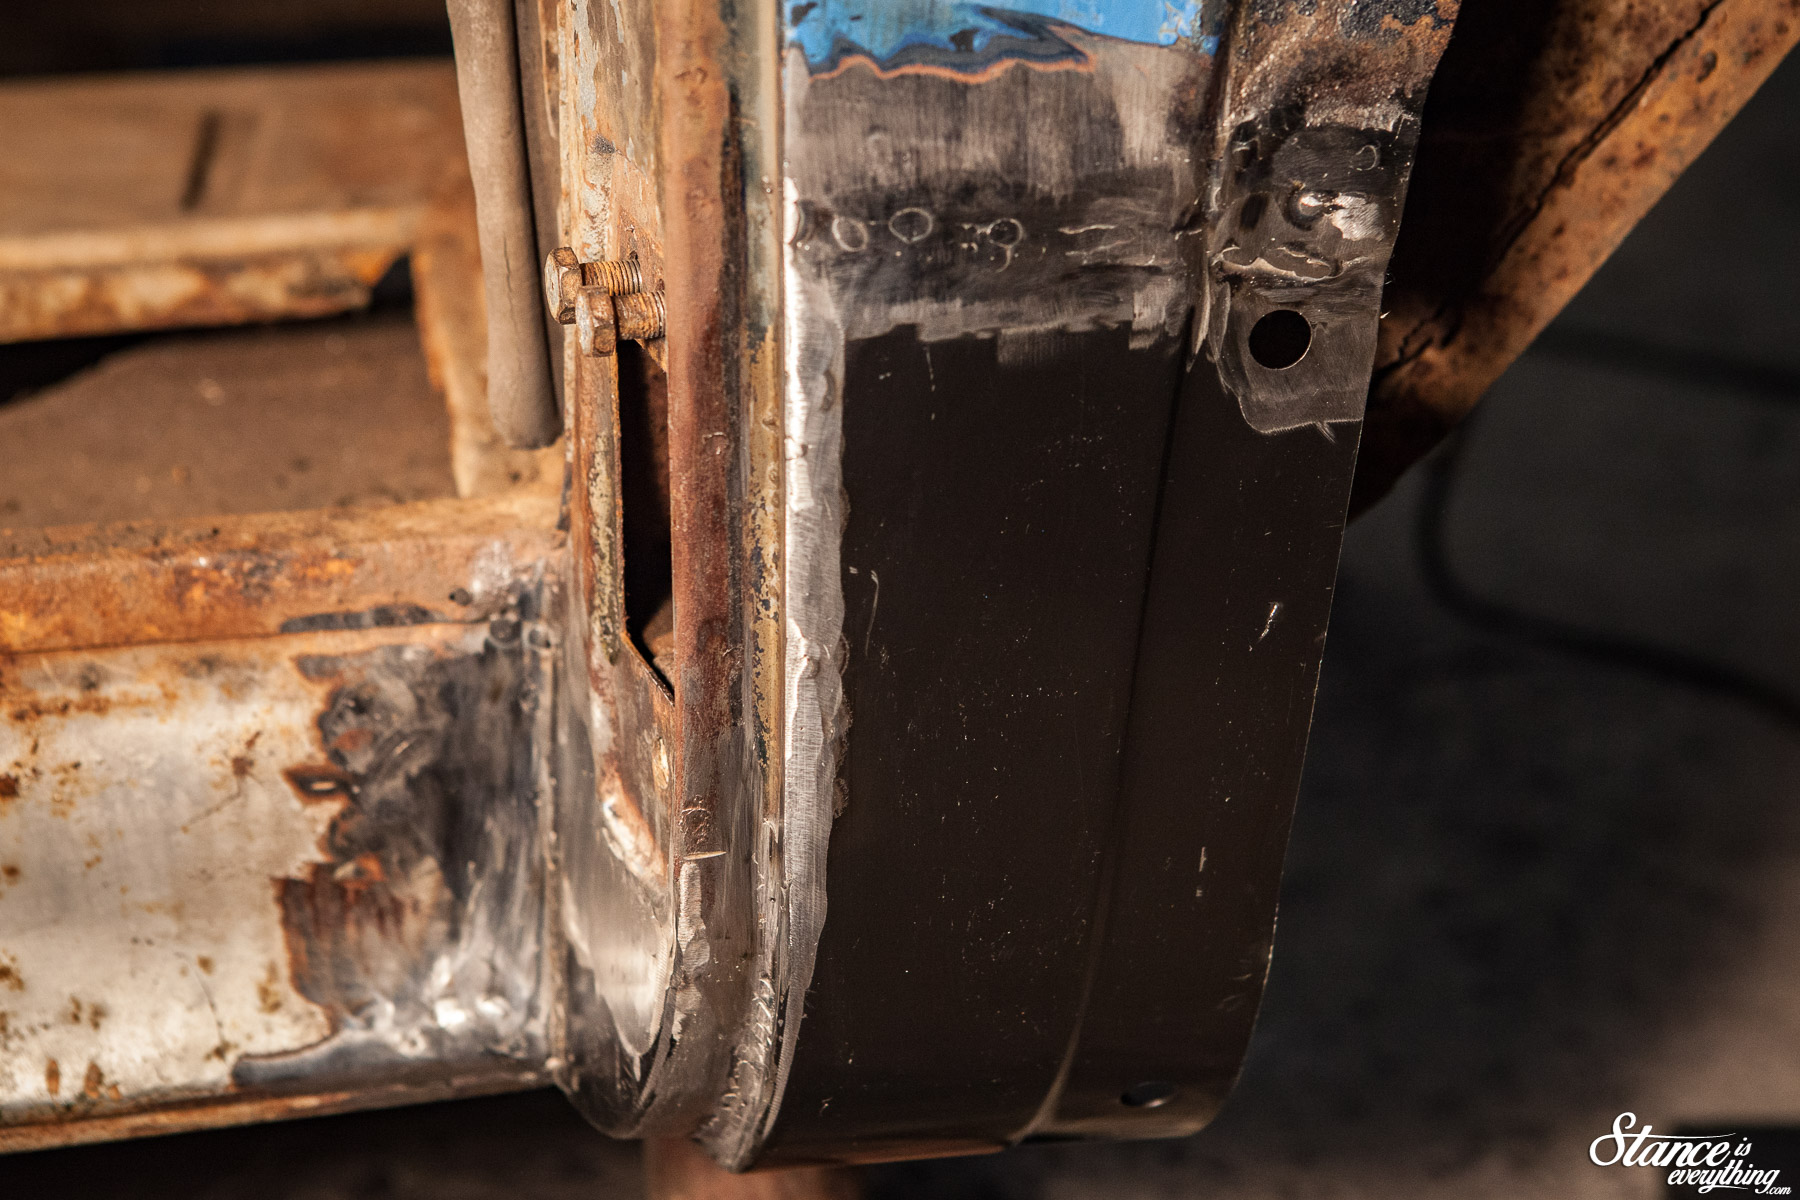
For this panel I tried connecting small tacks instead of running beads. It  looked horror show before the grinder came out, but cleaned up reasonably well.

Later I adopted a half-inch pass method alternating from spot to spot while using an air blower to cool the panel down.

I preferred the later method because it was easier to get into a groove.

There’s plenty of mud work ahead but a grinder knocked down everything fairly well.

Gassed up on my success I turned my attention to the bulk of the metal repair for the passenger side. The toe board and floor area.

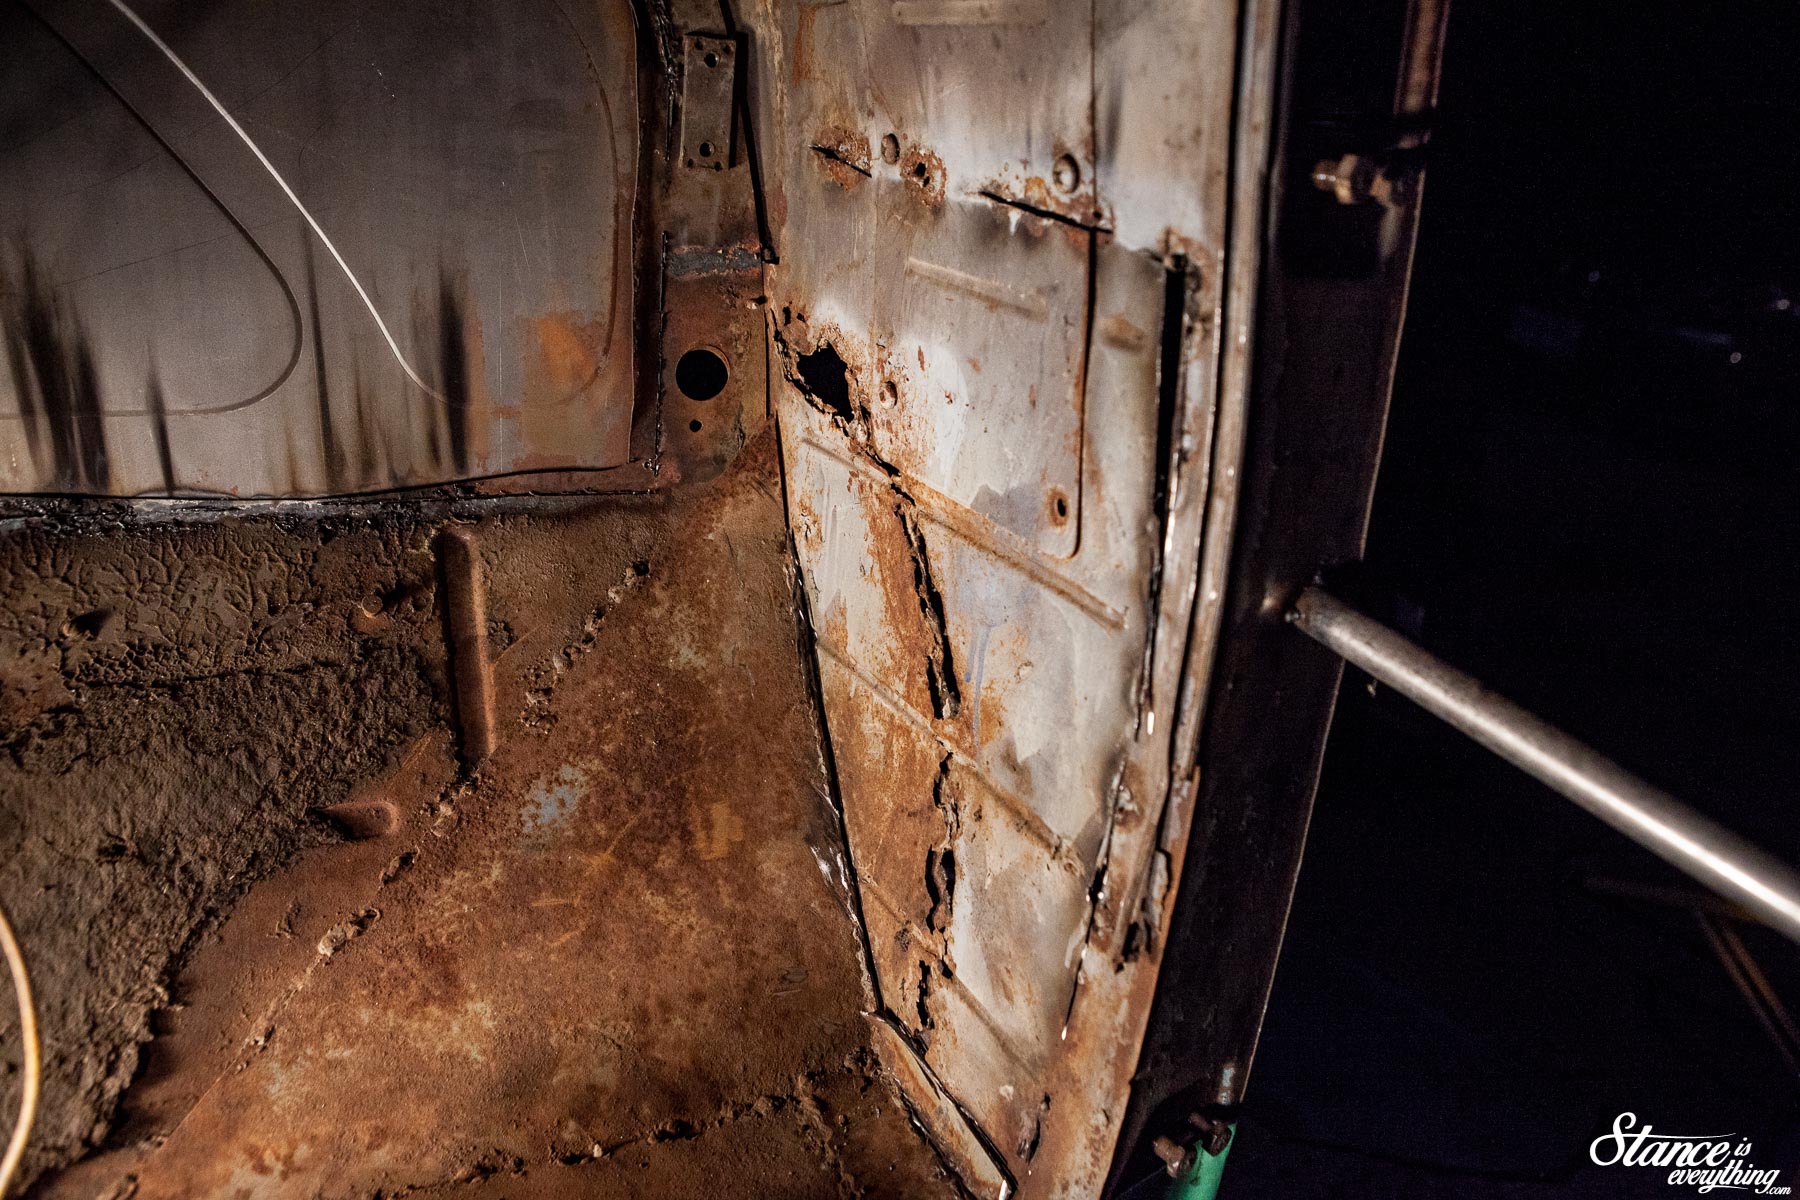
This area had been patched before and I knew some manner of tragedy lay beneath, but I was a little taken aback by just how bad things had become.

If you look at the work above (this photo is after I removed a kick patch) you can see that the patch panel was little more than scabbed into place.

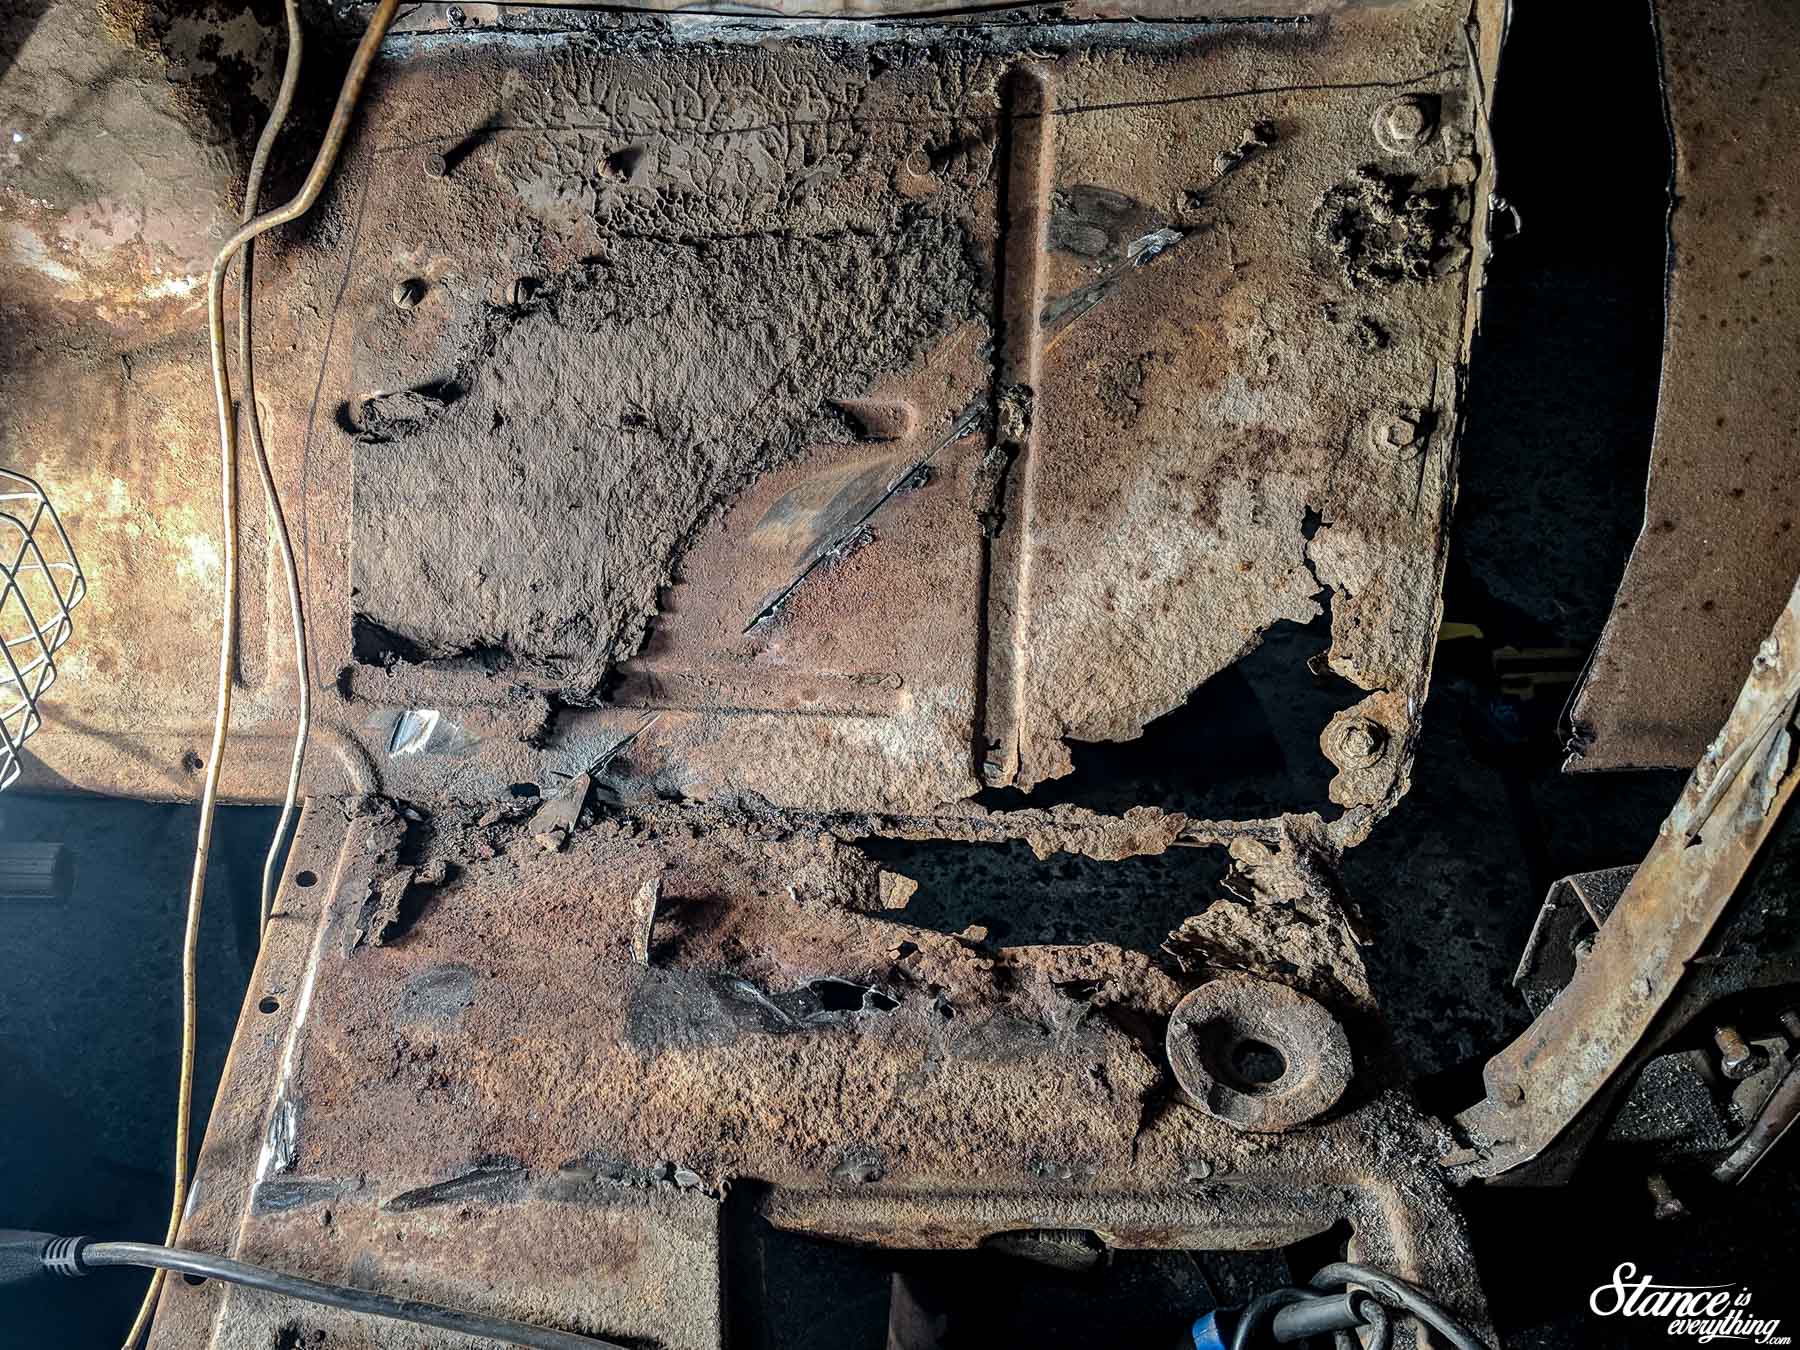
Considering what was left underneath I’m surprised the cab didn’t collapse or buckle inter its own weight.

I cut all of it back leaving as much good metal as possible, even if it made the cuts a little unorthodox.

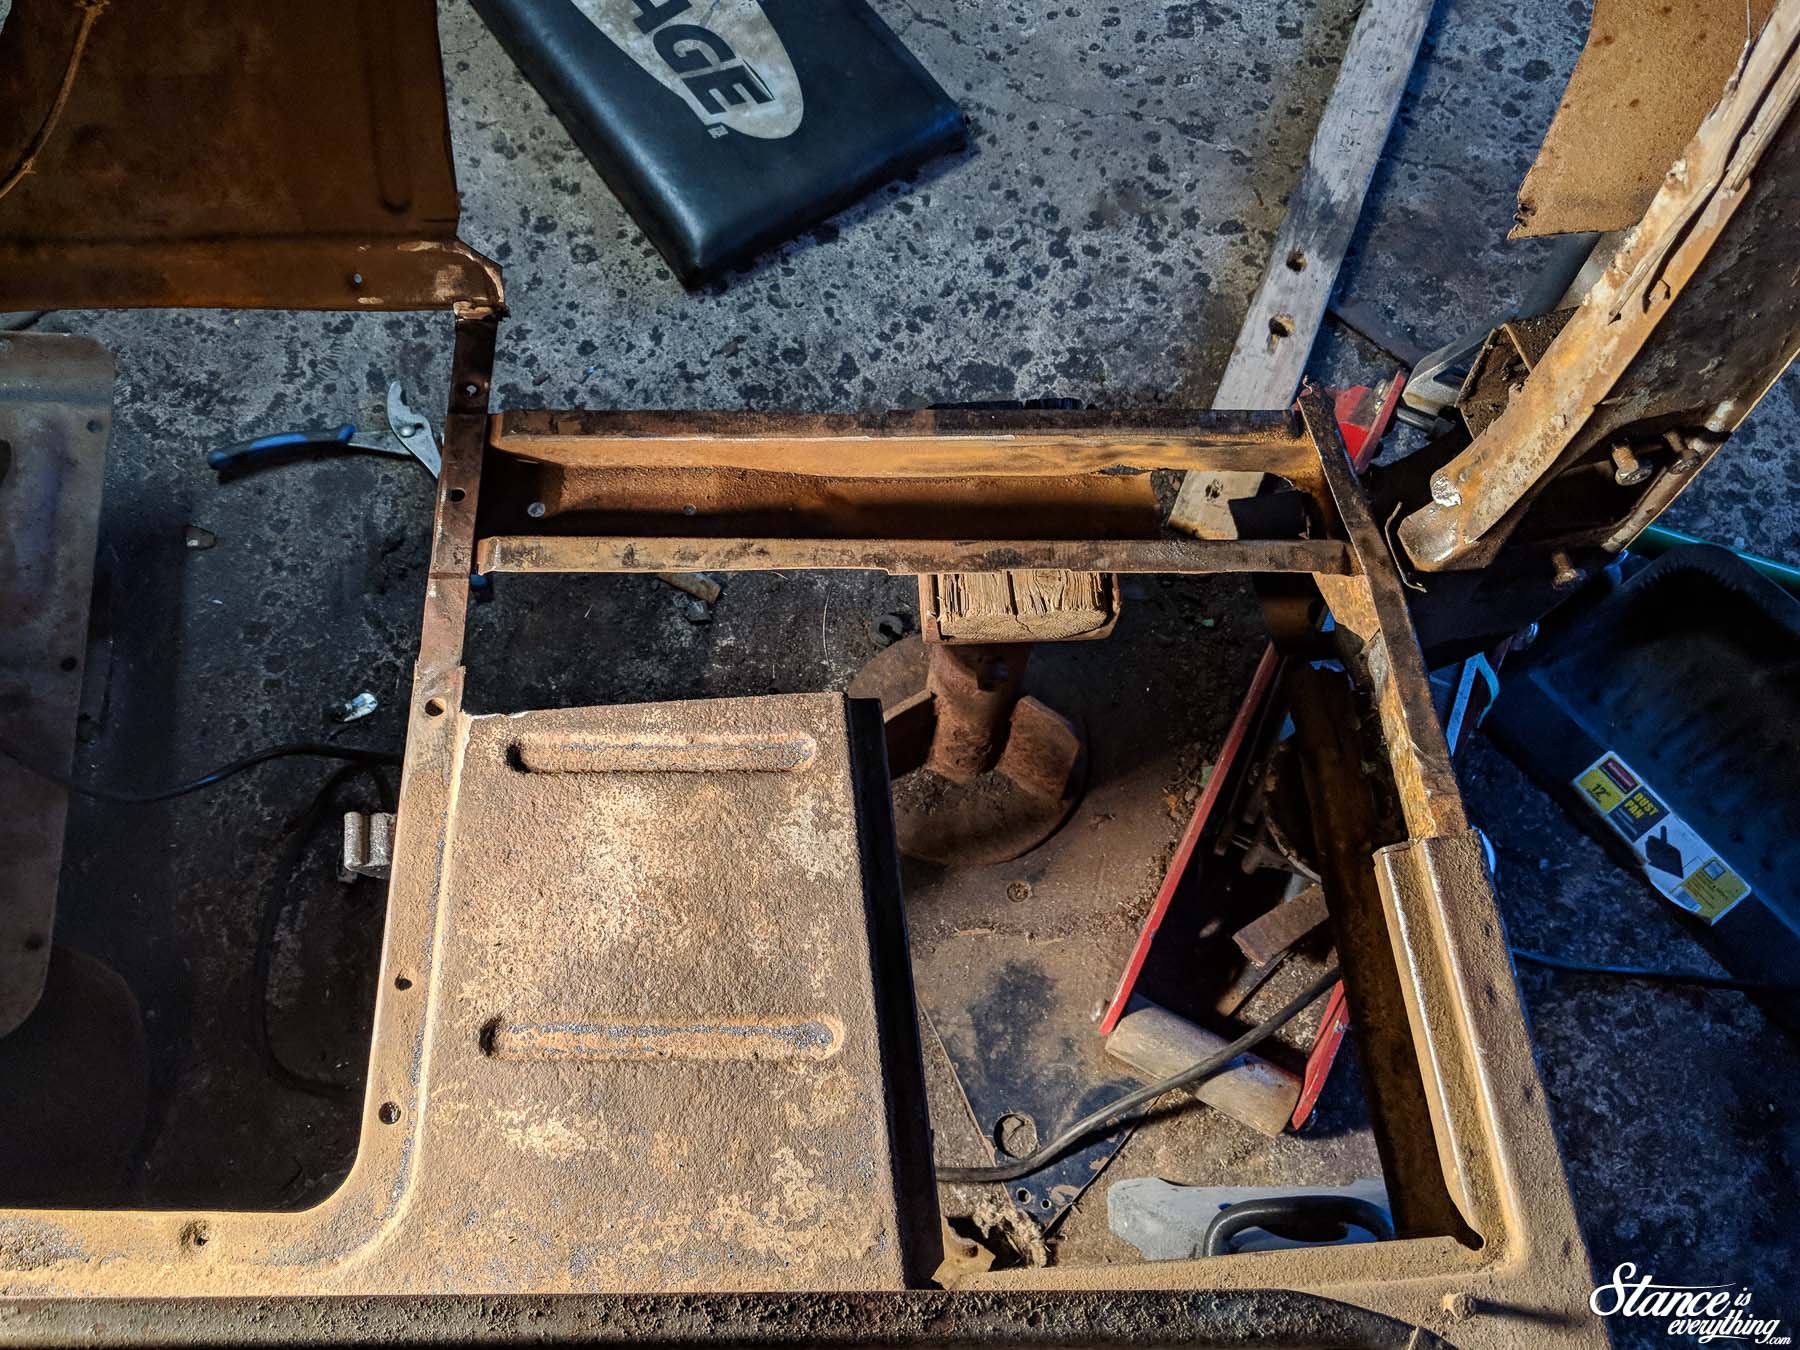
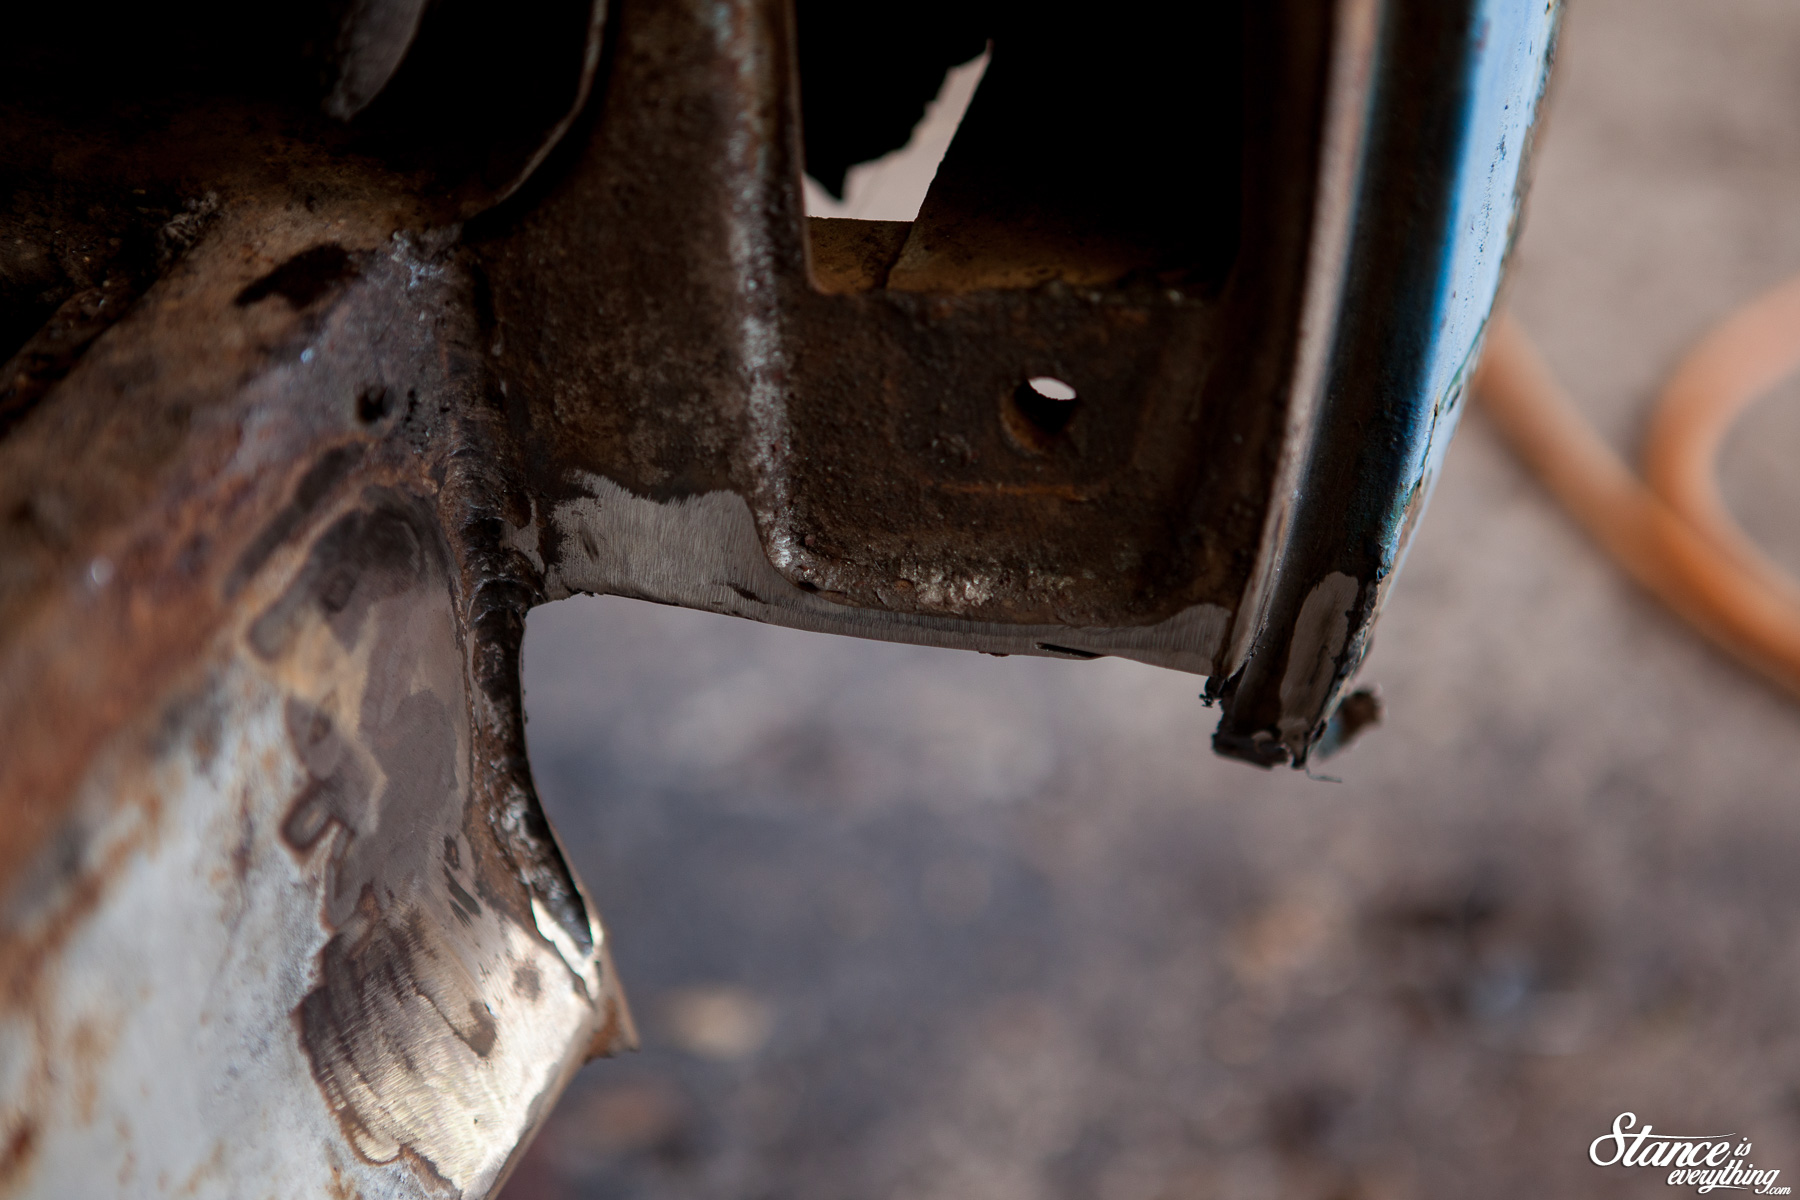
Cancer removed the rest of the floor looked good save for the fact I could see right through the cab support. Crap.

Another run to Bill’s later and I had a new cab support. I think took the OEM one out only to have some of the rocker come with it.

Bamboozled again.

This happened early in a garage session on a Saturday night before a fairly busy week.

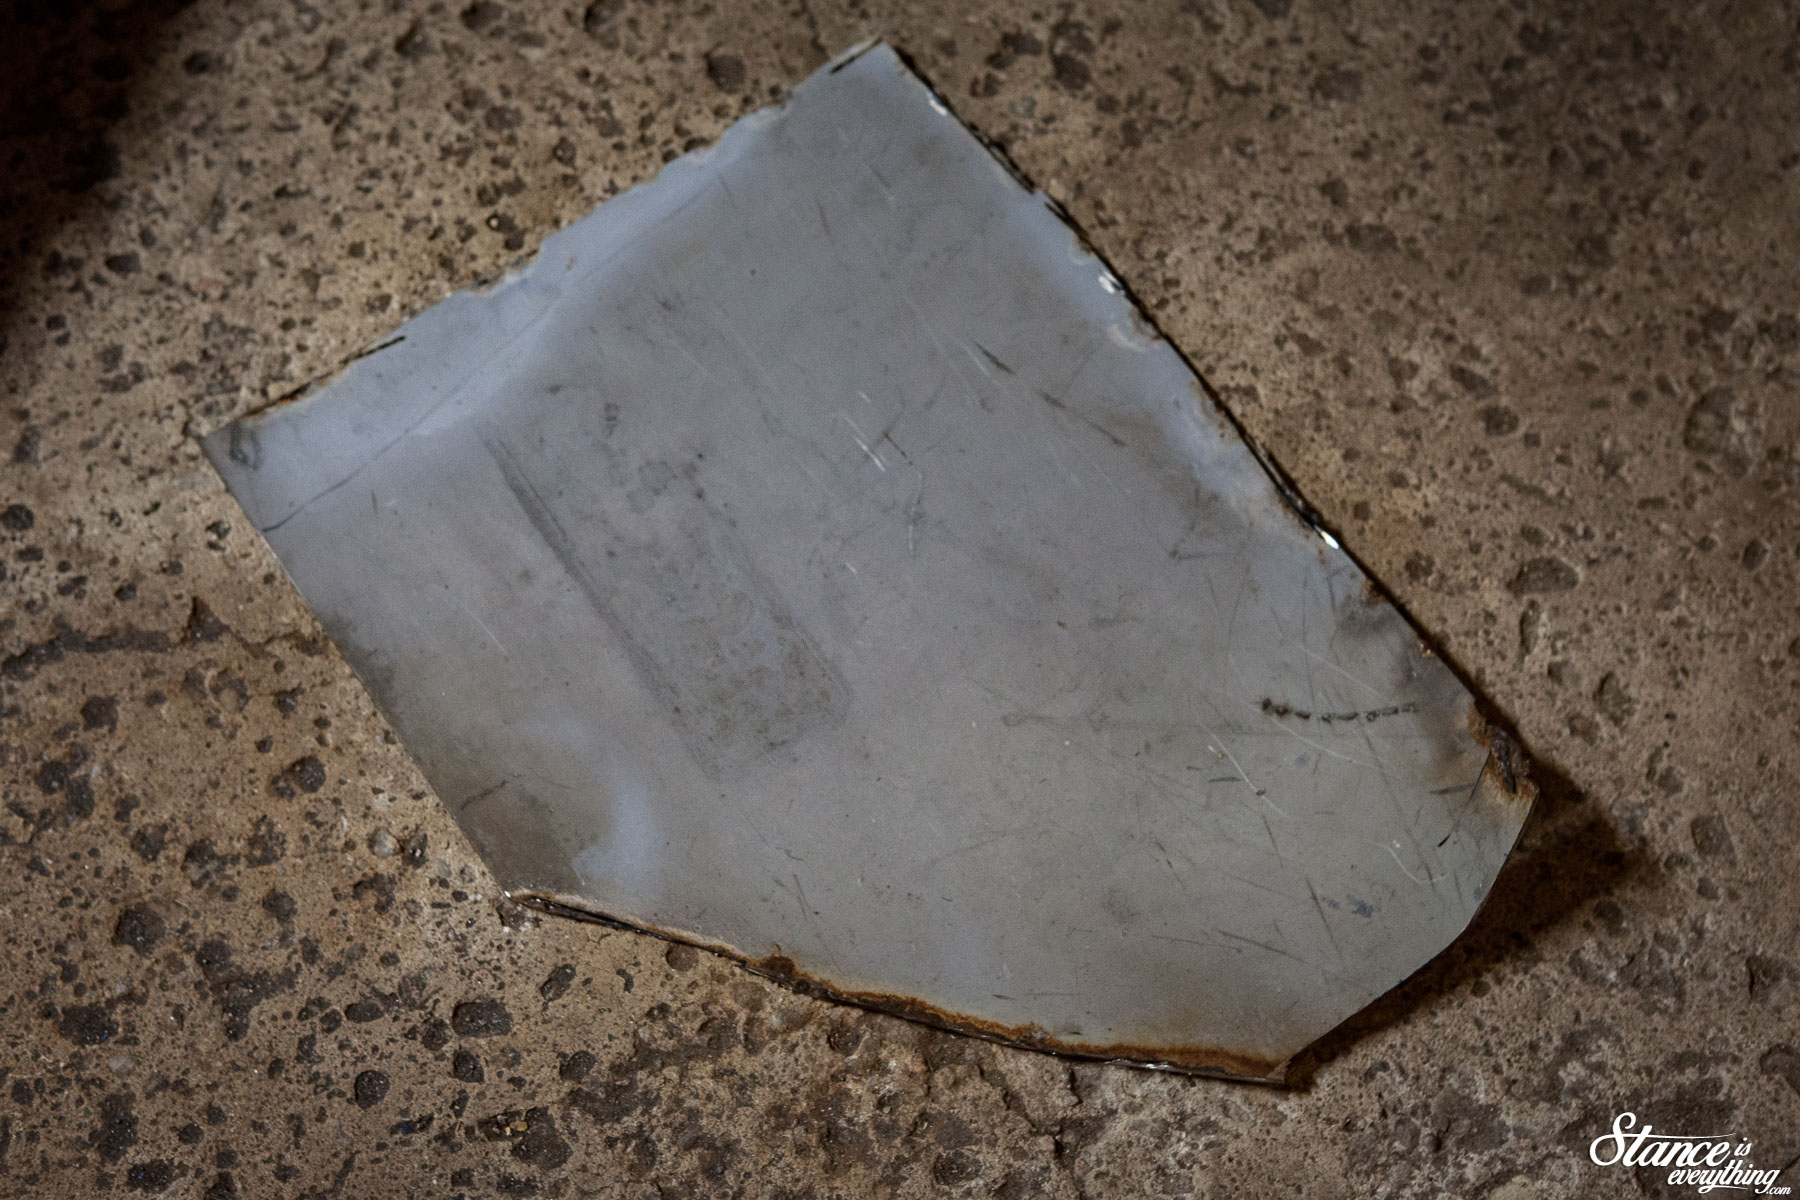
Not wanting to give up I rummaged through my cut offs hoping to find something suitable for a patch.

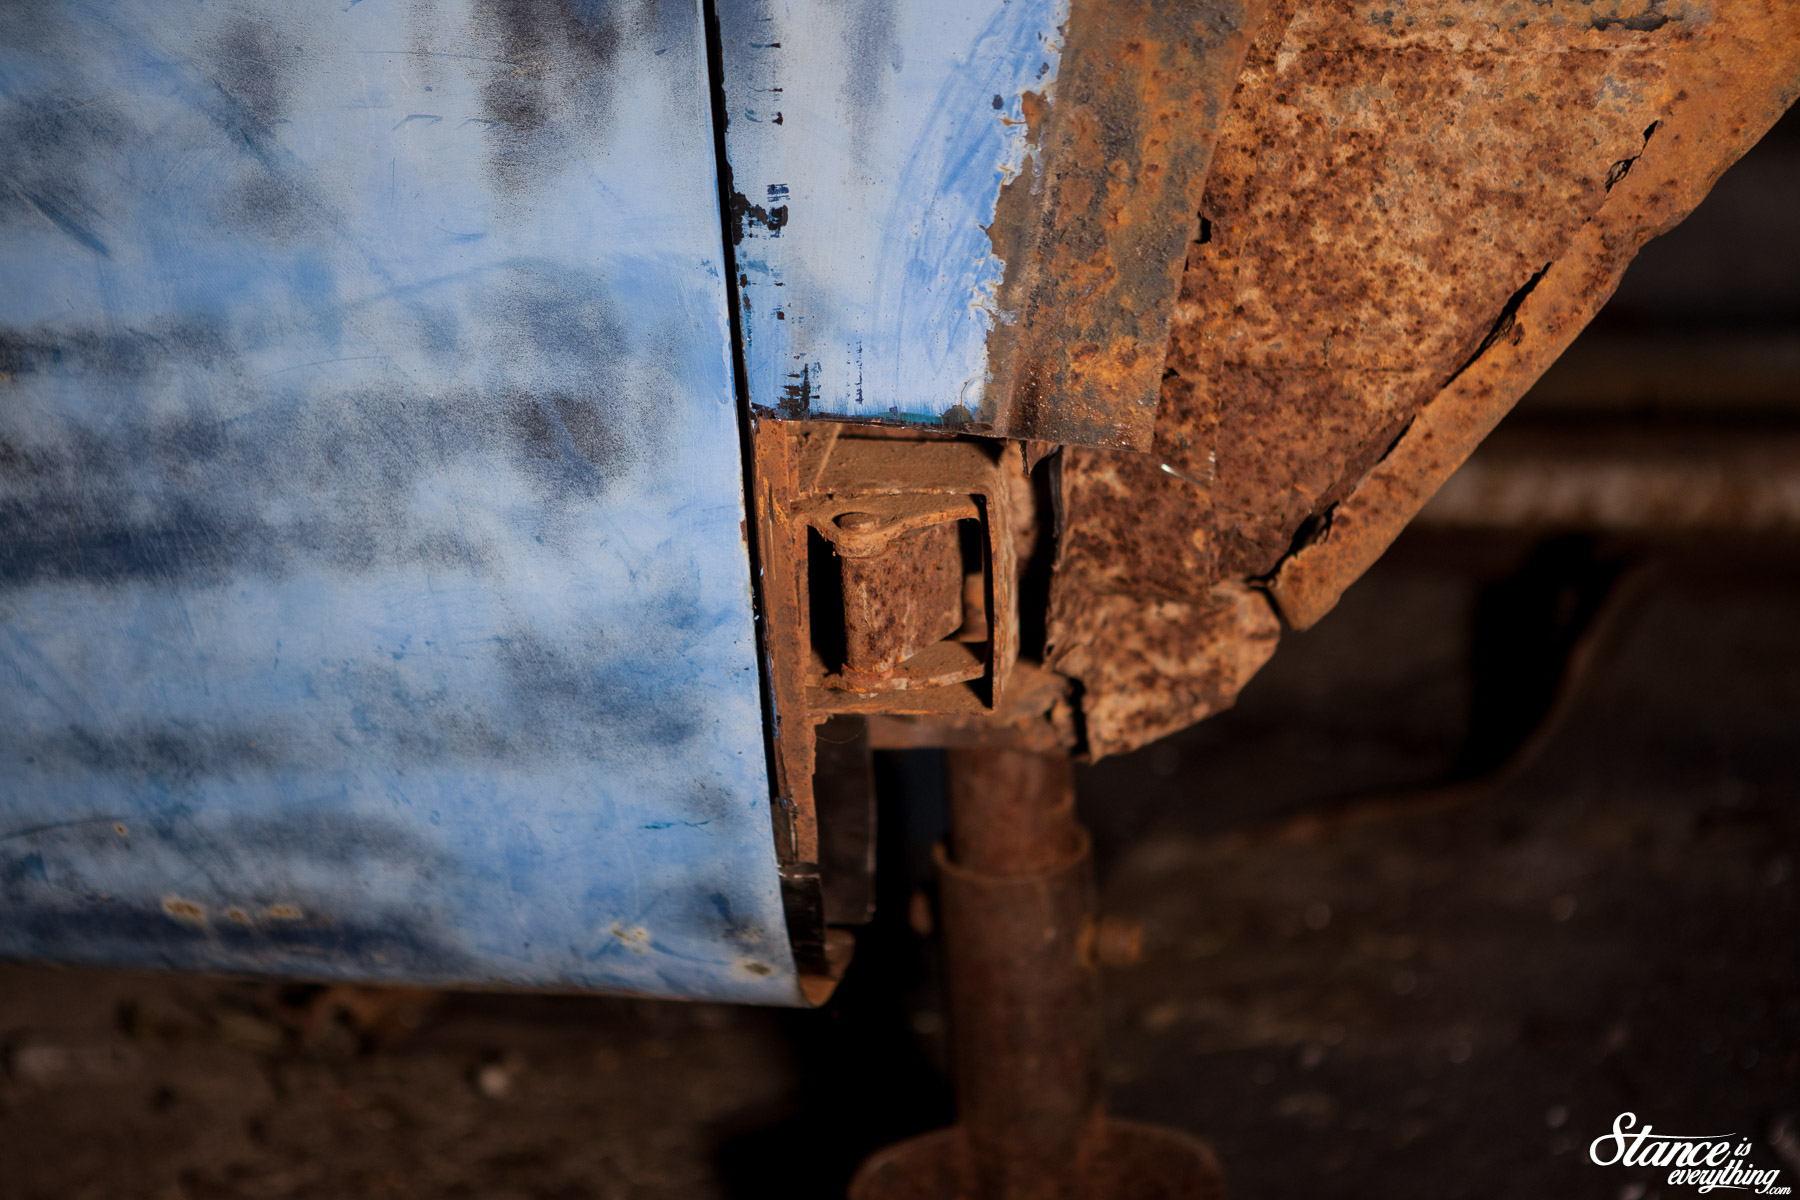
In a rare stroke of luck the previous floor patches were surprisingly thick gauge. Slightly overkill for the floor but perfect for a new rocker, and part of a floor support.

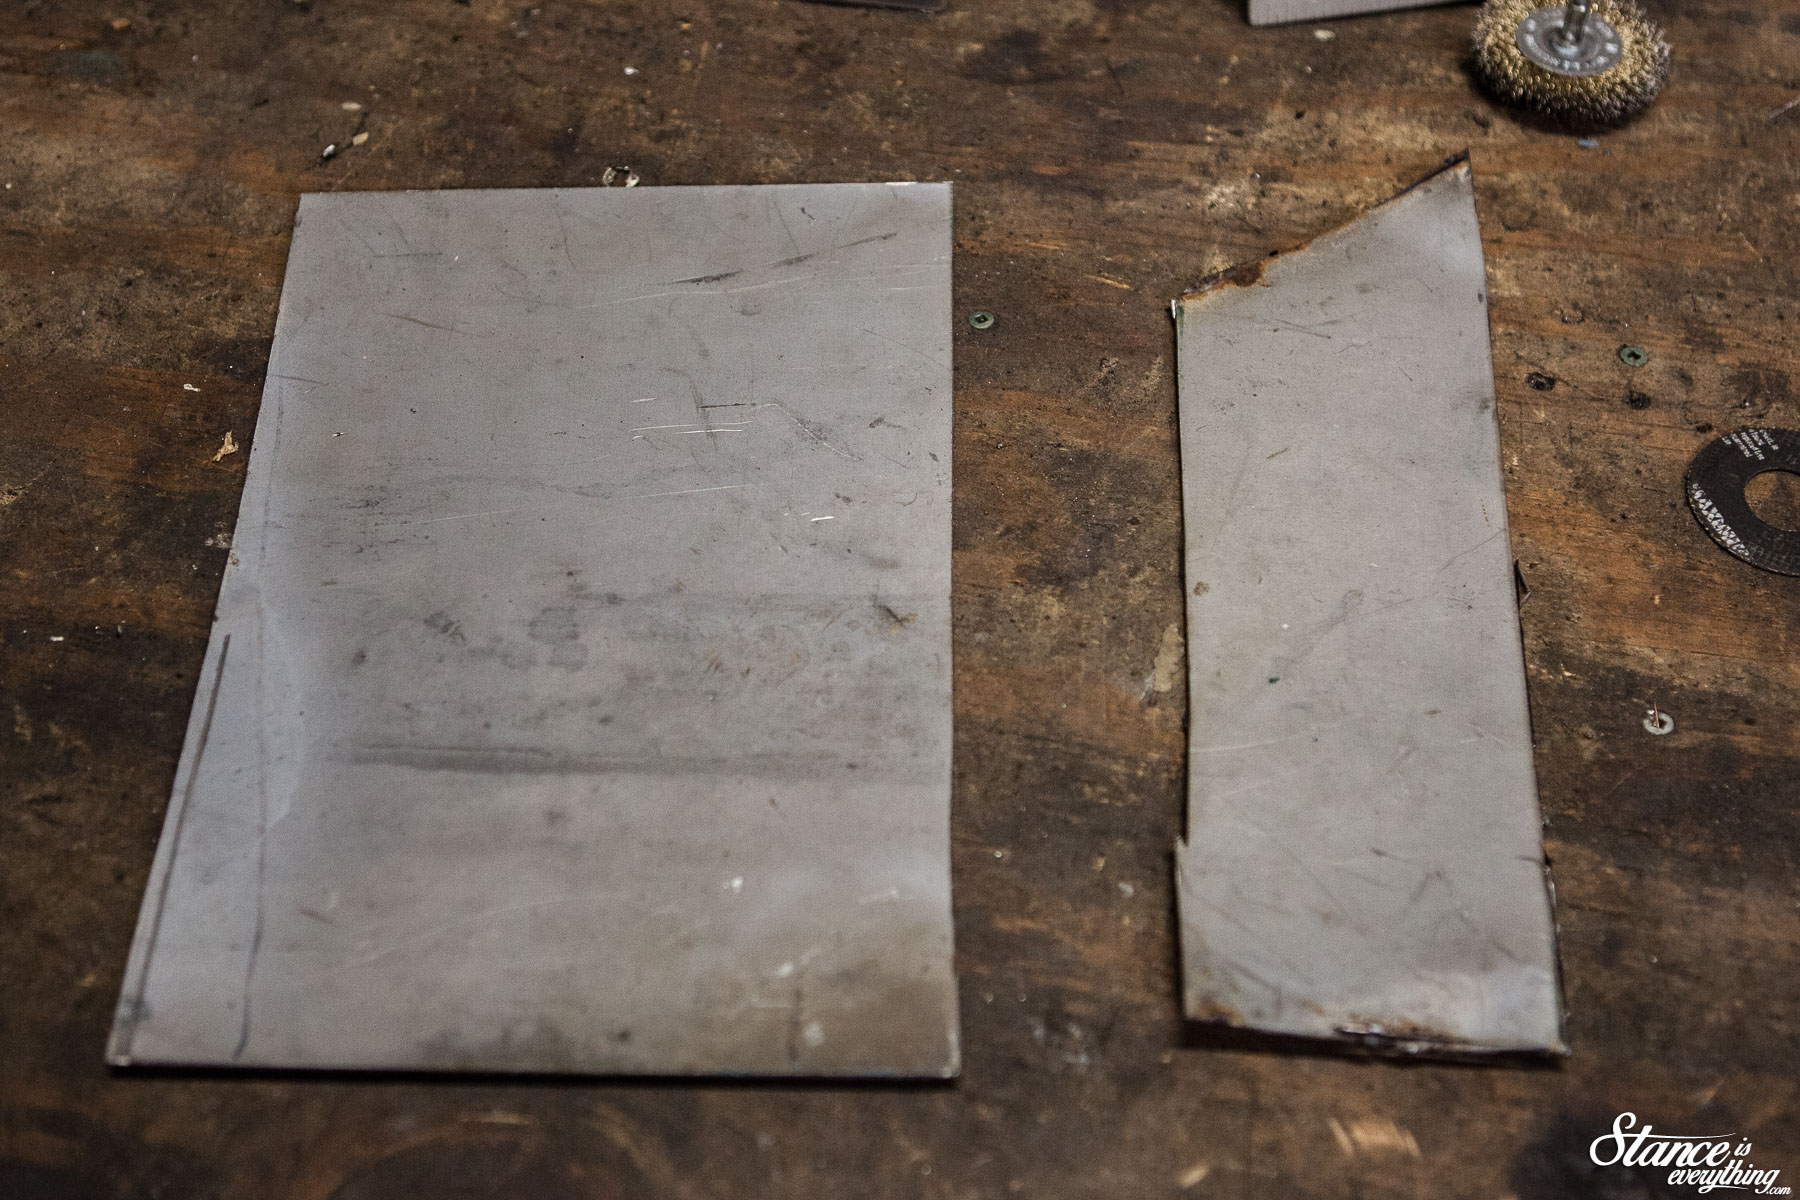
Grind, cut, hammer, smash and I was able to make the patch panels I needed. I finished them early into the next morning leaving just enough time to tack them into place before calling it quits for the night.

Satisfied with the way everything was fitting up, I saved final welding for later that same week, before hitting the new panels with some primer and the armatures best friend, Rocker Guard.

No lie  (this is a safe space right?) I was really relieved that the cab support didn’t separate from the rocker the minute I let it down on my jack stands.

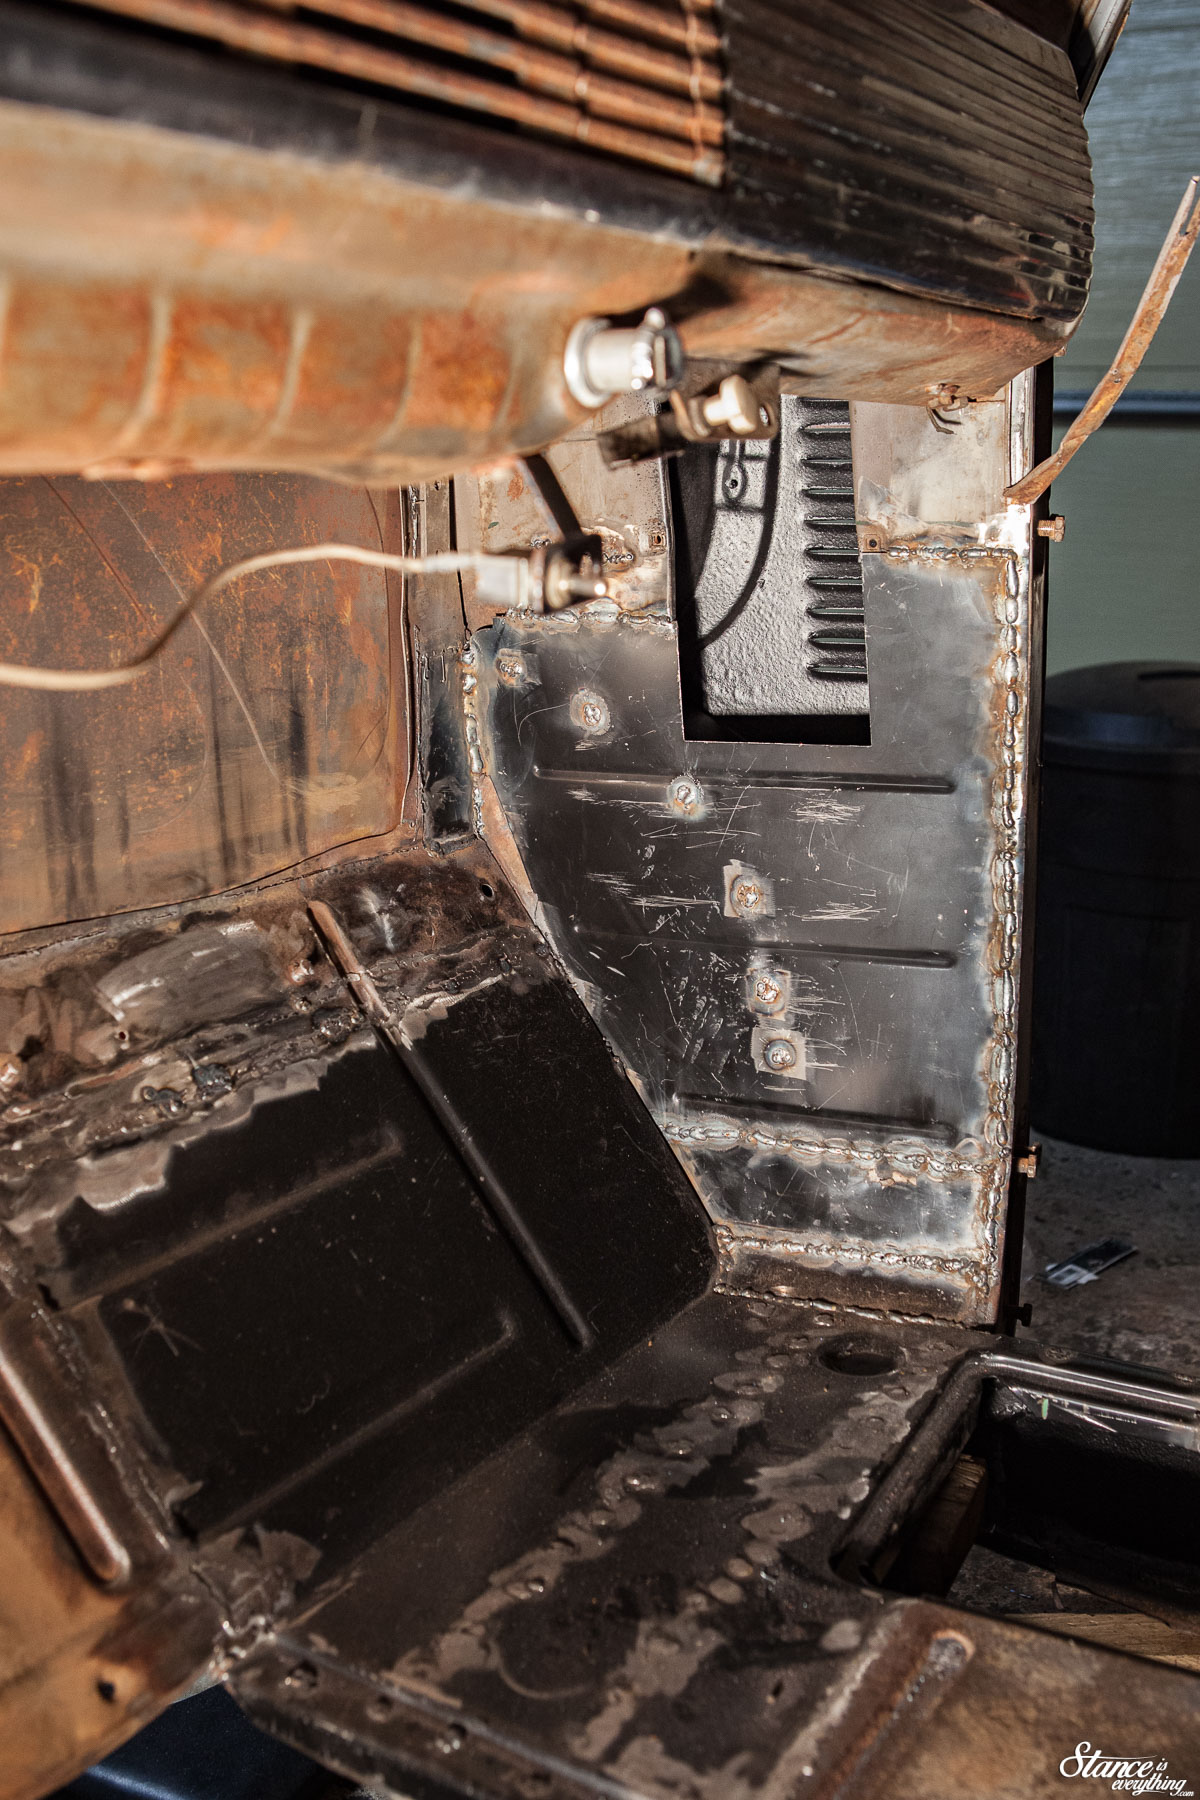
With not a lot of space to work on my back it was penetration before beauty got this work.

The next step was to mark the replacement floor panel. As mentioned I chose to retain as much factory metal as possible. Particularly I wanted to retain as many corners of the battery cover as possible as the oem cover didn’t fit the new floor.

As good as replacement panels might be, nothing fits quite like the factory metal. If it survived a hammer and punch test it stayed.

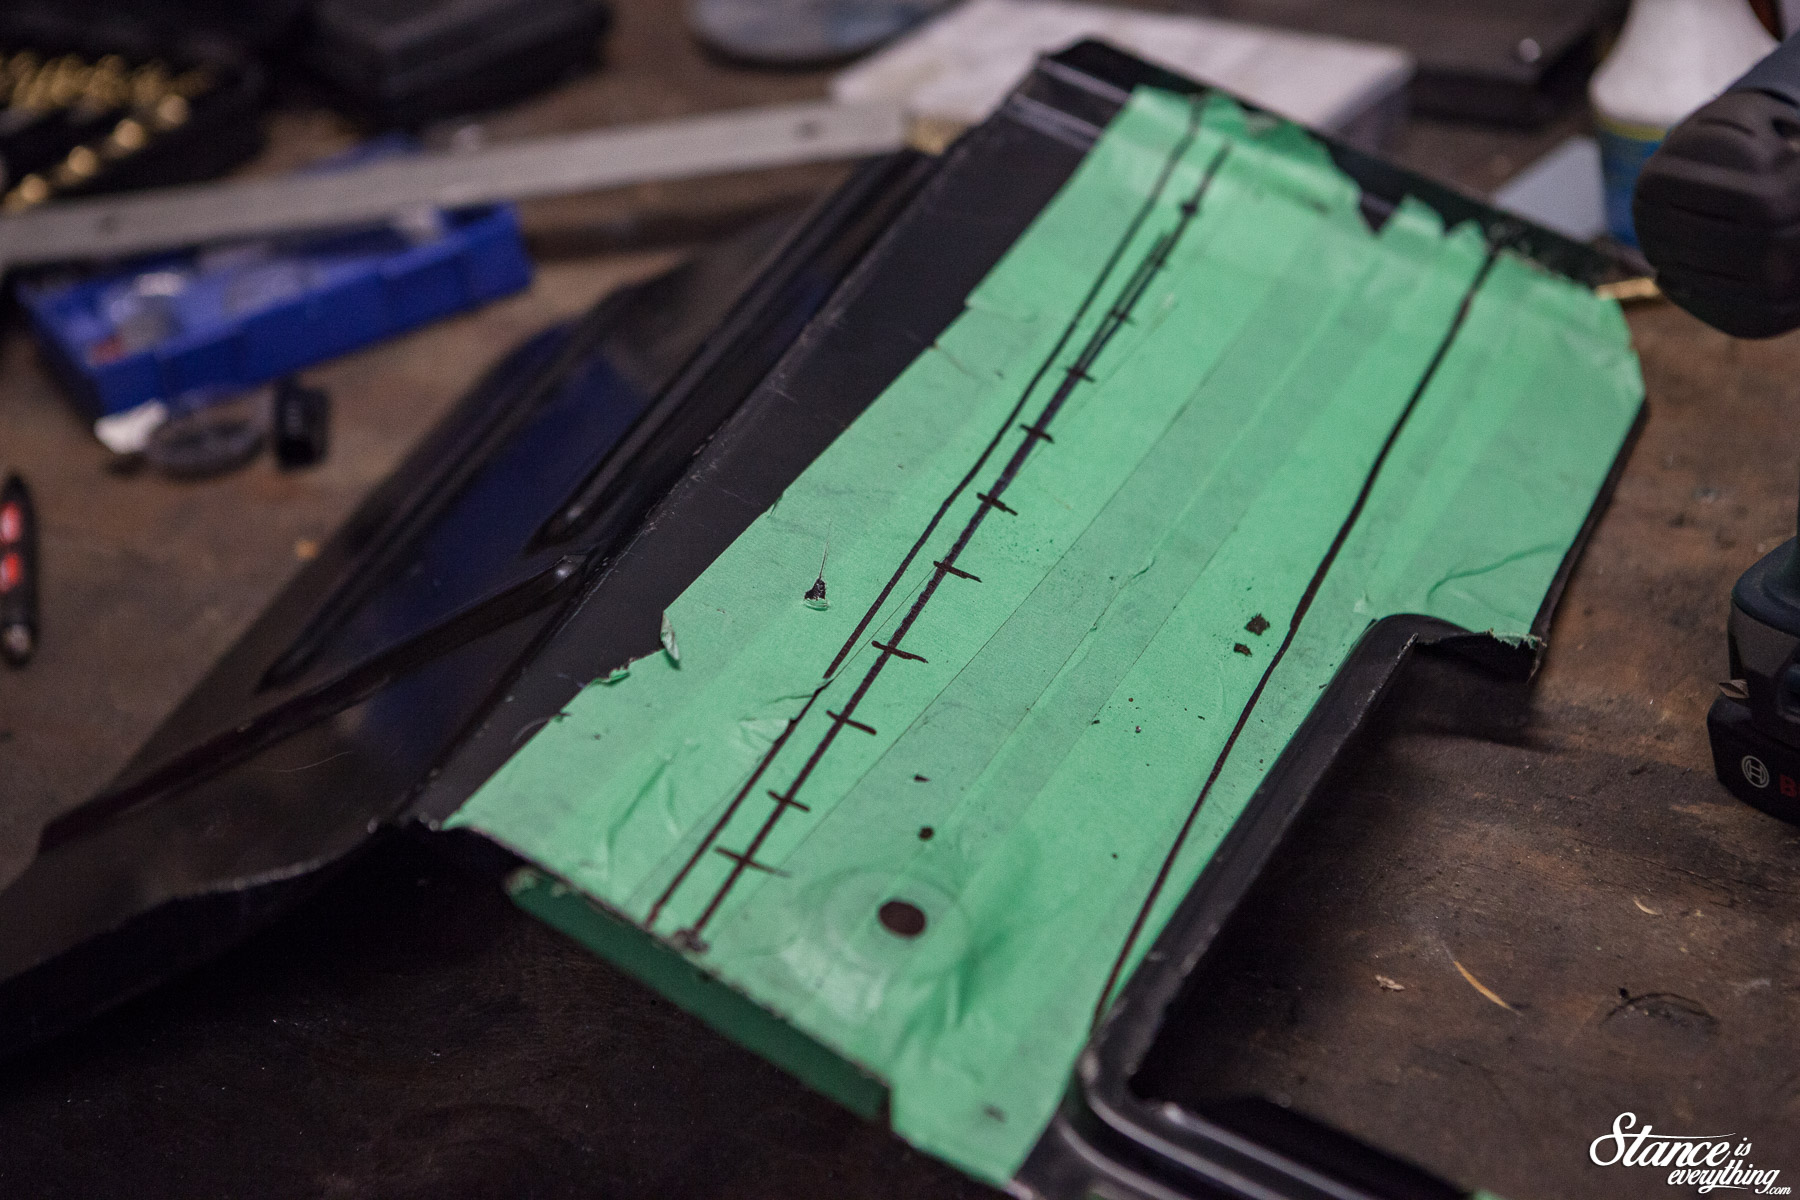
To line up where my spot welds needed to be I did a little artwork on underside of the replacement panel.

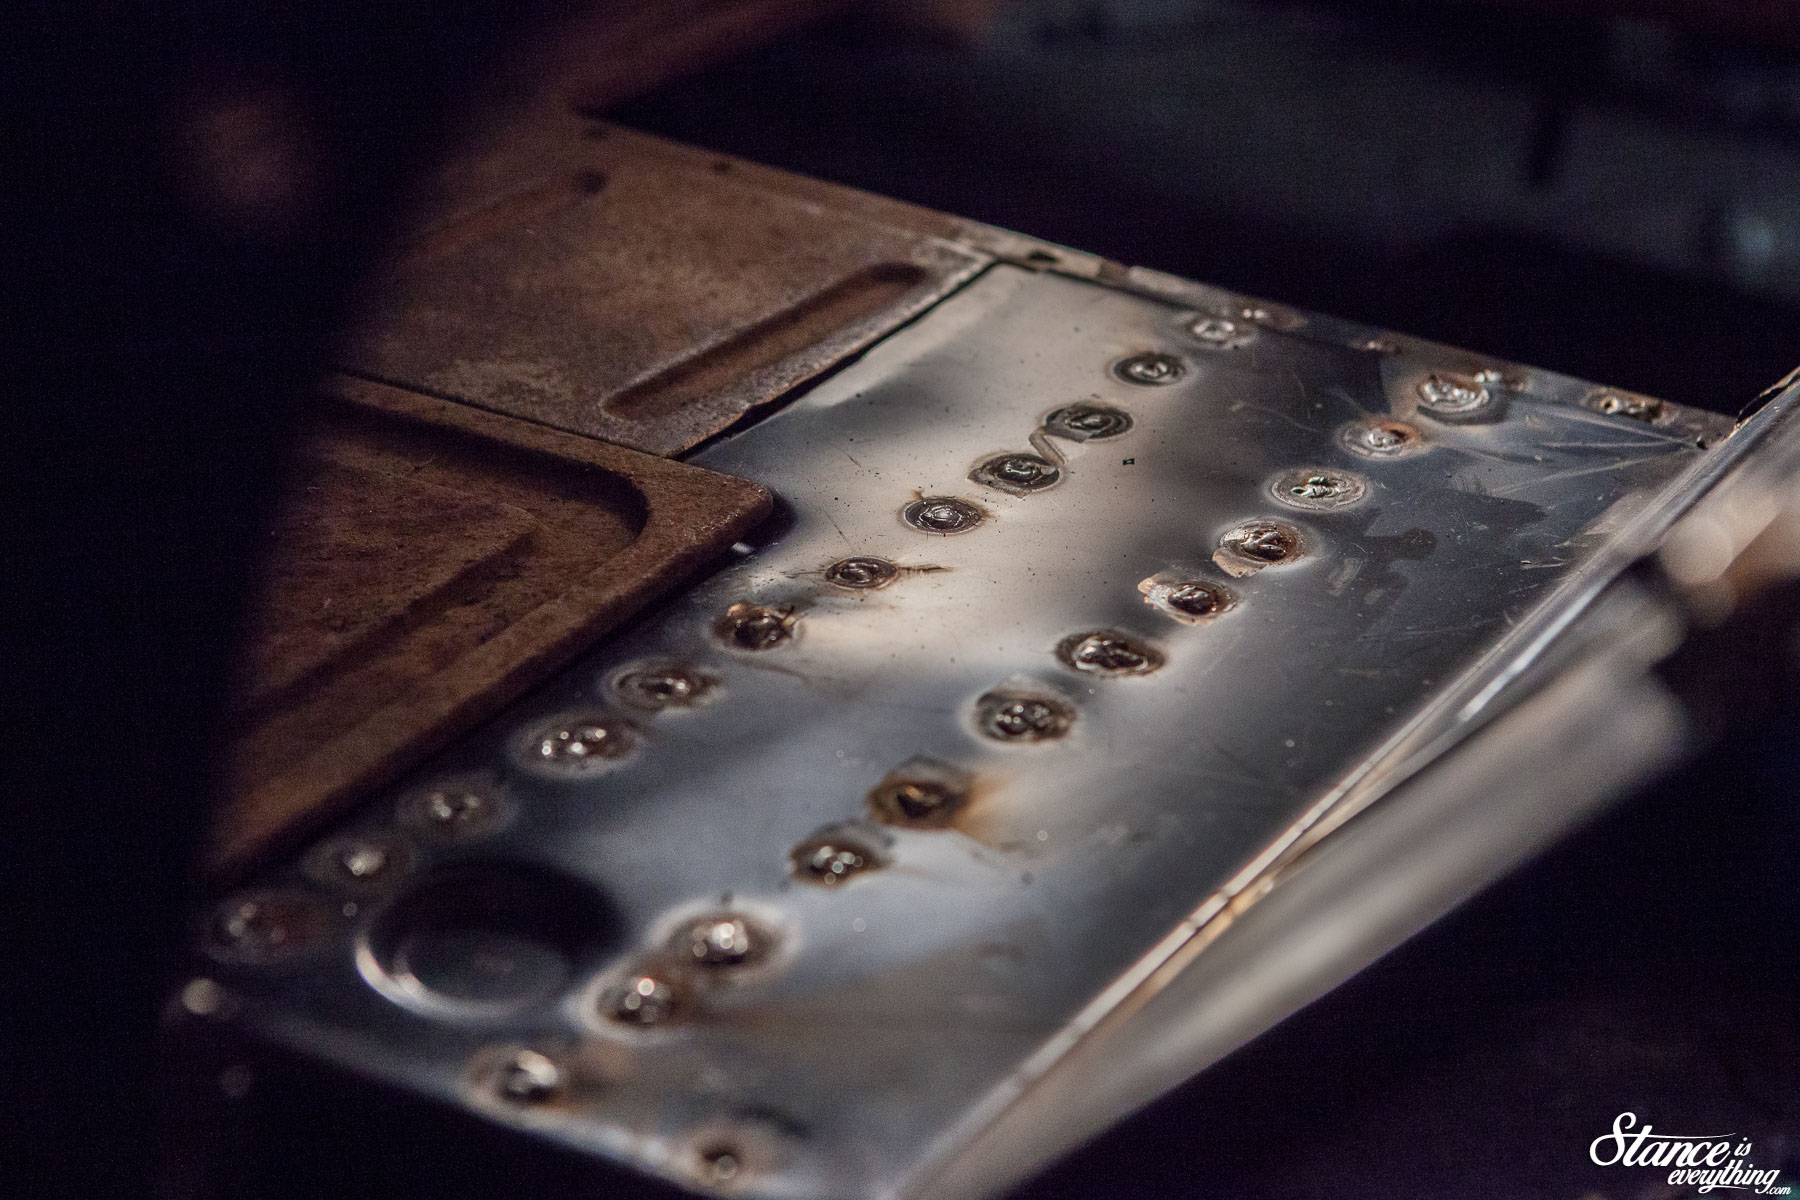
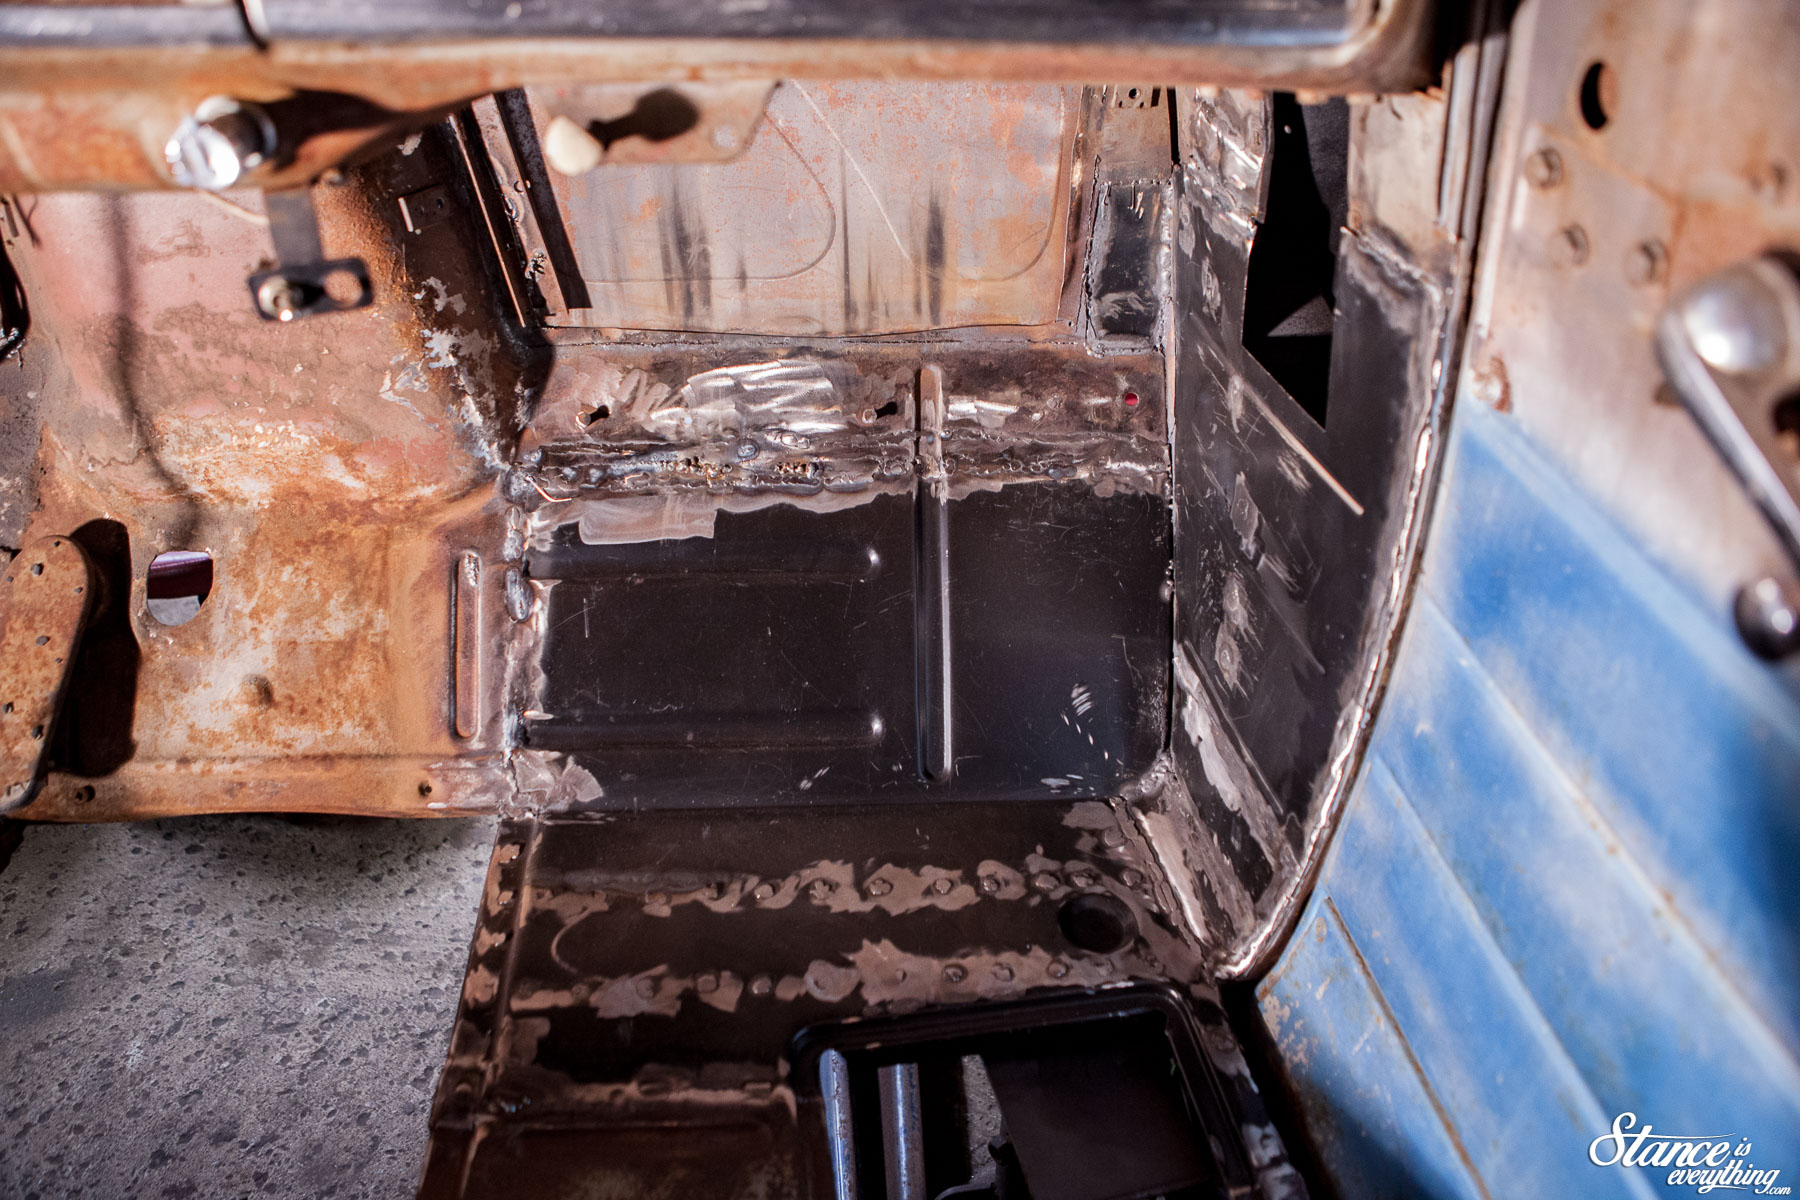
I tacked the floor to the cab support first to keep things from shifting while I did the rest.


Weld, grind, weld –you’ve seen me do this before–and the floor was in. Yep, the double weld line appears again. I got a little over zealous removing the factory floor. Luckily I kept what I cut out.
Rookie.

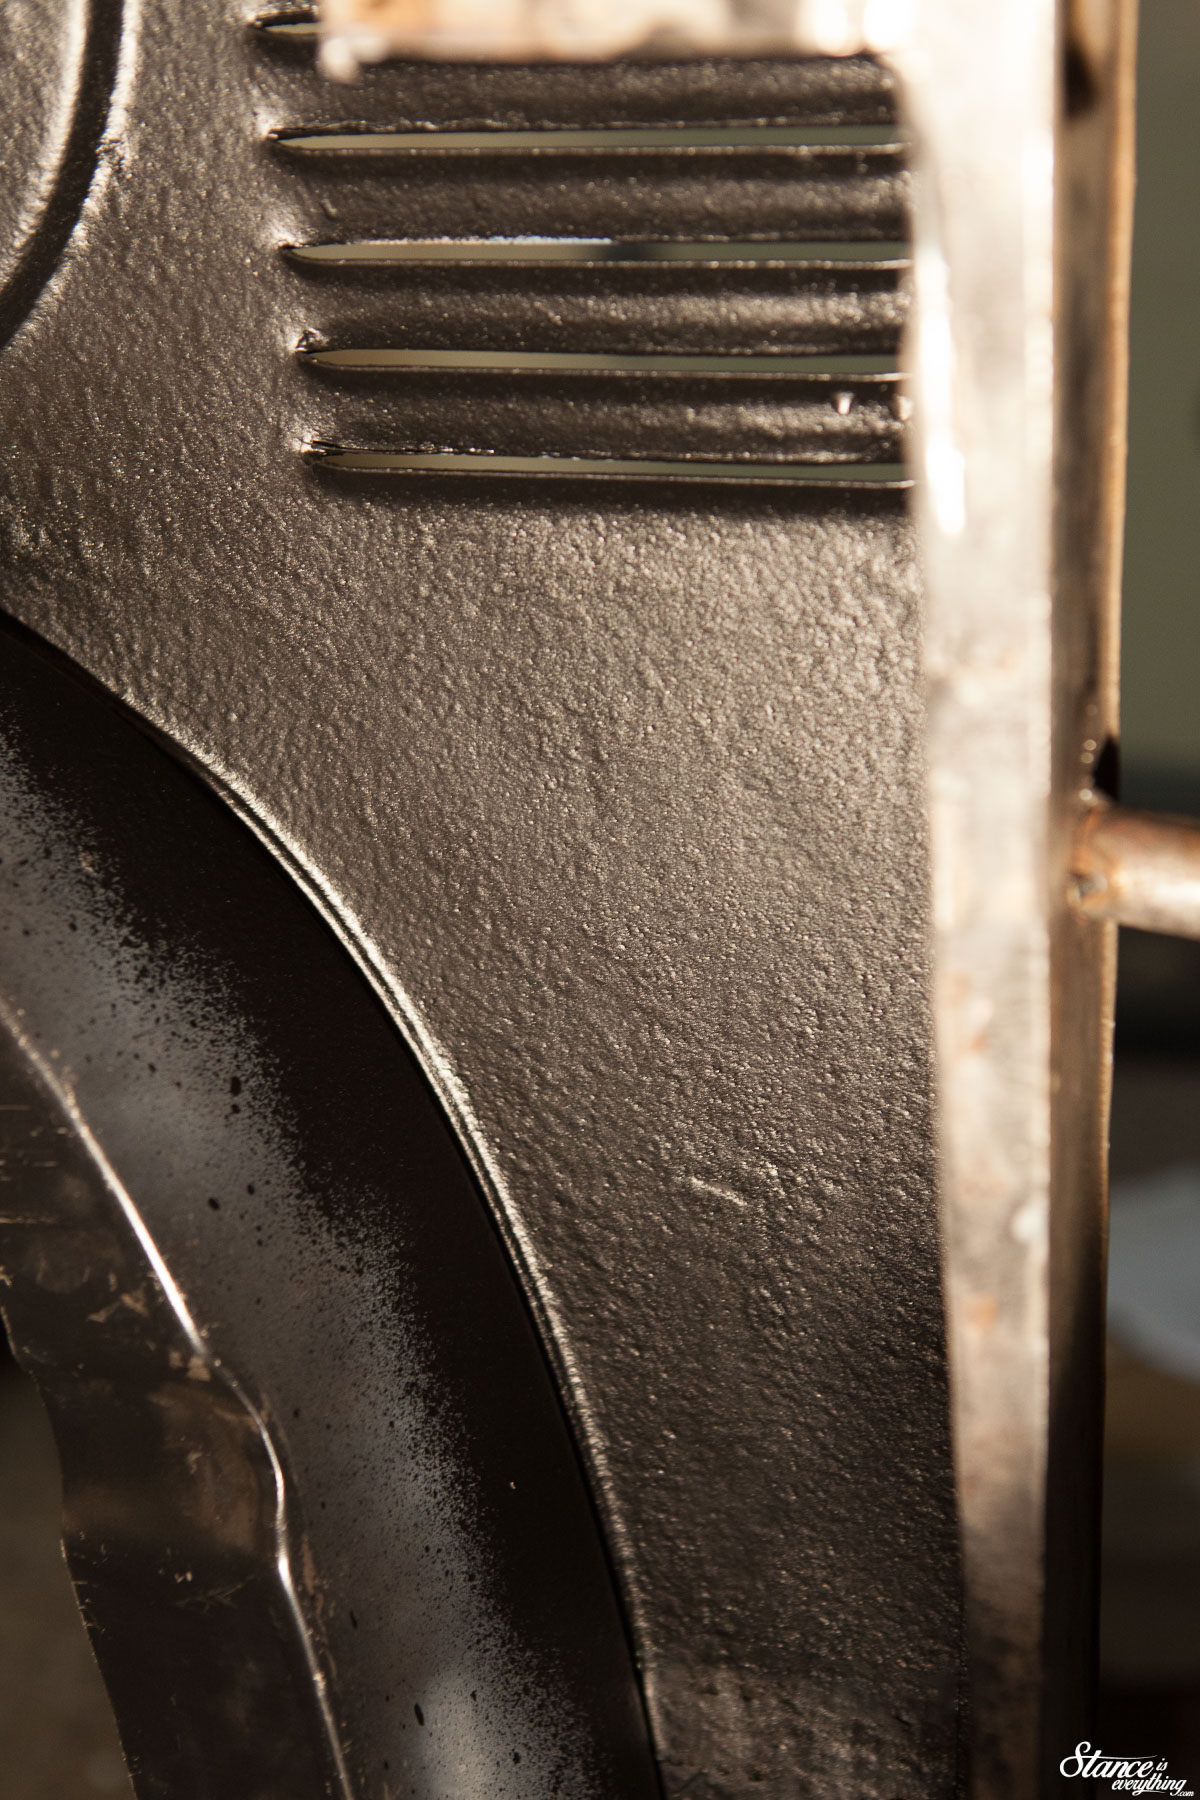
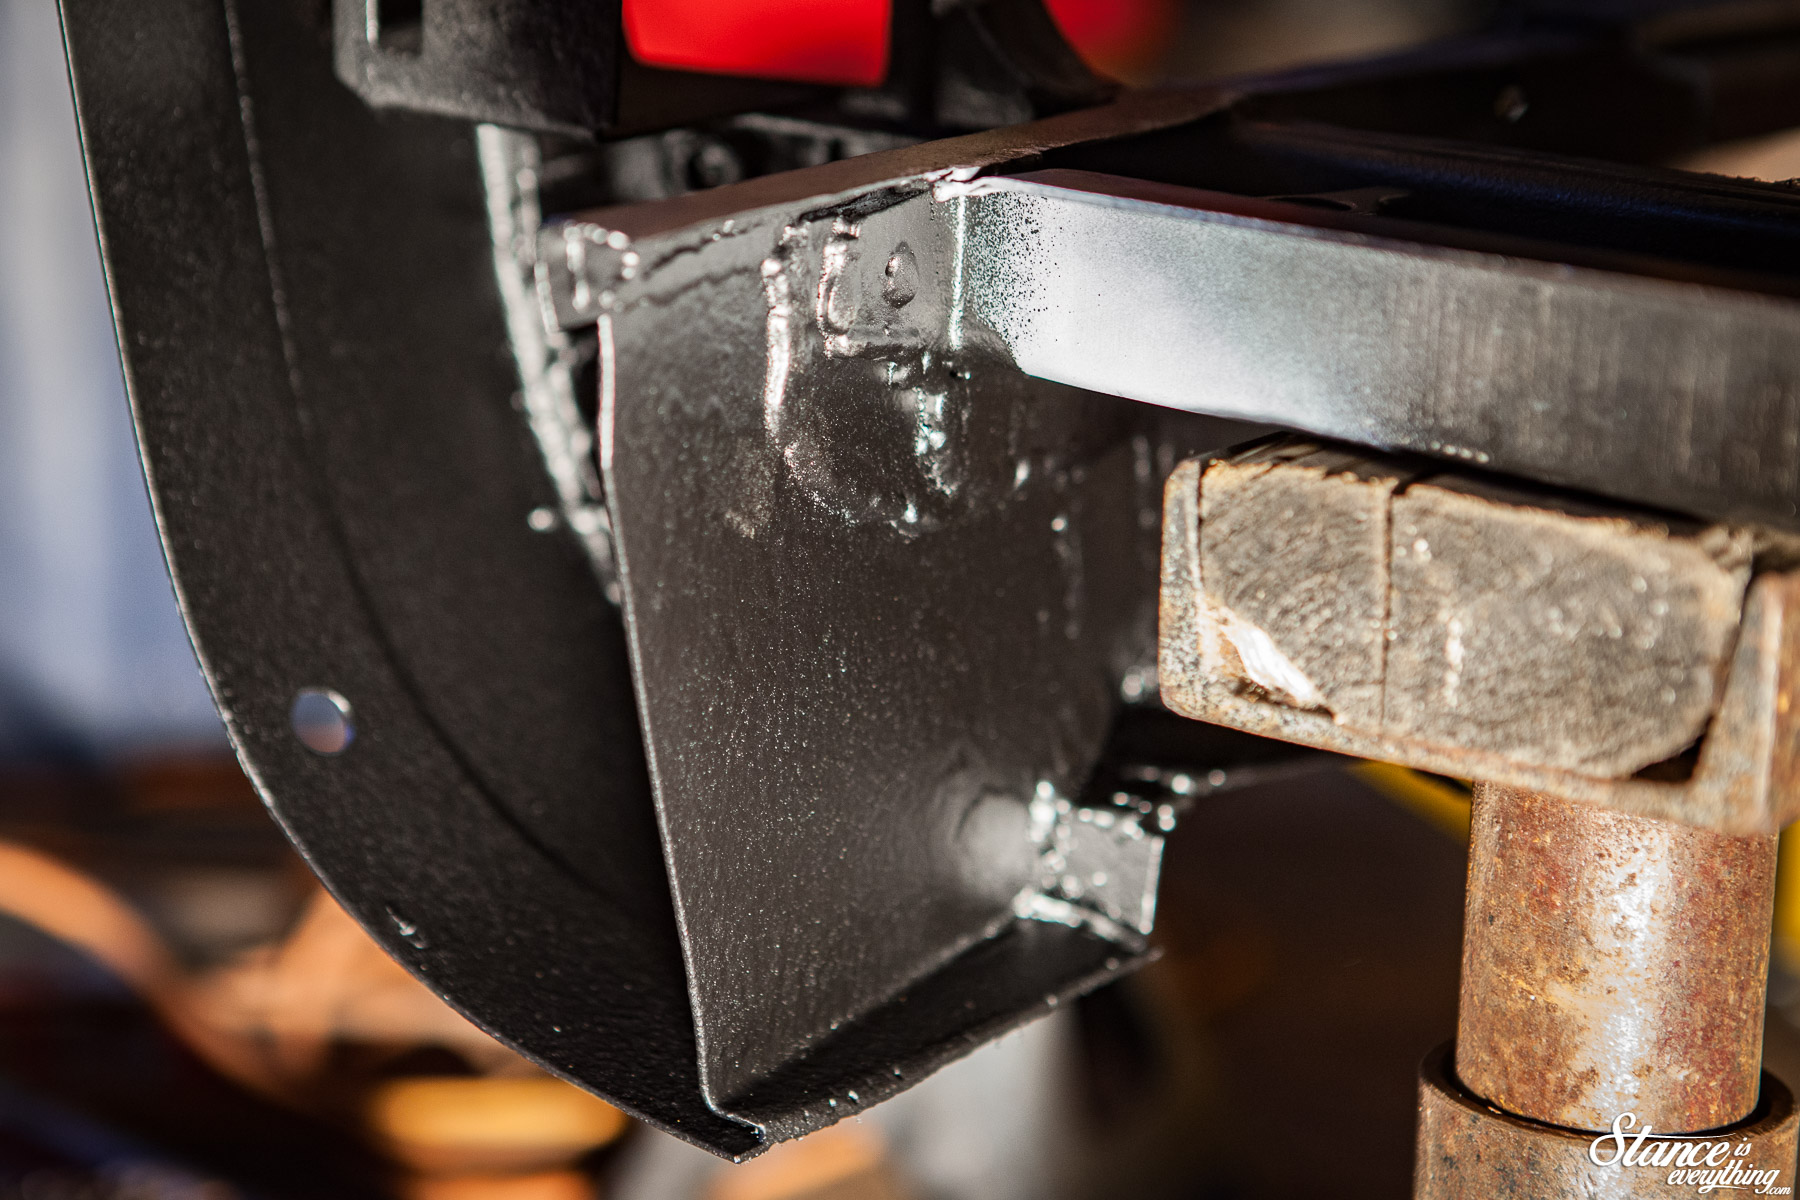
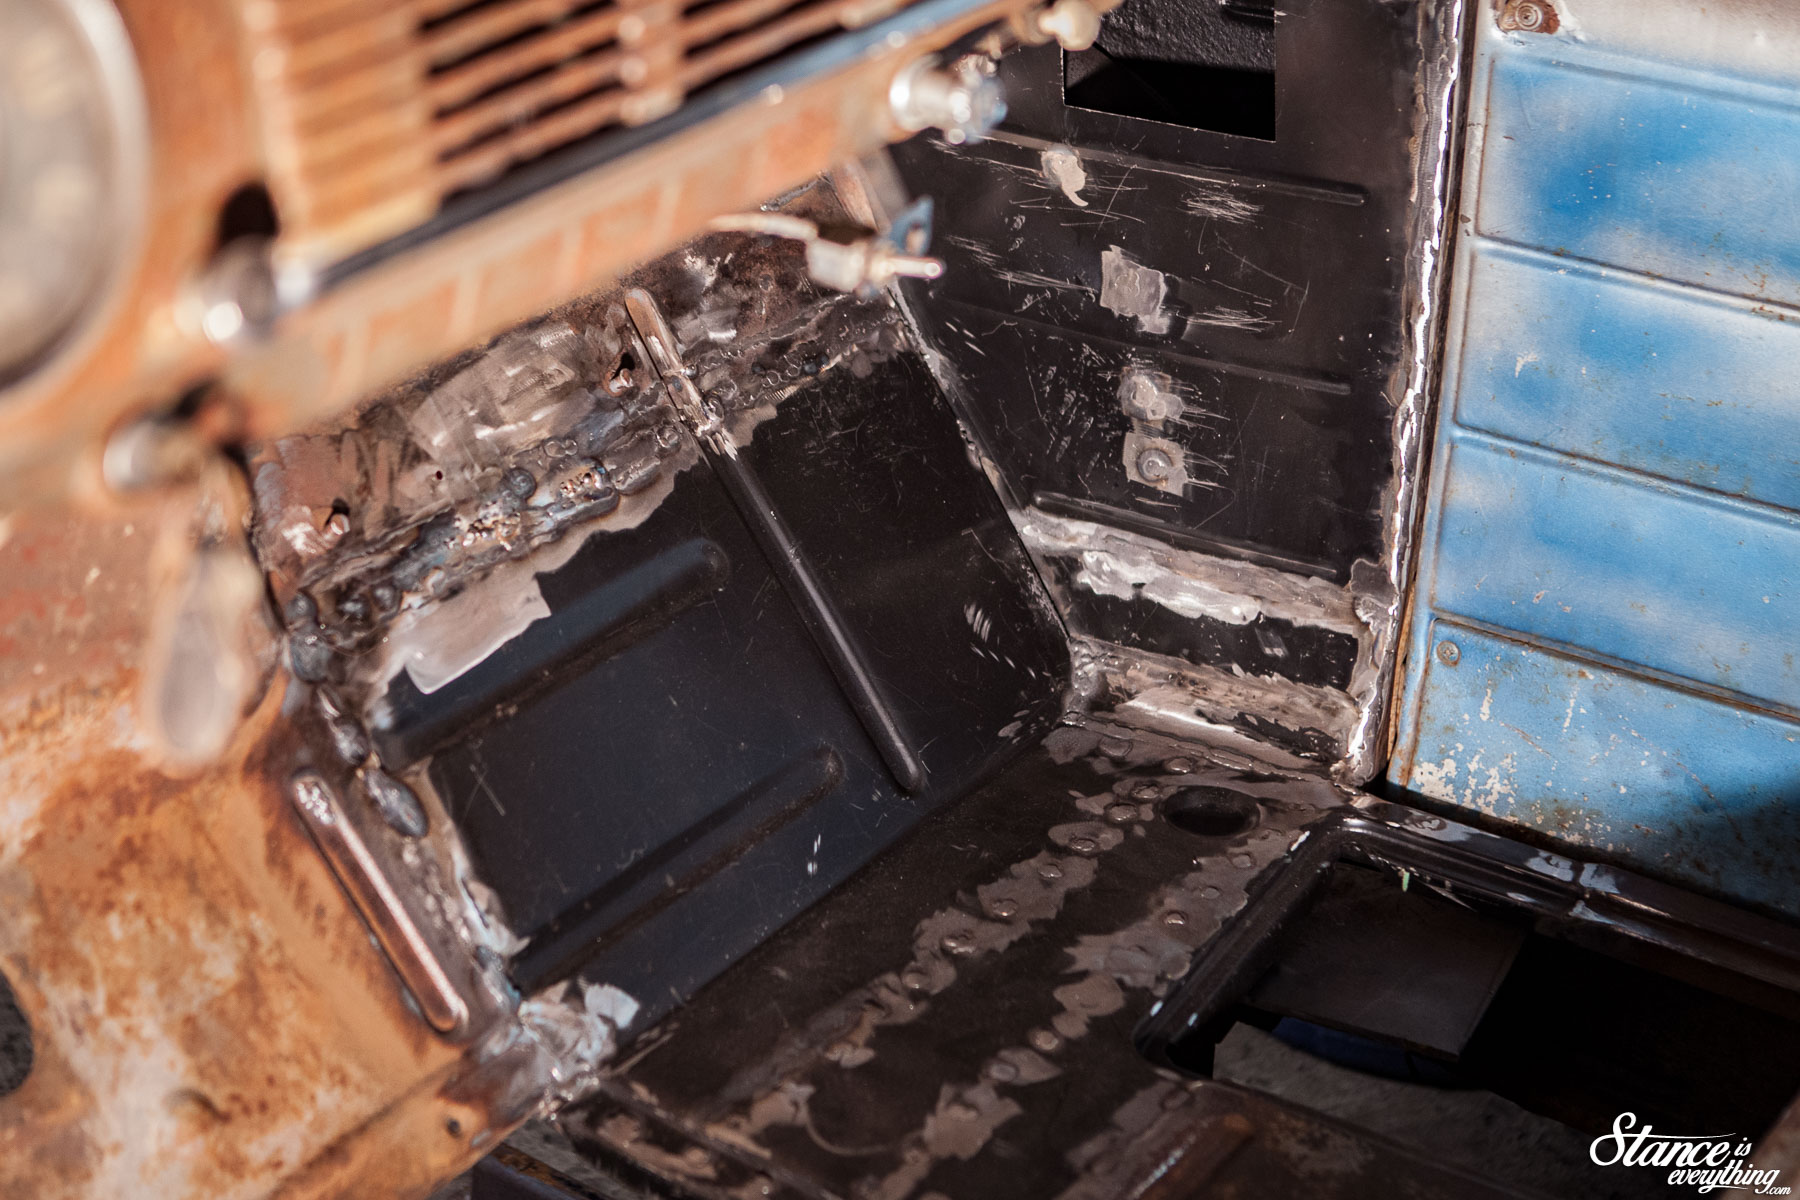
Before closing in the kick panel area for good, I gave all the original metal a coat of rust primer and more rocker guard. I couldn’t just leave it as it was, even though the bulk of the rust here was just surface.

I’ll also be spraying some rust proof in the panels once everything is complete.

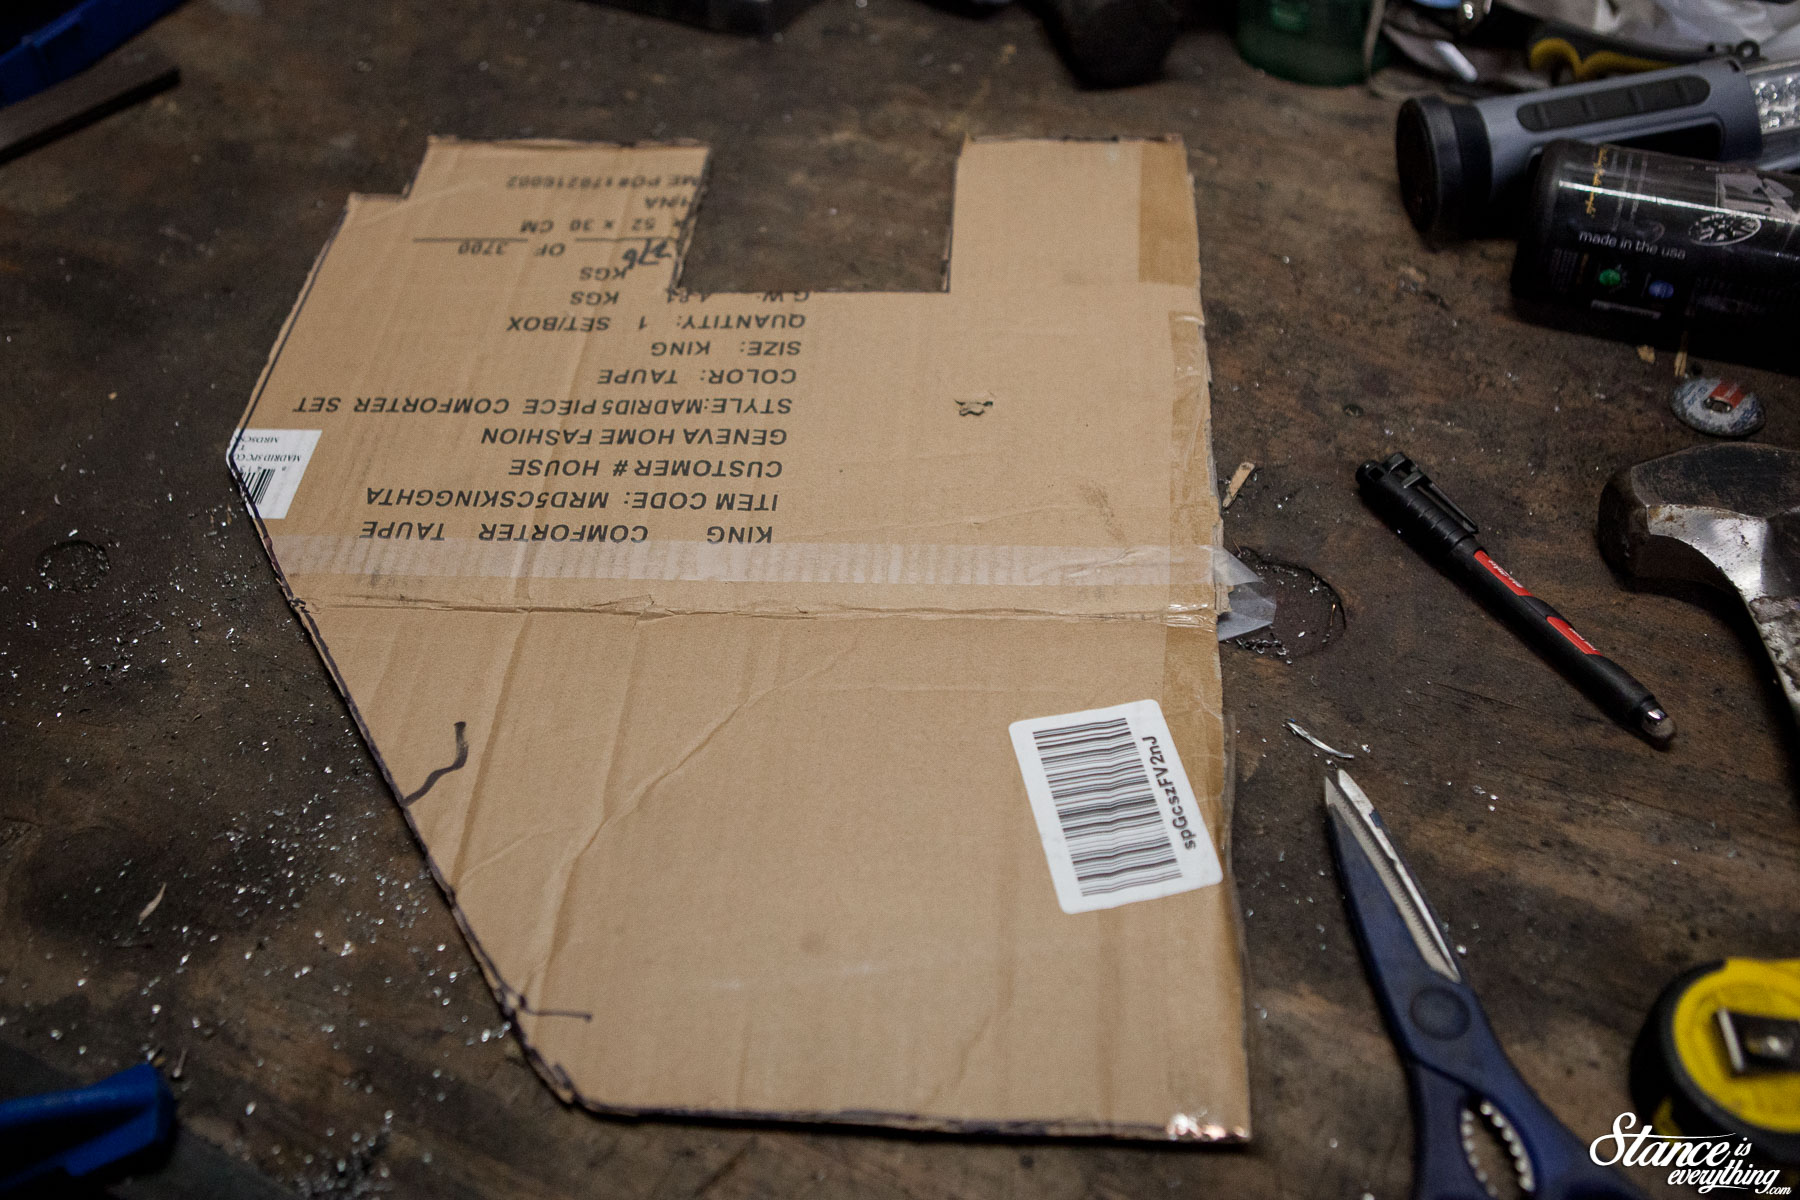
I ended up putting the inner fender in, before the kick panel, and it made fit up a little challenging.

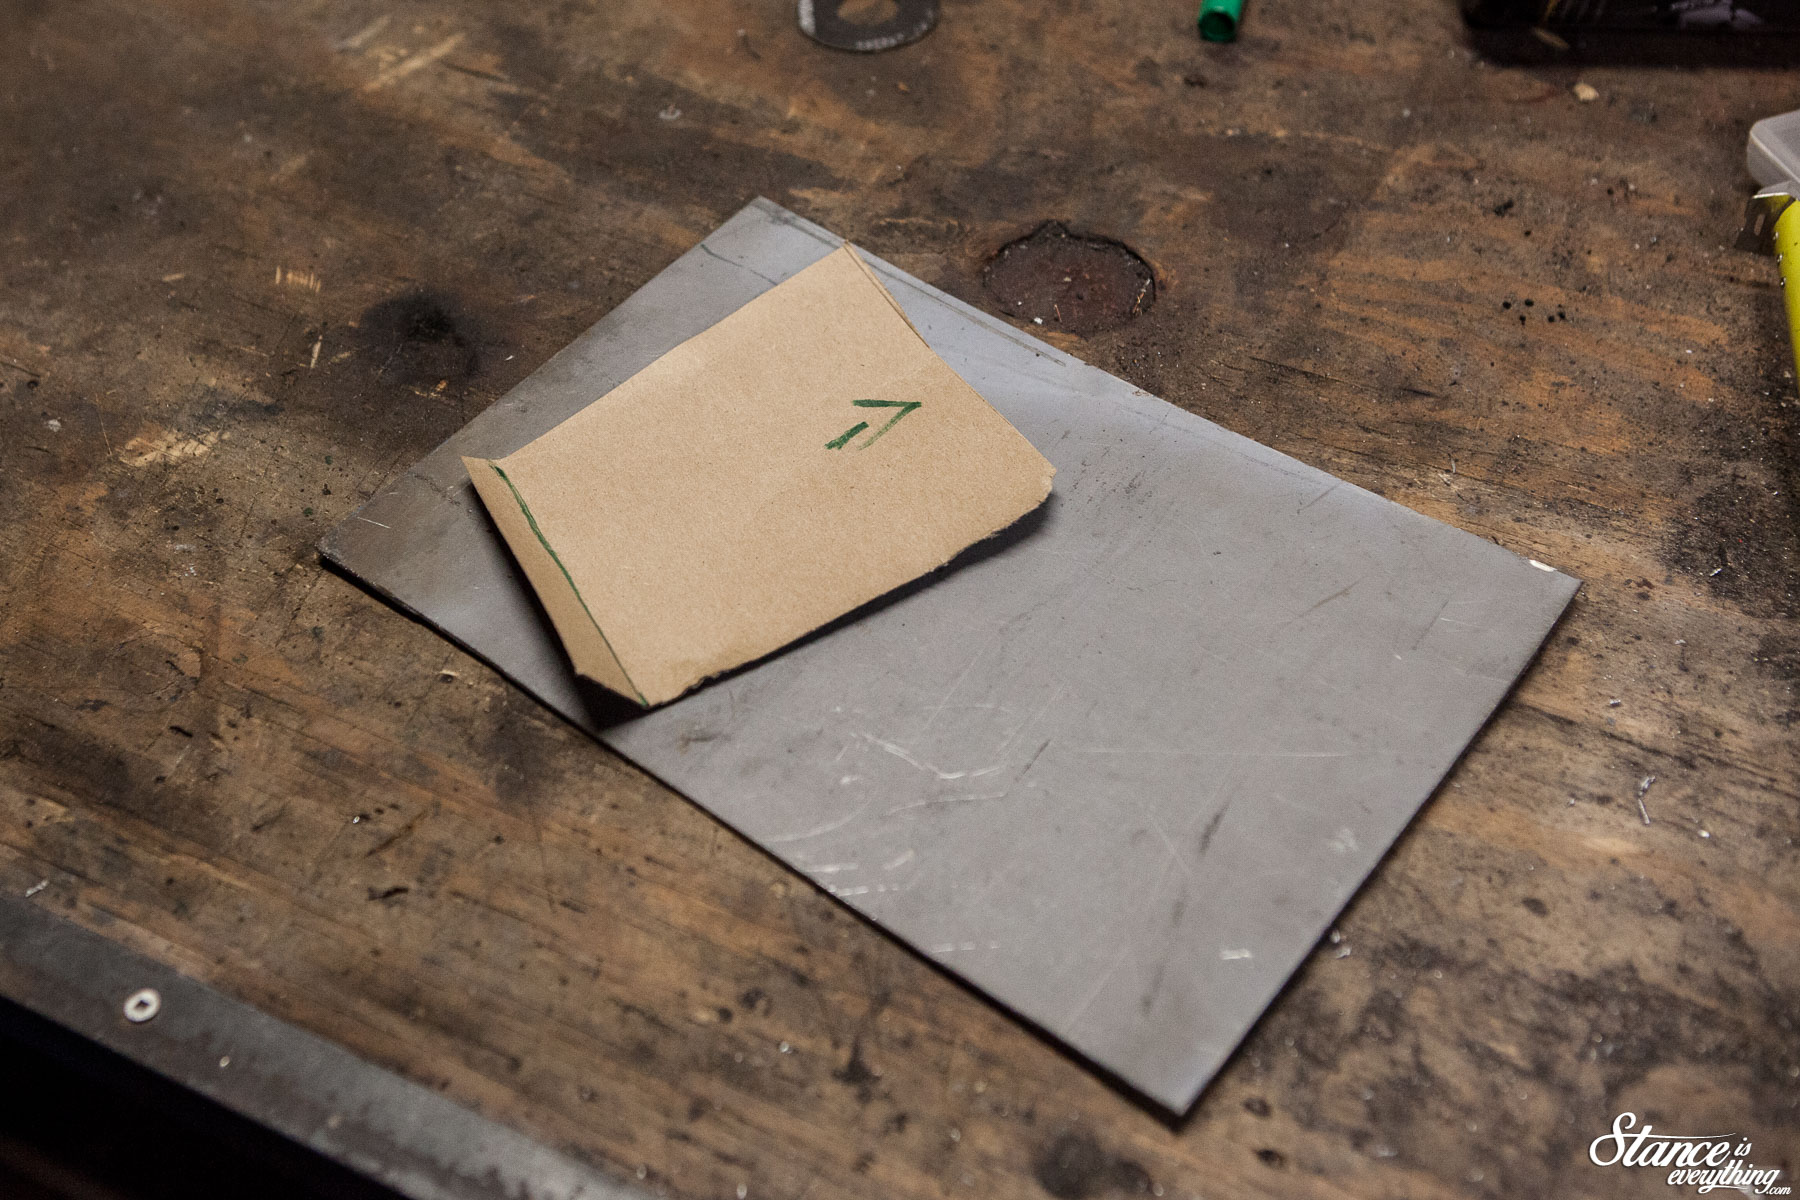
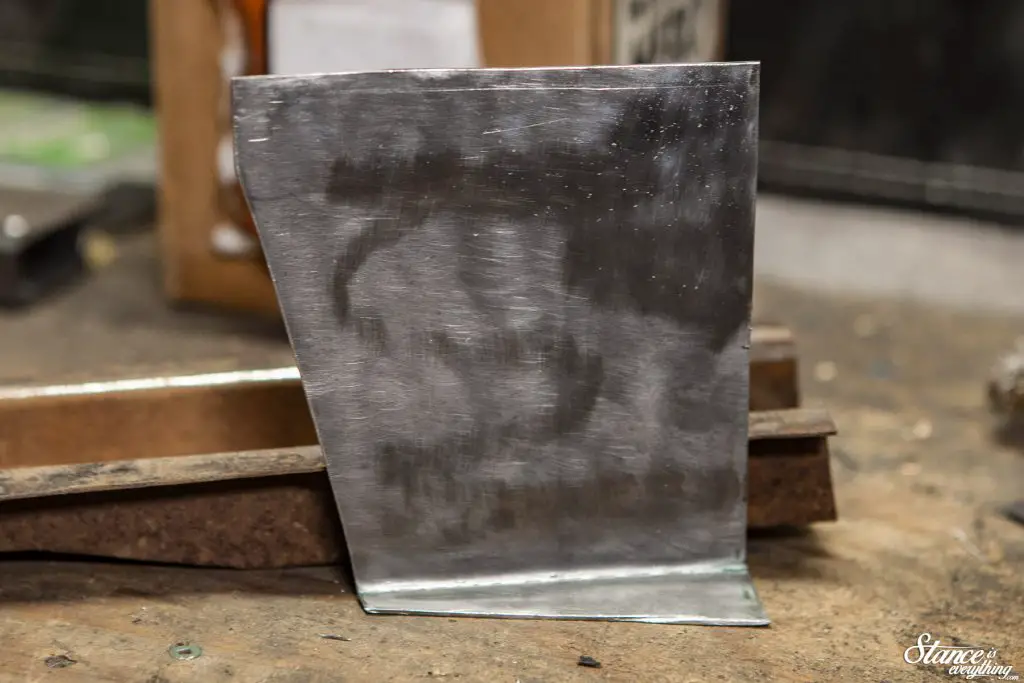
To make my life easier I made a cardboard template I could cut up and manipulate at will to figure out how to get the kick installed.

Eventually I ended up cutting it into three pieces so that it met up with the floor properly.

Not the end of the world, but, it did eat a few hours.

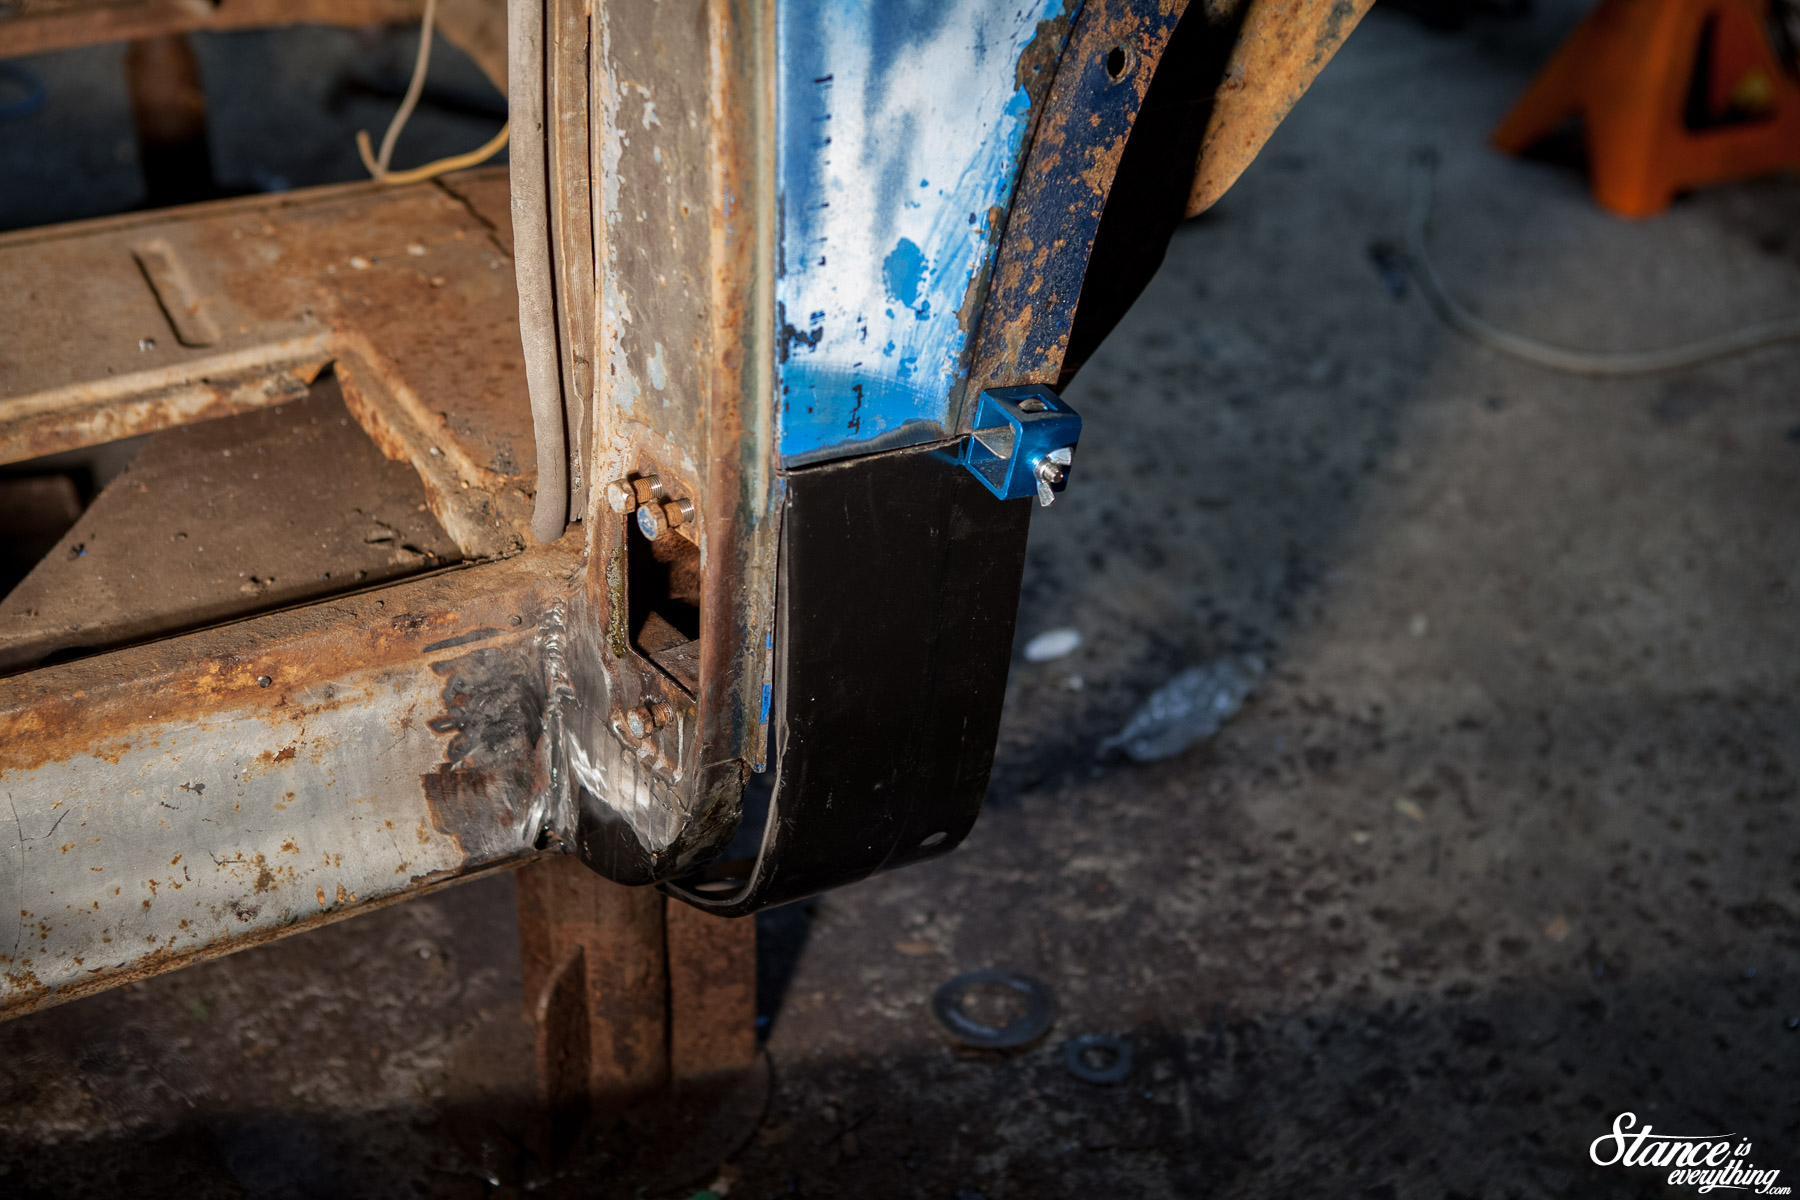
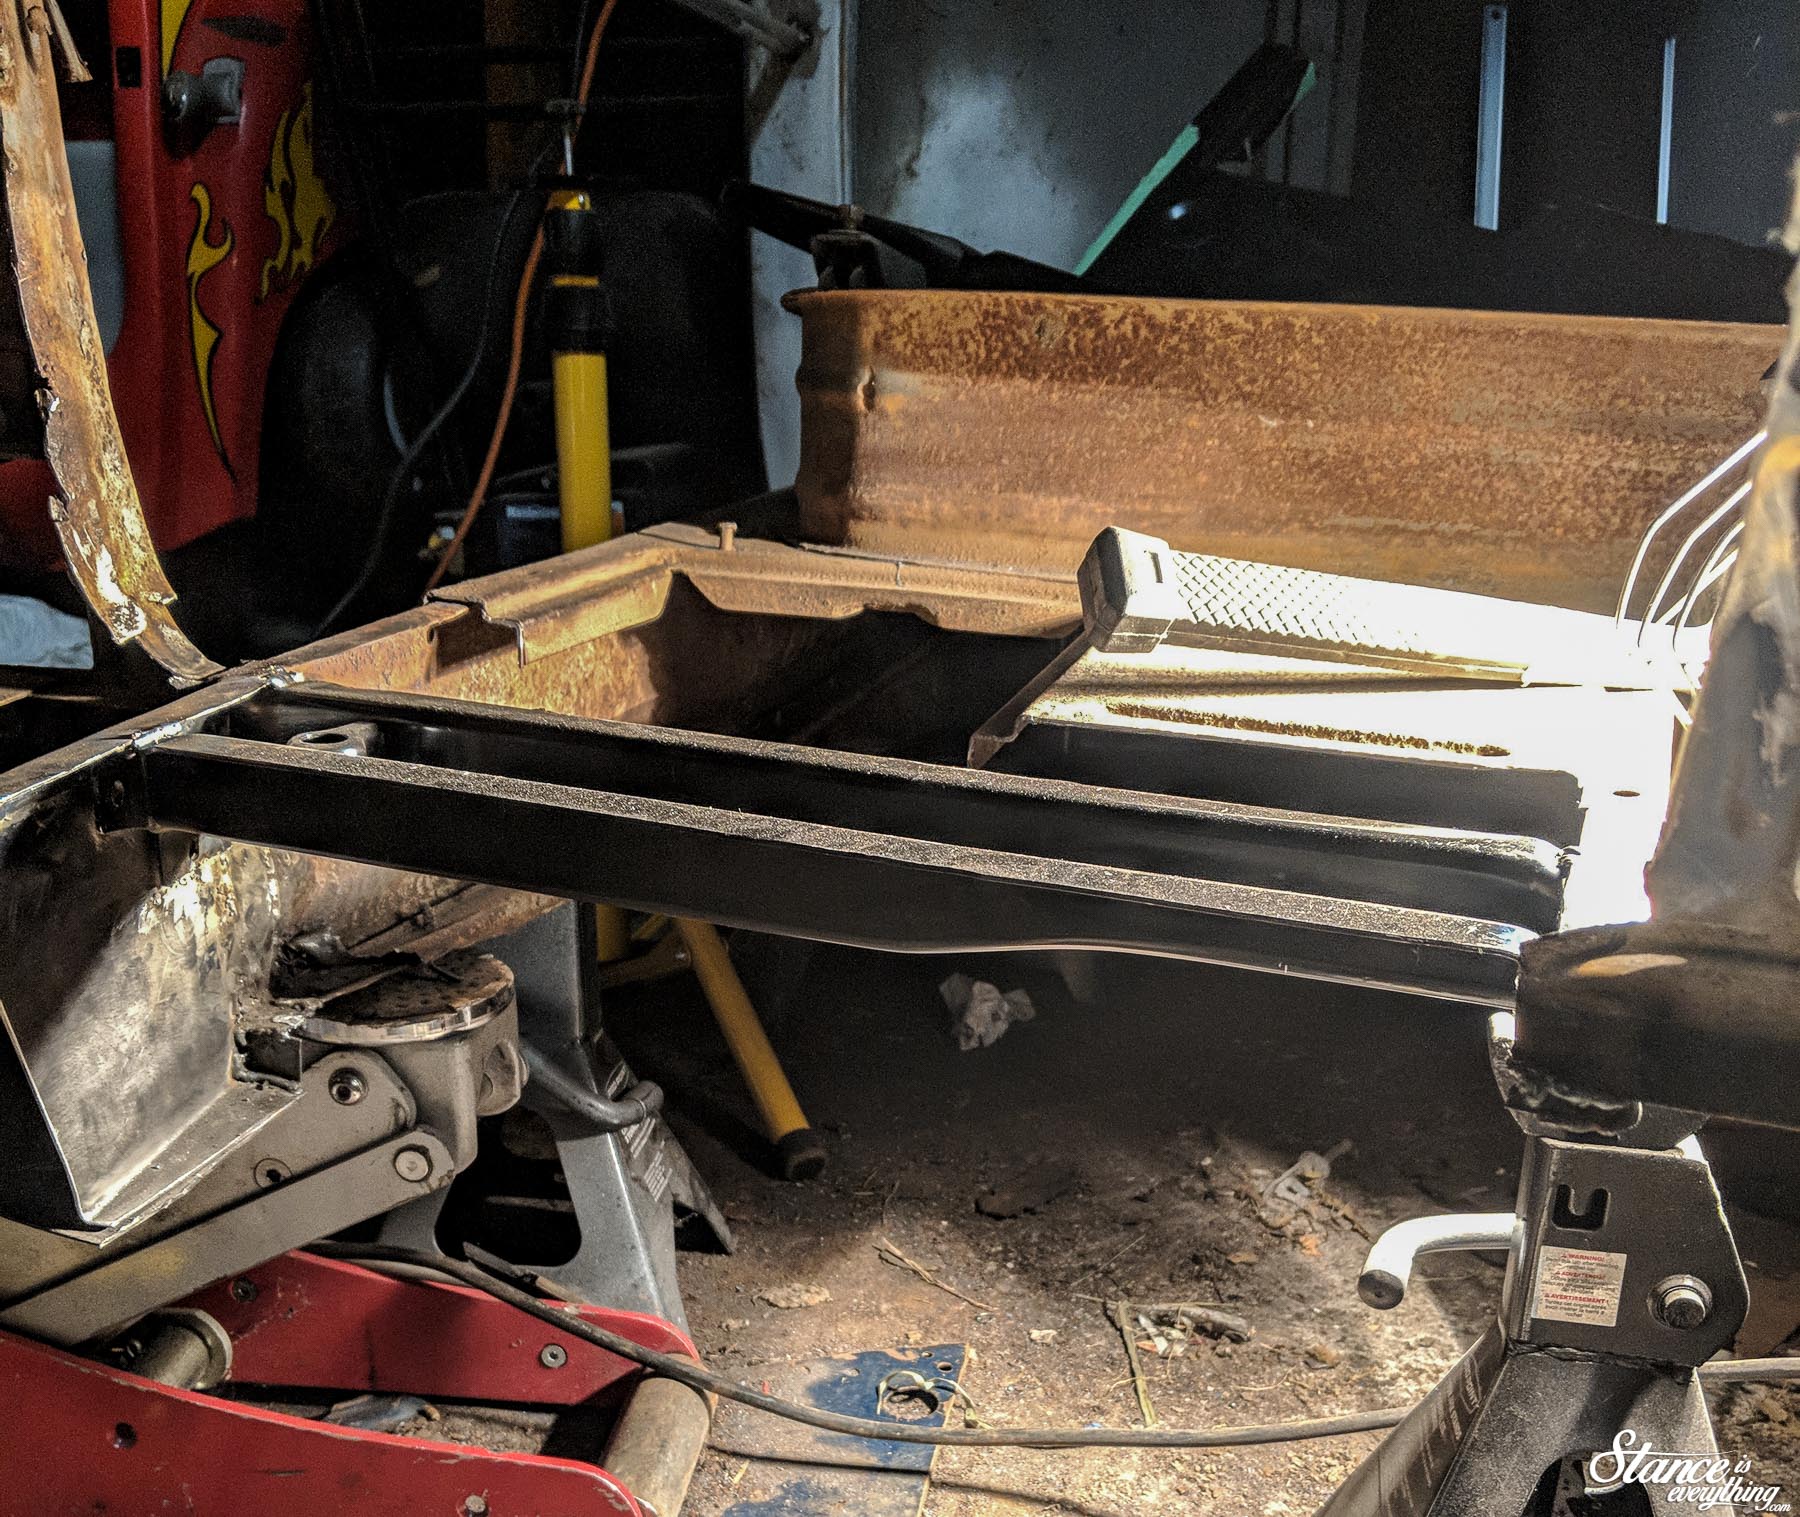
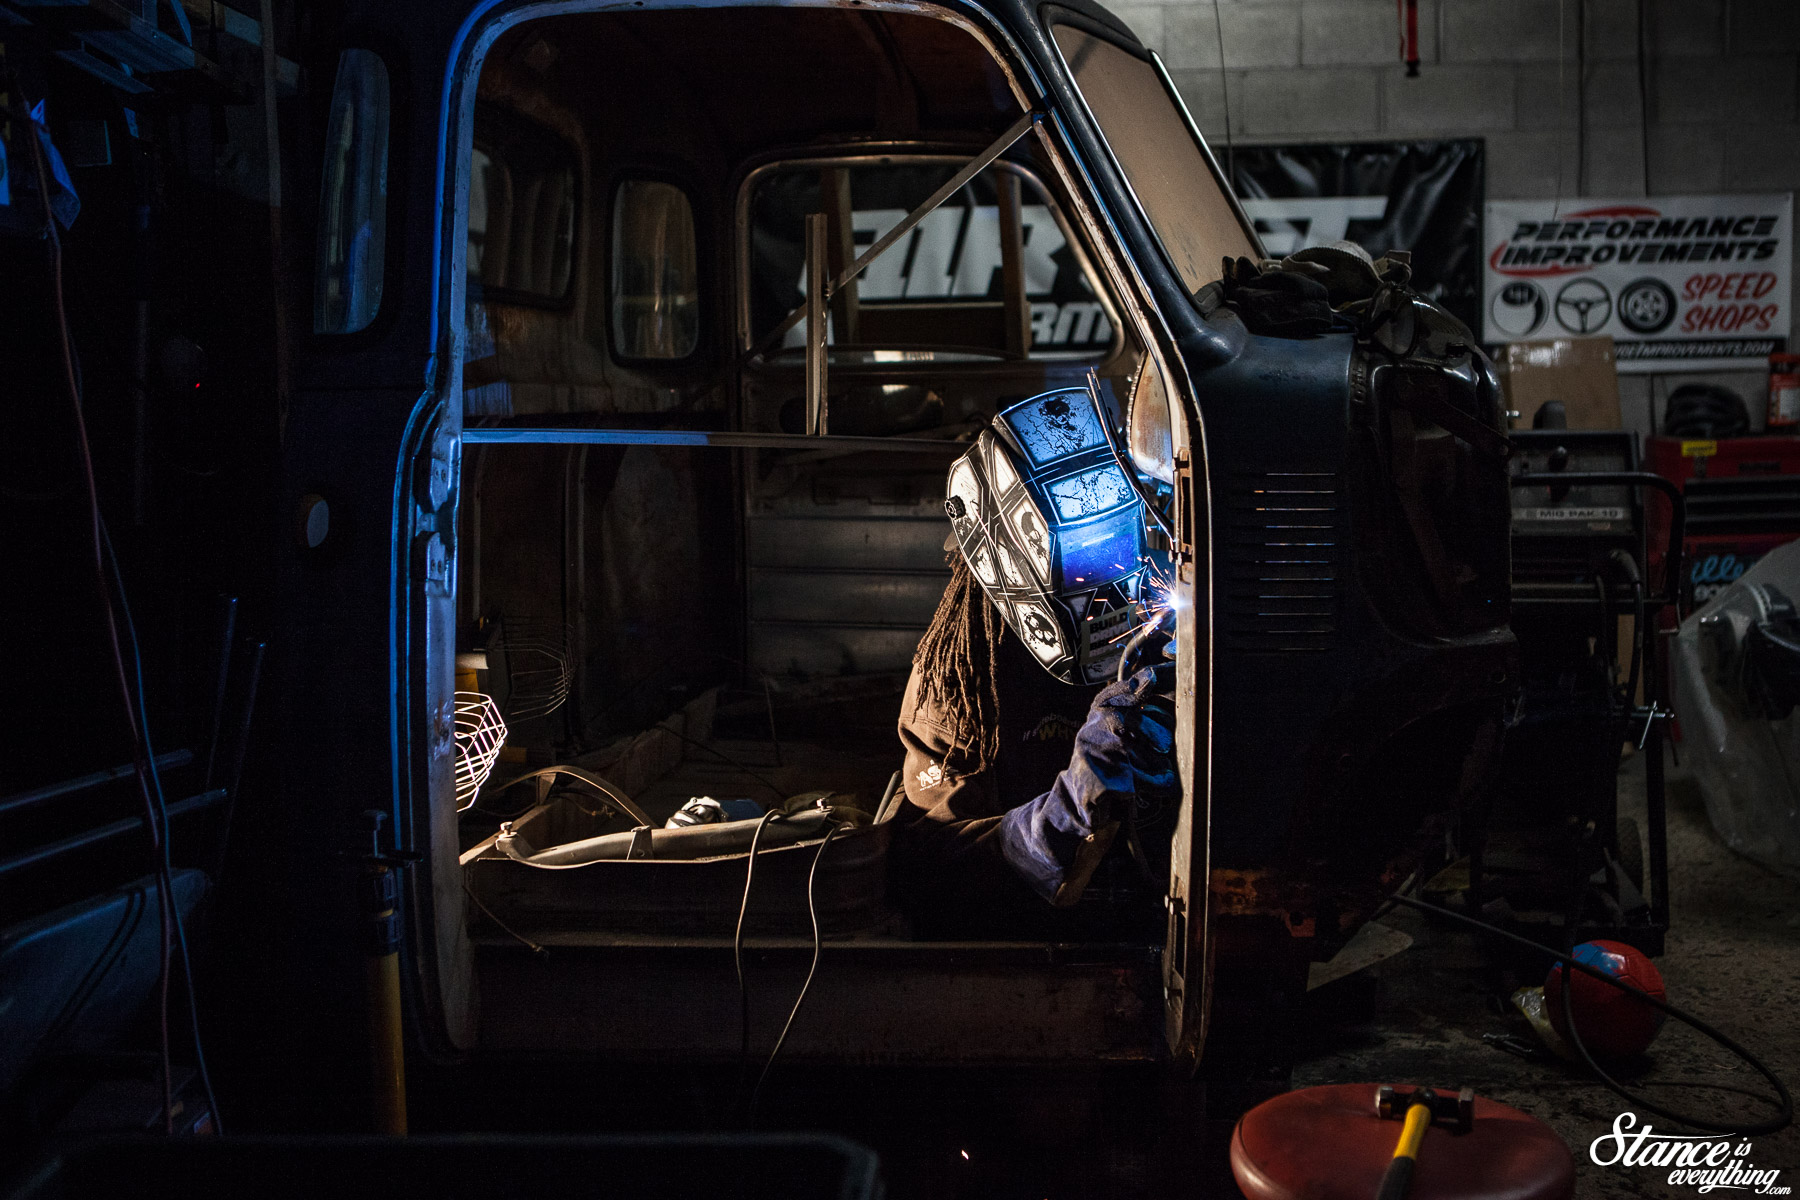
Out came the grinder once more and things were complete enough to remove my cab bracing and reposition then cab for side two.

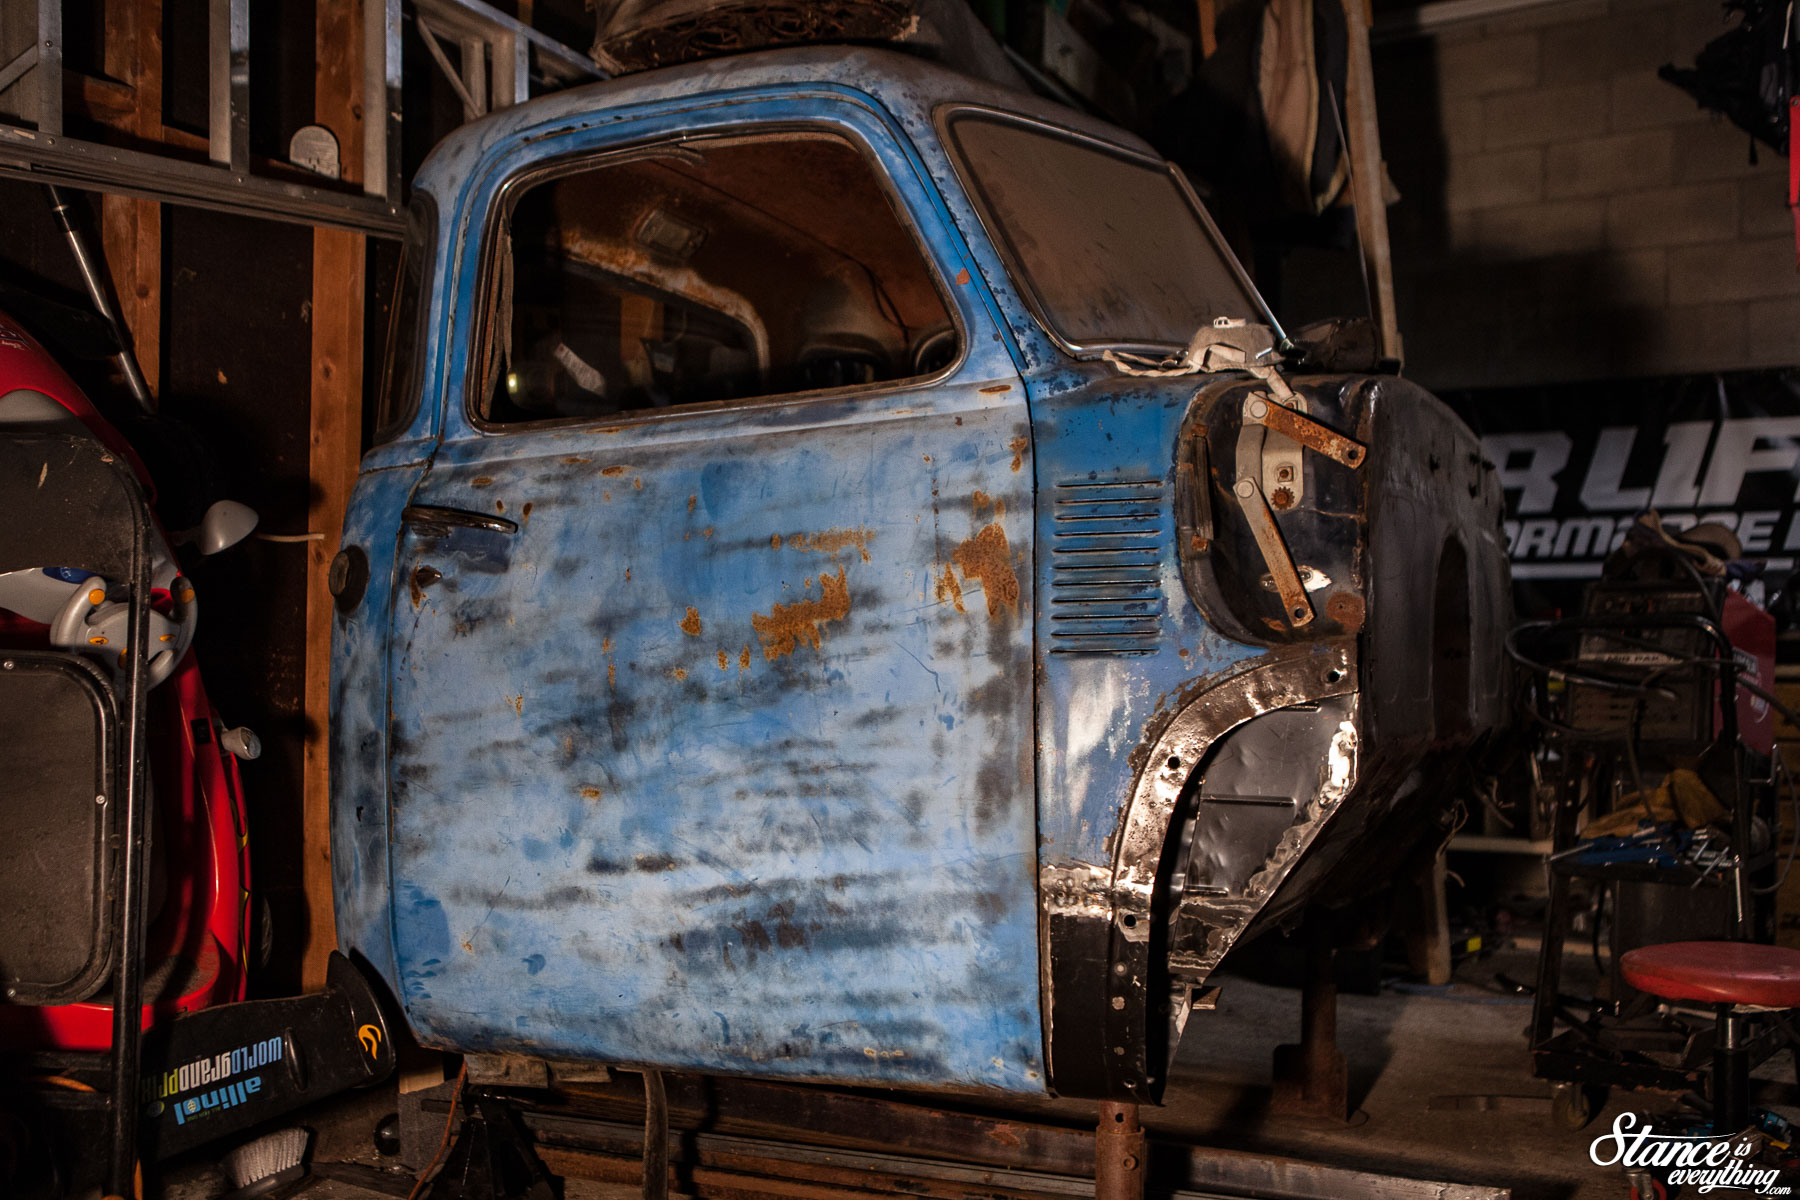
Putting the door back on and having it close was one hell of a relief. Even though I had braced the cab while doing my work a large part of the front corner of the truck was missing for months.

For my first time, the gaps turned out fairly reasonable, and should only get a bit better once I put a bit of filler on there and clean it all up.

However before I do that, I ought to complete the passenger side.

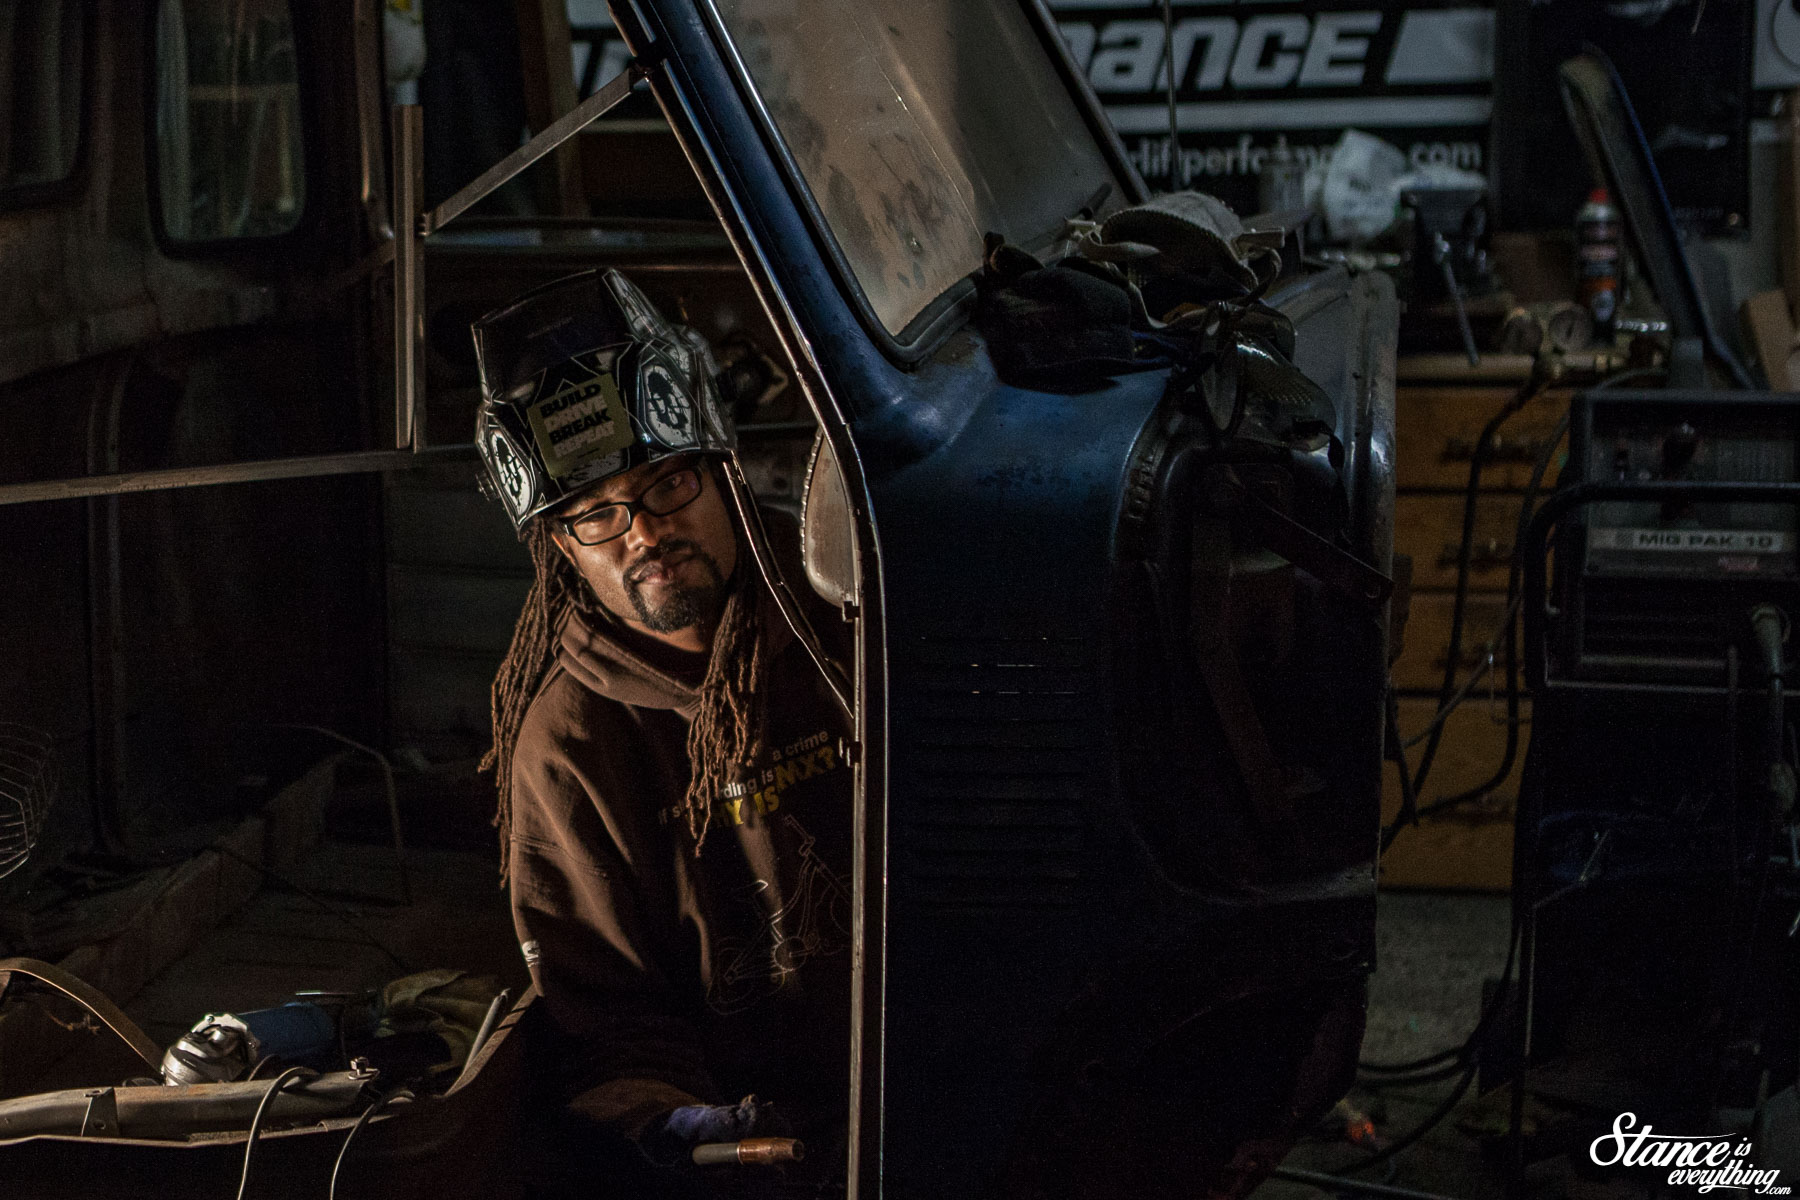
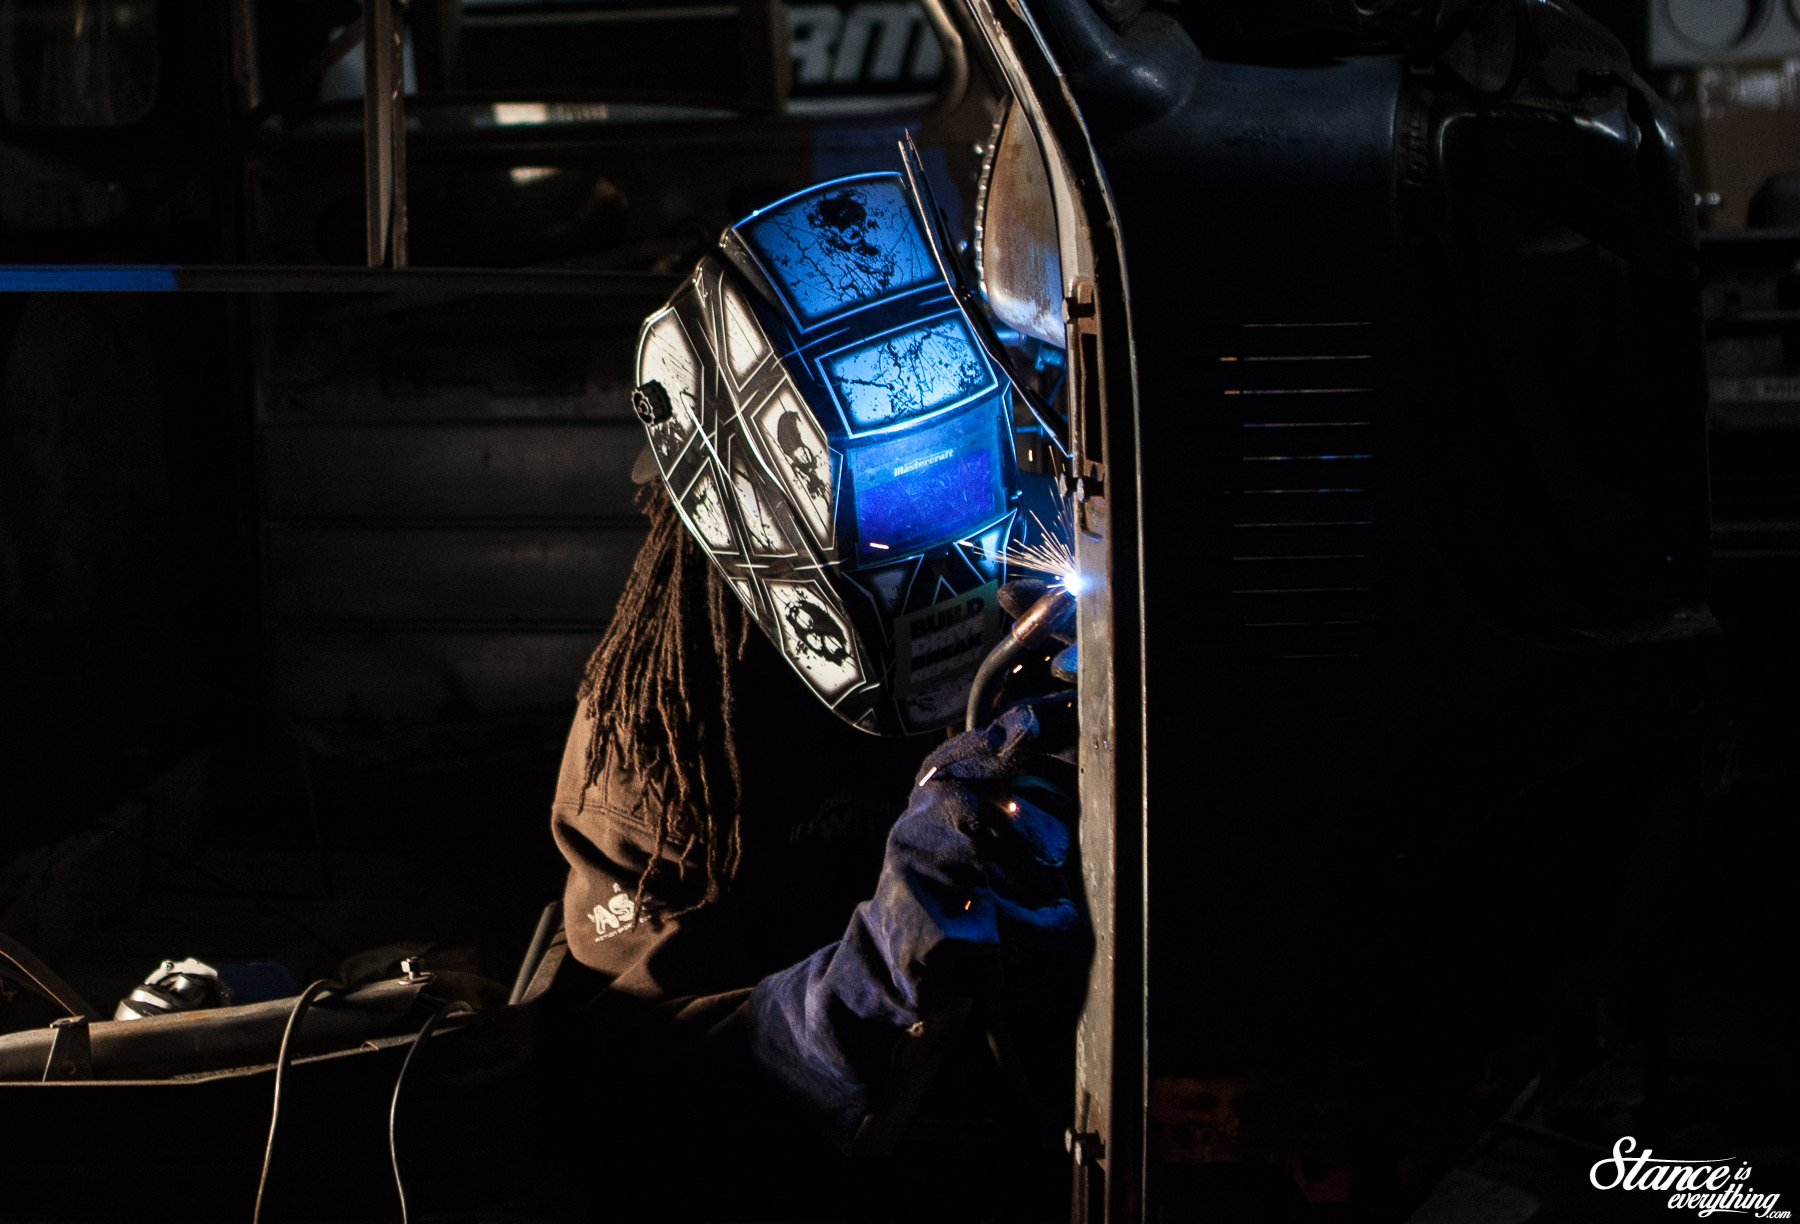
So if you’re looking for me all winter, chances are I will be right where you see me above. At least I won’t have to sweat through anymore 30+ days with the humidity!

Event Coverage: Drift Jam Throwdown Round 3

0

At the start of 2018 Devo and Jover decided to shake up the Ontario Drift scene with the introduction of Drift Jam.

Throughout 2018 their Throwdown events have hosted a respectable field of drivers. Bettering that, the driving at Drift Jam events has been some of the best in Ontario.

Last weekend the 2018 ‘Throwdown’ series concluded at Barrie Ontario’s Sunset Speedway.

The Sunset round is unique because it’s the only round to be held at a banked oval. Featuring a course layout that travels from the oval, down into the center, the Sunset layout favours high horsepower cars.

Linking the entire course requires full commitment, and the layout doesn’t offer driver’s much quarter. Mistakes are easily visible and often hard to recover from.

Drivers known to stay in it and push hard were rewarded with successful runs. Those who air on the side of caution (well as cautious as possible for a drift driver) found themselves on the outside looking in when finals rolled around.

Documenting the madness for this round is local photographer Nik Dimitriou.

Along with being talented Nik, has shot a number of TOPP Drift events, which means he’s familiar with the sport, and the drivers.

Nik managed to capture both the competitive and fun-loving nature of Drift Jam.

No matter what’s on the line at the end of the day, trophies, glasses, or high fives, having fun is the most important part of any Drift Jam event.

At the end of a solid day of competition the bottom step of the podium went to Byrson Cook. Byrson drives an absolutely killer looking LS1 powered FC RX7.

He’s been one of my personal favorite drivers to watch all season.

Second place went to Aaron Mazzoccone the driver of the 2JZ powered Sil80 shaped smoke machine.

Dan Paska earned the top podium step at this round in his 2J s13.

The 2018 overall series results shook out as follows; Pat Cyr got number one, Dan Paska and Franky Becerra tied for second and Aaron Mazzacone and Josiah Fallaise tied for third.

That’s a super tight podium and a direct reflection of the level of driving all year.

With the competition aspect of Drift Jam complete, partially spent tires were offered up to the Gods of horsepower via a burn out demo. Everyone loves a little tire smoke and fire.

Though the competition is done Drift Jam hasn’t packed up shop for 2018. The final event of the year will be a two-day Spooky Vibes event held October 20-21 at Gamebridge Go-Kart Track.

If the event is anything like the season opener it promises to be a lot of fun.

Hopefully see some of you at that event. Thanks again to Nik Dimitriou for heading out to Barrie and snapping photos for the site.

More photos from the car show and the pits can be found below.

Next stop, Gamebridge!

Is That A… Cavalier?

3

A few weeks ago I went to the CSCS 2018 Season finale (more robust coverage coming soon) and became absolutely fixated on a Cavalier. Yes, I said a Cavalier.

The Cavalier that captured a lot of my attention was as much a Cavalier as it wasn’t a Cavalier. But it was still more Cavalier than any race car ever needs to be.

As you can see the object of my temporary obsession looks like an ’89 Cavalier, but likely doesn’t share a single part with one.

These days second gen Cavaliers are really pretty rare, so to see one (even in Pro Mod form) threw me for a bit of a loop.

Fiberglass front end removed there’s nothing Cavalier about the power plant, chassis, or really anything else.

You’ll have to forgive me for being light on specifics for this post, I didn’t get a chance to speak with the driver.

I didn’t spy a blower on the car but based on the physical size of the heads I’ll hazard a guess it’s a big block powered car. If I recall correctly Pro Mods (if this is indeed a Pro Mod spec car) have no upper limit for cubic inches naturally aspirated, so, this could be 500 cubic inches or better.

Fit and finish this car was incredibly well done. Especially considering the source material for design. All of the necessary body lines were present, the door gaps were quite good and the lights looked real from about five feet out.

The builder’s even went so far as to replicate the factory Cavalier dash out of fiberglass, vents and all. That’s serious dedication to looking the part.

Even the two-tone paint job carried through to the door jambs, something that can’t even be said of a lot of the show cars I see.

Cars like this really make me wish I knew more about drag racing, it’s one rabbit hole I’ve yet to explore to deeply. If anyone more information on this car (including corrections) let me know in the comments below.

As stupid as it is for me to be obsessed over a Cavalier, and yet here we are.

WTF Friday: 5.0 Twin Turbo Miata

1

Wow, it’s been a long time since the last WTF Friday post. A drought as long as this one isn’t something I plan on repeating. Shout out to all of you who check the site every Friday for something new. I’m going to put some work in to re-up my stash and make sure your time is support is rewarded appropriately.

This week, a Miata rolls through the WTF Friday archives.

V8 Mitatas are far less common in 2018 than they were in 2014, but an Ontario based twin turbo V8 Miata certainly raises an eyebrow on my head.

Sitting on Kijiji at $25,000 after three days the Mustang lifted Ford 5.0 has to Turbonetic t3 turbos hanging off either side. Fueling and ignition for the set up is handled by MSD.

While horsepower figures are mysteriously unlisted the ad boasts 7s at 100 mph in the 1/8th mile and 30 miles per gallon in the city.

Water and meth injection provide cooling and the owner states the car is a turn-key driver, and racer.

Exterior photos are not the focus but the body looks to be in reasonable shape considering the age. The hood is a little odd, but since the turbos (and much of the plumbing) sit above the fender line a stock unit is ruled out.

Similarly the interior isn’t too crazy, aside from the visible plumbing running through the center console.

If you’re interested, serious offers only and the car is in Sudbury Ontario.


Theme Tuesdays: Classic Minis – Pt. 2

2

If you’ve been reading this site since damn near the beginning then you know the last Classic Mini Theme Tuesday was done all the way back in 2012. Six years is far to long for me to revisit such an iconic car.

No disrespect to BMW, and the models they are currently producing under the Mini marquee, but I’ll take an old model over a new one any day of the week.

So with that said, here’s classic Minis part two.

Classic striped and British racing green, its hard to find a more iconic mini look to kick things off with.. however there’s one thing missing
Of course the “missing” thing, depending on your taste preference, are the quintessential fog lights


Super clean example from an Engineered Automotive’s Cars & Coffee
I’ve never seen this particular combination again, I wonder if it is still around and for that matter, who built the pint-sized trailer?
Despite their small stature people have managed to stuff all manner of motor inside a classic Mini engine compartment
One of the most common swaps is of course the 4 cylinder Honda B series motor
This little mini built by Jeff and shot by Chris Johnston was the subject of a 2012 feature
This little B series Honda gives away its secret on the quarter panel
I think there was a B under the hood of this track prepared Mini if my memory rings true…
The sign basically says all you need to know about this particular mini, it’s a K swapped all wheel drive beast
Sadly I’ve never seen this car again it was super clean however
Stepping away from the Honda motors, this is a car that I’ve spotted all over Ontario
A small block Chevy 350 motor sits in the rear
The car has recently started to appear on instagram more often, and recently saw a turbo fitted.
This monster Mini has a Porsche 944 motor under hood, if there was a hood of course
It was the subject of a WTF Friday years back

How about a Hayabusa powered Mini?

Not sure where I picked up this photo, as it’s been on my computer so long, but it’s an absolutely killer looking little car, I love the side exhaust too
This Mini is a “Mini” in name and body but not chassis. It’s an MX-5 underneath and you can find the build thread over on Build-Threads.com of course – Photo: Slam: Media

A blend of mini styling and hot rod attitude? I can dig it
Going to close things out with the Critter, a 1/4 mile mini that looks to have a serious V8 under hood via – ozwild.com

Event Coverage: The 2018 Jalopy Jam Up

0

Since its inception the Jalopy Jam Up has been unique. It is, to the best of my knowledge, the only traditional hot rod and custom show in Canada.

Prior to 2018 the show took place at a fairly unique venue, a re-purposed dude ranch on the outskirts of Ontario. That venue while extremely different and very photogenic, wasn’t without its flaws.

The most significant of those flaws was perhaps distance. It was a haul to get to the ghost town it was always worth it for those who went the distance, but, everyone knew it was far.

It’s said, if there’s one thing that’s constant in life it’s change and after four successful years it was time for the Jam Up to change.

The new home for the Jalopy Jam up is now the Rockton fairgrounds. A venue with fair history itself and lots of space for the show to grow.

Unfortunately with the venue change the Jam Up lost its original date, moving to the same day as another favorite show of mine, Northern Showdown. I mention this, not to cause controversy or anything like that, but to mention that these photos are actually from Friday, the quieter of the two-day event.

When two shows I support are on the same weekend, I do my best to make both.

For the smaller of the two days the turnout was still extremely impressive and kept me more than busy the few hours I was there.

It was a mix of old friends and old cars, and new friends, with new cars. Throw in a vintage bike show, mini-bikes, and the smell of BBQ and you’ve got a great afternoon. My only regret is I’ve yet to stay and enjoy the Jam Up night life.

I don’t know the exact numbers, but I am pretty sure this year’s Jalopy Jam up was largest yet, which considering a venue switch and a slightly worrisome weather forecast is a great thing.

As always there was quite the variety of vehicles strewn about the event. Traditional builds took precedence, but if it’s cool, and if it’s classic it’s generally welcome somewhere in the grounds.

Making the most of my time I was sure to do a few laps of the venue looking for anything cool.

There were plenty of cars I liked, in fact I really don’t think I saw a car I didn’t like but I really enjoyed the two cars above.

They were both fairly simple, cleaned up, but not restored, a bit of pinstriping on the Buick and a lot of low on each.

Classic metal stuffed in the weeds works well doesn’t it? And with each having more than enough room for a full family they’re ideal summer cruisers.

When it comes to favorites, this green/teal/ Ford was another one of my mine. Fords with fenders usually don’t do it for me but there was something about this one.

The wheels, the color, the stance, it all just came together and I couldn’t help but stare at it.

It wasn’t extremely elaborate, but it was clear a large amount of attention was paid putting it together. The treatment was also so timeless that it was impossible (at least for me) to tell when it was built.

Keith, the man at the helm of Binbrook Speed And Custom not only had a booth this year, but he was also chopping a top live in one of the venues pavilions.

Unfortunately for me the bulk of that work happened on Saturday, so I’ll have to catch him do it again next year. From what I hear it was a hit.

As my time to be at the Jam Up wound down I did a few extra laps in order to get photos of the variety at the show before the sun slipped behind the horizon for the night.

Though this year just finished I am eagerly looking toward next year and the year’s to follow.

Congrats to Jeff, Brandon, and Jay for another great year and here’s to many more. One day I’ll have something cool to bring, I swear.

Not Your Average Blobeye

0

Imagine you were out on an urban exploration mission, popped open a barn, and inside found a road worthy, former competition, WRC car hiding inside. Sounds too good to be true right?

Well, that’s because it is, but that didn’t stop Mike Pateras and project partners Skepple Inc and Autolak from telling that story when they released the video below.

Mike dropped the “discovery” video on Youtube about a week ago and somehow I managed to completely overlook the fact that it was a Canadian car.

Worse still, I didn’t even realize it was an Ontario car until I saw it at Northern Showdown 2018.

A car as extensive as this doesn’t get built overnight and Mike has been plugging away with his Subaru for a few years. If I recal correctly it’s motor build number two and widebody conversion number one.

Before it’s current guise the car was already winning rally blue with green wheels, but the new aged livery really sets it apart from the pack.

Skepple Inc did a phenonomal job on the wrap design and from a few feet out the simulated wear and tear does a really great job of looking authentic.

The battle scars might currently be fake but I don’t imagine they will be forever.


While I spotted it at a show, this car is definetly not a show car. Mike drives the wheels off the thing as evident by the two videos below. The first being his first gymkhana effort.


Mike has plenty of information on the car, and more video of him thrashing it, on both his youtube channel and Instagram (MP_Gymkhana and @MP_Gymkhana respectively) so be sure to check those out for more information.