The road track at Cayuga was pretty busy all day with lapping, time attack, and drifting going on. The number of events resulted in a capture card full of tons of photos and while I could have posted everything up today I’ve decided to break up the track coverage as well for those on phones/sketchy wifi.
This post contains photos of the the time attack event and a few cars I missed from yesterdays show & shine coverage, as well as a teaser of tomorrows coverage which will be nothing but drift action.
Off track
I knew I forgot some photos yesterday…
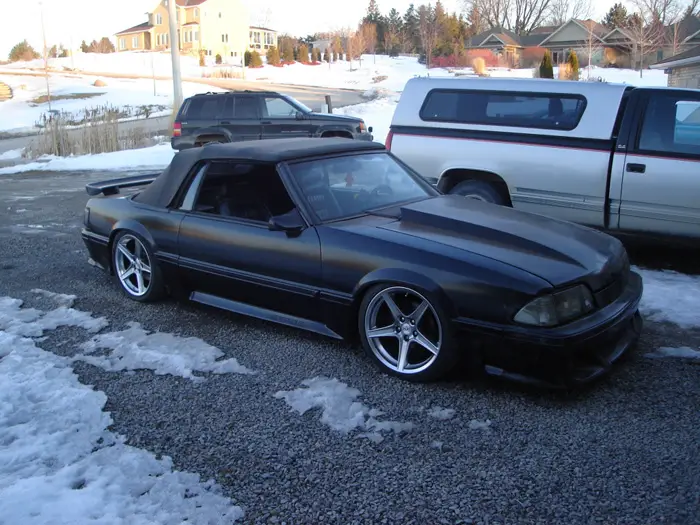
This is what happens when your car does not have a roof and it rains...Purple, or pink?So simple, so perfectSaw this as I was leaving, even dirty as hell I still want it, BAD
Lapping
This just made the fact that I wasn’t able to get out to a lapping event this year sting even more, I really need to try this.
As I mentioned yesterday this Subaru looked right at home on the trackAdvance Power House Civic getting up on 3Stage four Civic leaving the cornerRX-7 on CCWs being put to taskSpeed 3s are made for the trackThis rally prepped Subaru was set up for the track on the weekend and was tearing it upAnd this Subaru was a damn monsterThis Nextmod Evo was my first attempt at a panning shotGodzilla! Godzilla!A Cosworth Evo being put through it's pacesI'm quite pleased with how this shot turned out
For you guys anxiously waiting for the drift shots here is something to hold you until tomorrow:
Sorry this one is a little late getting out the door, but look on the bright side you have been that much more productive at work today.
With vinyl wraps becoming more prevalent there are a lot more cars coming out with matte finishes. I’m a fan of the look however it’s done but big props to those who do it flawlessly with paint.
The Matte black Infamous Project 5.0I really like this finishThe matte finish sort of hides the flares hereLike a bossThis car has undergone some changes which I will have more info on shortlyHave I posted this s2k before? Perhaps, but its worth a second glanceHot Rod flatsSkunk 2 Civic8th gens are growing on meFlawlessThis NSX was later painted red but I like it this way better personallyWin, Win, WinThat's some bright ass pink!Black shoeAll paint, all bad assMeanest looking Toureg ever? I think so.
Sunday August 22nd 2010 was a busy day for the GTA automotive community. Three events took place simultaneously (Vagkraft, Meeting of The Mazdas, and CSCS:Xtreme Tuner Challenege) and depending on your location you were anywhere from damp to soaked as the weather didn’t want any of these things to happen.
Thankfully in Cayuga at CSCS the weather actually wasn’t too bad for most of the day, a little damp at times but for the most part dry and great for photos.
I managed to take quite a few pictures so I’ve broken up the coverage into multiple parts, today’s coverage is of the off track action.
Transformer II
I am a BIG Transformers (Generation 1 & 2) fan but this truck was a bit much for even me. Team H.V. put a lot of time into this truck (Avalanche?) but it was just way over the top.
I've never seen a wooden Autobot insignia beforeMassive custom tilt front endIt's won a whole lot of trophies...
Subaru
This is the first time I have seen this Trial wide body Subaru in track trim and I’ll tell ya it looked good out on there on the track.
I might actually like this business setup over his usual set upUp close of the sticker bomb
Euros
With Vagkraft going on at Downsview park a lot of the European crowd was over there ,but a few came out to enjoy the drier weather at CSCS
Gary's bright wide body e46, this is the first time I have noticed that he could go wider with his wheelsSpotted this MKII Golf in the paddock and out on the trackIt was pretty quickNice Jetta on big lip RMsThe red on the outside of the lips was a unique touch, you can just make it out here
Chevy’s and Minis
Bowtie owners always bring the goods.
I have been given to OK by my girlfriend to build a car like this Nova A GTA show regularJames brought his truck out and I manged to shoot it at the worst lighting angle everI did however get an alright shot of detailing he has going on underneath the truck This bagged s10 was looking a little lonelySo some women stopped by to keep it company
Nextmod
As usual Nextmod rolled pretty deep both in the Show and Shine and the time attack/lapping events
Andrew was parked near the track, with the Nextmod famAndrew's trunk setup is very clean, I like the red on blackThis Acura's Arc lip on the groundAdvnce Power House/Nextmod/Amuse s2000Pearly's rims are greener than the grass
Drifters
When not on the track I manged to snap a few shots of these well used Nissans
Cooling between runs, this driver pushed his car hardChris St John can really slide a carNothing zip ties can't fix
Honda’s and Acuras
Just a preview of some of the cars that will probably be at Honda-Tech 7 next weekend, hopefully I can sneak out and get a few pics after the move.
Dumped AccordWith a cleaned, polished/chrome bayBoosted H.V. performance DABig Turbo Inlet horn, looks like a trumpetVery clean Turo elTiddy detailed engine payand an equally tidy trunk set upVery clean functional looking eighth gen@ChesterYu29's Civic on super AdvansI must have just missed him as he was judging at the showMsequence got new rims as well as a few spoon accessoriesThe K swapped CRX from Scrape By The LakeI almost got a set of these for my car but the offset was just a bit too aggressive (mexi)I've taken a picture of this EK hatch every time I have seen it, love the colorThree very clean EKsNever thought I would like purple lips, but here we areCloser look at the SIR on CCWsWhich is actually owned by a womanNo, I am not tired of these wheels
That’s it for today, check back Wednesday (or maybe Thursday) for photos of the on track action with some guest shots from my girlfriend.
To hold you guys over until I get a chance to start rolling out my CSCS coverage here are some Euro Rods courtesy of ‘go kart tire fitment ,ollie’.
Ollie admits that he is not the biggest fan of traditional America Rods Muscle (because they typically don’t handle well) but he is a big fan of these.
I have not see a whole lot of euro rods before so I enjoyed these, hopefully you do too.
Ollie guesses this is an Austin A 90, I have no clueAnother Ford we didn't get in N/A, the PrefectAustin 7s share a look similar to 32 Fords just squishedI have learned something new today: this is an a 40 DorsetA nice race prepped Volvo 544Older Volvos are so appealing because they are such a departure from what they do now, Amazon FTW
I’ve had some issues before with scheduled posts and since the week before and after my move might be kind of hectic I thought I should probably get the bugs worked out before hand.
Well it didn’t go to plan and this is one week late, better late than never!
I'm really a fan of these older Caddys done up subtle and cleanI wish I were thereOnce a work truck now retired to the easy lifeAnother slammed full size, Sometimes I think I have car A.D.D. my taste is all over the placeBest Volvo ever?Those stacks are huge Hmm lower truck = the ability to run taller stacks?Sinister looking 2002 in it's elementNow this.. this is a work of art.
Speaking of VW’s if anyone is going to Vagkraft this weekend and wants a place to host their images send me an email.
Site Updates
I will be at the CSCS Xtreme Tuner Challenge show this weekend with my camera and bag of stickers on hand so if you see me be sure to say hi.
Sunday, Sunday, SUNDAY!
On the topic of stickers I have a new order coming which will include the popular ‘I Like Em Dropped’ sticker in a variety of colors including black, purpler, and yellow. Big thanks to Mat at Seche Media for fulfilling another order very quickly.
These past few weeks at work have been pretty wild, the entire department has been busy and I’ve been slammed with a bunch of time sensitive projects.
I’m not complaining because though because it’s better to be too busy than not at all as far as work is concerned.
Drawing inspiration from being slammed at work here is a quick post of an Accord slammed on Works.
Has anyone ever seen a bad VS-XX application?If only I had more moneyPoke all around with little to no camber in sightMy favorite shot of the setIf this car was any other color I think the hood would be too much
The internet is a great way to kill a lot of time and personally I spend a lot of time browsing automotive blogs and forums. If you are anything like myself you have have recently come across photos of a white Amuse kitted s2000, a red s2000 on gold works, and an Import Expo brandedAcura NSX.
If you look closely at those photos you will notice that they all share a similar water mark, and or photo credit: ‘Dougboy 2010‘.
Dougboy (not Doughboy) is the alias of self taught GTA based automotive photographer Edwin Tan and today’s featured photographer.
When I asked Edwin to share a little bit about himself he was quick to emphasize one thing. He is, and always will be, an automotive enthusiast and like many enthusiasts photography was just a natural progression of his passion for automobiles.
Dougboys personal ride
Picking up a camera two years ago Edwin honed his craft by reading a variety of online photography forums, speaking with other local photographers, and most importantly by snapping as many photographs as he possibly could.
My rich persons envy is kicking in again…
During this two year span Edwin has shot variety of different subjects including: events, retail products, and food for small design firm called F.C.D.
While I have yet to see this in person I have seen a lot of it online
Edwin is a Nikon shooter always experimenting with different styles and techniques and often incorporates strobes and rigs into his shoots.
The quality of his work has made him the go to guy for a number of JDM enthusiasts in the area, as well as the official photographer for Option JDM.
The engine bay of one of my favorite Hondas
Edwin is looking forward to expanding the variety of cars he shoots by offering his talents to the exotic crowd in the near future.
Ultimately Edwin would like to have the name ‘Dougboy‘ paired with clean cars and clean photography. I would say that he is already off to a great start.
Here is a snippet of Edwin’s work behind the glass:
A fierce looking widebody RSXEdwin has rig/rolling shots downI’ve never thought of shooting here and it’s 5 min from my houseBeautiful interior shotEdwin’s capture of a track ready s2kTakata harness + women + a good photographer always = greatness
Here is part two of the coverage from the Nextmod 1 year anniversary BBQ that went down last Sunday August 15 2010.
Today’s coverage has all of the brands I missed yesterday with stand outs including the Infiniti and Lexus crowd who brought out some serious low, flush, rides.
Mercedes Benz
The local wheel powder coater in the area brought out his latest project/promo carIt certainly is unique, we were talking wheel/drop options that would work with the finishLooks like we've got another Batman fanI might have to take a trip over to Puremb.com and see what those guys are up tooSimple yet effective
Nissans
This s14 was also at stretch and poke, very aggressive.Well done 350White on blue looks great and the diffuser is a nice touch
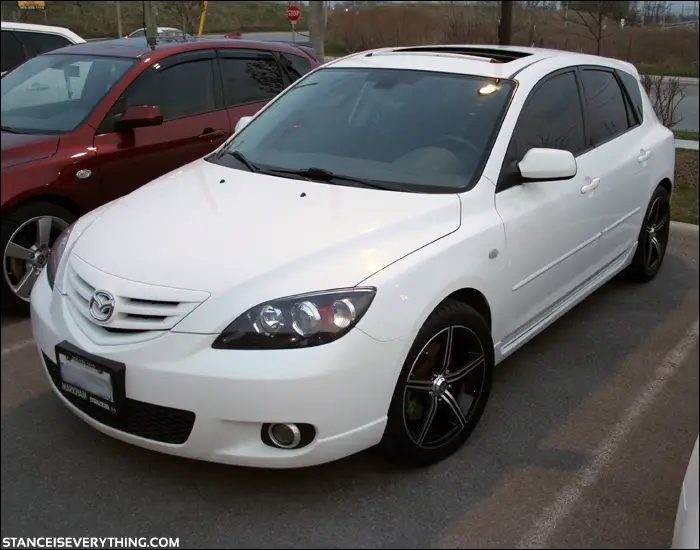
Mazdas
Clean early 3 sedanHatch sittin on sportlinesJon Jons new look, not too many people run this front bumperRyan changed up his ride yet again, this time with some camoTM3 guys have wasted no time with the 2010sA sinister smileI'm going to say RX-8s are some of the best looking oem rims ever...Floodgatez on his way out, this car has changed a lot in a short period
Lexus’
Lexus looking great on a set of Work VS-(kf?) wheelsIS300's are such a versatile platform, they look great many different stylesTo the victor goes the spoils, Peter's new rims look fantastic.Rolled in with Mr. ING, necks snapped when he pulled upHe's got the internet goin' nuts right now
Blain's got his front end back together and looking cleanI have no idea how he got in here at this heightProper Specs.G on RaderwerksNo parking and no dumping, both rules broken here
That’s it for all of my Nextmod coverage, big thanks to everyone who I met and who purchases stickers hope you like em!
One of my favorite parts of the original Transformers series was when Jazz, or Optimus, would assemble a group of Autobots to go on a mission, more specifically when Optimus would yell ‘Roll out!’ before they would drive off into the sunset ready to whoop up some Decipticons.
What does this have to do with today’s Theme Tuesday?
Nothing really I just felt like sharing, enjoy this second edition of rolling shots for this Tuesday.
Very clean e46The fitment on this e46 is just as epic as the sunsetMini on RMs?The Mark III Supra body style is slept onSwitching gears here is a hammered s10And a smooth full size ChevyQuite like the black hard top on whites2000 and CCWs are almost always a winning comboThis almost made the rig shots Theme Tuesday that is in the worksFoxy Tuner would be into thisHovercraftinOne crazy ass RangerHa what?Well that's one use for a quick release
Check back later today for the rest of the Nextmod Anniversary coverage.
Used to distinguish new sessions and visits. This cookie is set when the GA.js javascript library is loaded and there is no existing __utmb cookie. The cookie is updated every time data is sent to the Google Analytics server.
30 minutes after last activity
__utmc
Used only with old Urchin versions of Google Analytics and not with GA.js. Was used to distinguish between new sessions and visits at the end of a session.
End of session (browser)
__utmz
Contains information about the traffic source or campaign that directed user to the website. The cookie is set when the GA.js javascript is loaded and updated when data is sent to the Google Anaytics server
6 months after last activity
__utmv
Contains custom information set by the web developer via the _setCustomVar method in Google Analytics. This cookie is updated every time new data is sent to the Google Analytics server.
2 years after last activity
__utmx
Used to determine whether a user is included in an A / B or Multivariate test.
18 months
_ga
ID used to identify users
2 years
_gali
Used by Google Analytics to determine which links on a page are being clicked
30 seconds
_ga_
ID used to identify users
2 years
_gid
ID used to identify users for 24 hours after last activity
24 hours
_gat
Used to monitor number of Google Analytics server requests when using Google Tag Manager
1 minute
_gac_
Contains information related to marketing campaigns of the user. These are shared with Google AdWords / Google Ads when the Google Ads and Google Analytics accounts are linked together.
90 days
__utma
ID used to identify users and sessions
2 years after last activity
__utmt
Used to monitor number of Google Analytics server requests


